Permissions
You will require an Access Role with the following permissions:
- Employees
Core Options
There are a large amount of options to configure when creating an employee within Assure Expenses. To help you understand the process, we have split this article into two sections:
- Core Options
- Additional Options
The core options are likely to be configured by the majority of organisations for new employees within Assure Expenses, such as their General Details, Permissions and Signoff Process. The additional options may not be required by all organisations and should not affect the core functionality that an employee will need to use Assure Expenses.
- Navigate from the Home page to Administrative Settings | User Management | Employees.
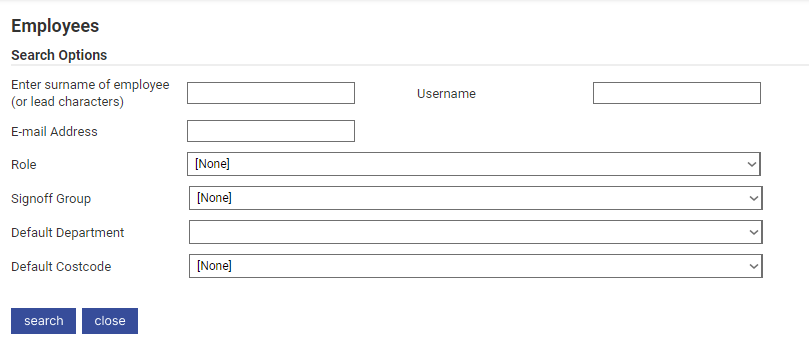
- Click New Employee from the Page Options menu.

General Details
- Click on the General Details tab and complete the following fields:
- Username
- Title
- First Name
- Surname
- Email
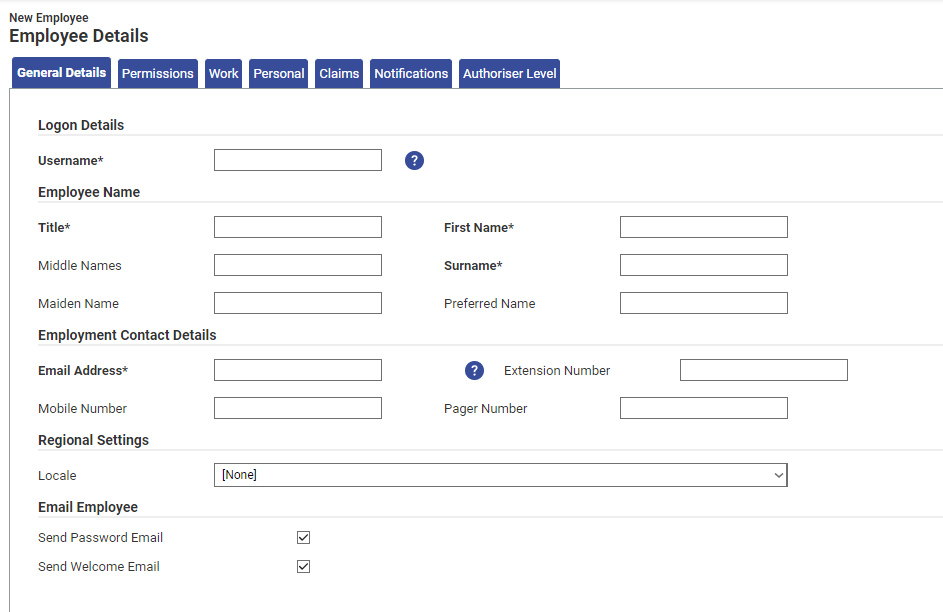
Note: The Username can take any form but must be unique. Typically, organisations will use existing formats such as the employee's network ID or firstname.surname
- Configure the employee email check boxes to enable emails upon creation of the employee record. Depending on your system configuration, new employees may receive two emails:
Option Description Send Password Email This is enabled by default. Upon employee creation the following emails will be sent.
- Password Request - Explains that a password reset request has been made and that a separate email will be sent. Includes the employee's Company ID and Username.
- Password Details - Provides a link and instructions on how to reset their password.
Note: If your organisation is using the Login with SSO feature, then this option won't be available as you will authenticate through SSO. However, if your organisation is using traditional authentication with company ID, username, and password, then the option will be available and you will be able to send a password reset email.
Send Welcome Email Select the check box to enable the email below on creation of the employee record:
- Company Expenses - Details how to claim expenses, provides a link to the Assure Expenses website and includes the approver's email
Note: Both notification templates are fully customisable.
- Password Request - Explains that a password reset request has been made and that a separate email will be sent. Includes the employee's Company ID and Username.
Permissions
- Click on the Permissions tab to configure the employee's Access Roles. This will determine the employee's roles and permissions within Assure Expenses.

- Click Add Access Role to display the Add Access Roles selection window.
- Select the check box for any Access Roles that you wish to assign to the employee.
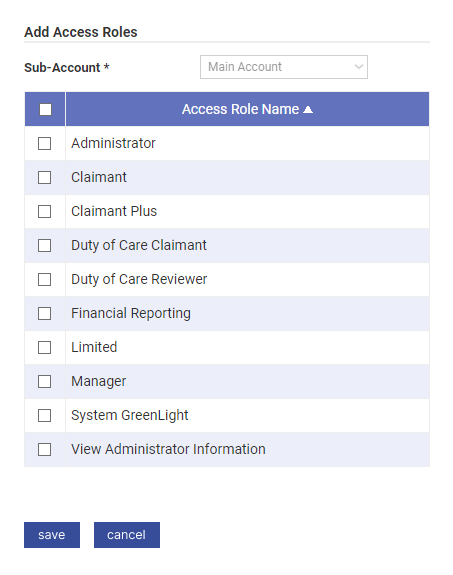
- Click Save to confirm or Cancel to discard the changes.
Work
- Click on the Work tab to configure certain parts of the approval process and cost centres which the employee's expenses can be assigned to.
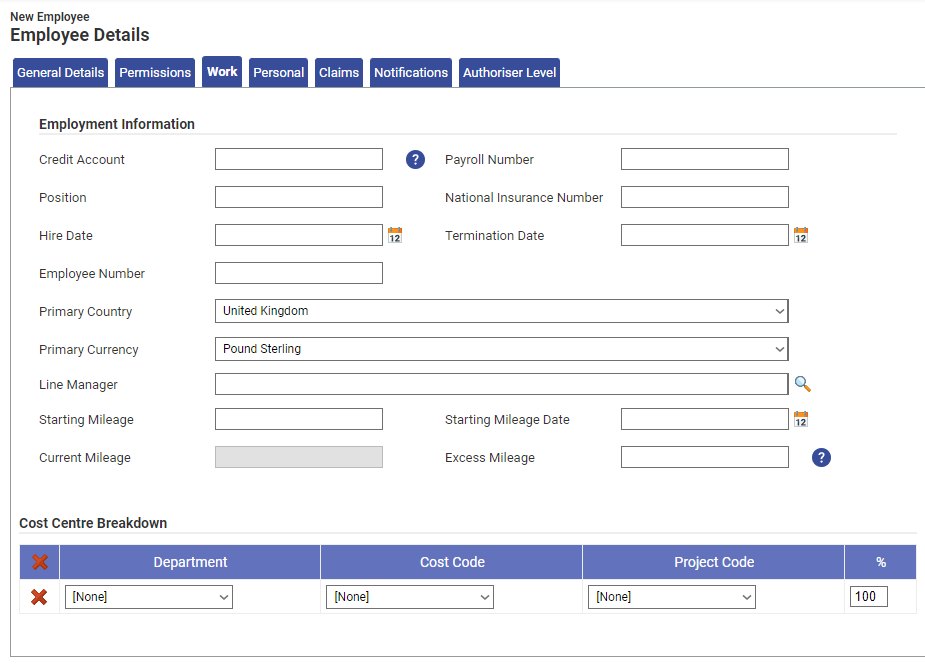
- Depending on how your organisation has configured Signoff Groups, you may want to set the employee's Line Manager or for NHS organisations, the employee's ESR Assignment and Assignment Supervisor.
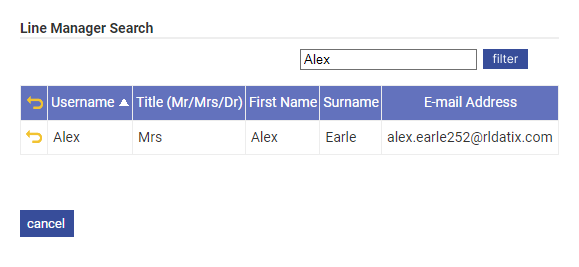
- To set the Line Manager, click in the 'Line Manager' field and then type to search for an employee. Alternatively, click
 to browse through the list of employees.

- To add an ESR Assignment, click 'Add ESR Assignment' and then complete the details.
- To set the Line Manager, click in the 'Line Manager' field and then type to search for an employee. Alternatively, click
- Configure any Cost Codes, Project Codes or Department for the employee. For more information, view Costing Breakdown.
Claims
- Click on the Claims tab to configure the employee's Signoff Groups and Item Roles. This will determine the process that their claims will go through as well as what expense items they will be permitted to claim for.
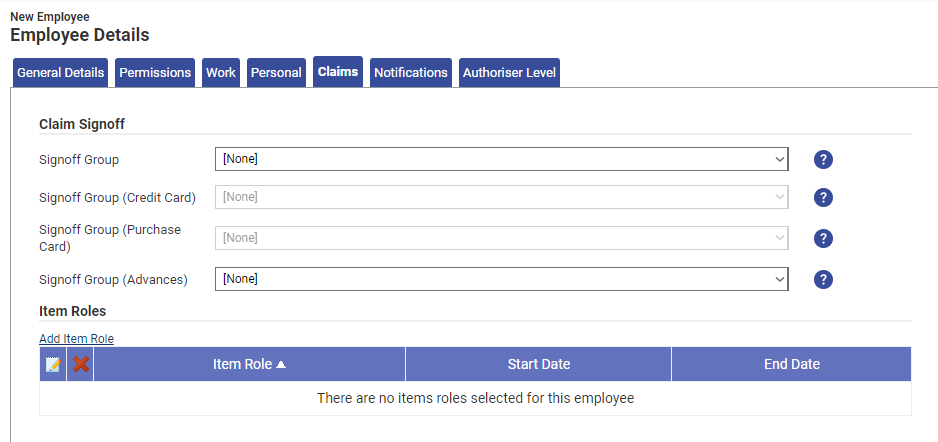
- Within the Claim Signoff section, select a Signoff Group from the available drop-down list. Additional Signoff Groups can be selected for Credit Cards, Purchase Cards and Advances. For more information on how to configure Signoff Groups, view Configure a Signoff Group.

- Within the Item Roles section, click Add Item Role to open the Add Item Roles window. For more information on creating and assigning Item Roles, view Manage Item Roles.
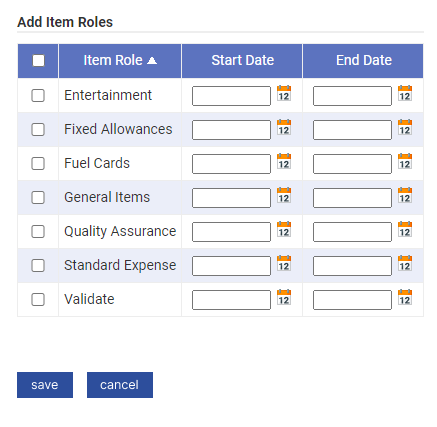
- Select the check box for any Item Roles that you wish to add to the employee.
Note: Start Dates and/or End Dates can be specified on each Item Role to determine when the Item Roles are active on the employee record.
- Click Save to store the changes or Cancel to discard the changes.
Notifications
Click the Notifications tab and select the check boxes to configure which notifications the employee will receive.

| Notification | Description |
|---|---|
| Standard | Obsolete. To be removed in a future product update. |
| Support Tickets | Sends an email to any subscribed users when a support ticket is created or updated. This email can be customised. For more information visit Edit a System Email Template. |
| Audit Log Cleared | Sends an email to any subscribed users when the audit log is cleared. This email can be customised within the 'Email Templates' menu. |
| Excess Mileage | Notifies any subscribed users when a home or work address is added, edited or deleted for a claimant. Note: This will only send a notification for claimants that have an 'Excess Mileage' value set on their employee record. Note: When using ESR, this email will be triggered when the outbound file processes the address change for each claimant. |
| ESR Outbound Import Summary | Creates a task and email which outlines:
|
| ESR Outbound Invalid Postcodes | Creates a task and email which informs the subscribed user that their Home or Office address could not be added due to an invalid postcode. |
Vehicles
From the Page Options menu, click Vehicles. For more information on how to Add a Vehicle, view Manage My Vehicles.

Additional Options
There are a large amount of options to configure when creating an employee within Assure Expenses. To help you understand the process, we have split this article into two sections:
- Core Options
- Additional Options
The core options are likely to be configured by the majority of organisations for new employees within Assure Expenses, such as their General Details, Permissions and Signoff Process. The additional options may not be required by all organisations and should not affect the core functionality that an employee will need to use Assure Expenses.
- Navigate from the Home page to Administrative Settings | User Management | Employees.

- Click New Employee from the Page Options menu.

Pool Vehicles
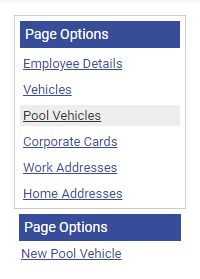
- From the Page Options menu, click Pool Vehicle and then click New Pool Vehicle to open the General Details window. For more information on how to configure Pool Vehicles, view Add a Pool Vehicle.
- From the Pool Vehicle drop-down list, select the pool vehicle that you want to assign to the employee.

- Click Save to store the pool vehicle for the employee or Cancel to discard the changes.
Corporate Cards
- From the Page Options menu, click Corporate Cards and then click New Corporate Card to open the General Details window. For more information on how to configure Corporate Cards, view Manage Corporate Cards.

- Complete the fields within the General Details window:

Field Description Card Provider From the Card Provider drop-down list, select the card provider that you want to assign to the employee. Card Number Enter the 16 digit card number into the Card Number field. Active Select the Active checkbox to make the corporate card active on the employee record. - Click Save to store the corporate card for the employee or Cancel to discard the changes.
Work Addresses
From the Page Options menu, click Work Addresses. For more information on how to add a work address, view Add Home & Work Addresses.

Home Addresses
From the Page Options menu, click Home Addresses. For more information on how to add a home address, view Add Home and Work Addresses.


 to browse through the list of employees.


