Permissions
You will require an Access Role with the following permissions:
- Check & Pay
After a claimant has submitted their claim, their approver will receive an email informing that they need to review the claim and then either approve or reject the claim.
- Navigate from the Home page to Check & Pay Expenses. The number in brackets shows how many outstanding claims require your attention. If you do not have the Check & Pay Expenses option on your Home screen, but are an approver, contact the administrator at your organisation.
- Click Check Expenses next to the claim which you will review.

- Claims which appear in the Un-allocated Claims section are not allocated to a specific approver, but a group of approvers, who can then assign it to themselves for approval. This may be apparent in a scenario where you are part of a team, and that team has been set as an approval stage within a claimant's Signoff Group. To assign an un-allocated claim to yourself, select the check box adjacent to the claim and then click Allocate To Me. This will move the claim into your Current Claims section.

- Claims which appear in the Un-allocated Claims section are not allocated to a specific approver, but a group of approvers, who can then assign it to themselves for approval. This may be apparent in a scenario where you are part of a team, and that team has been set as an approval stage within a claimant's Signoff Group. To assign an un-allocated claim to yourself, select the check box adjacent to the claim and then click Allocate To Me. This will move the claim into your Current Claims section.
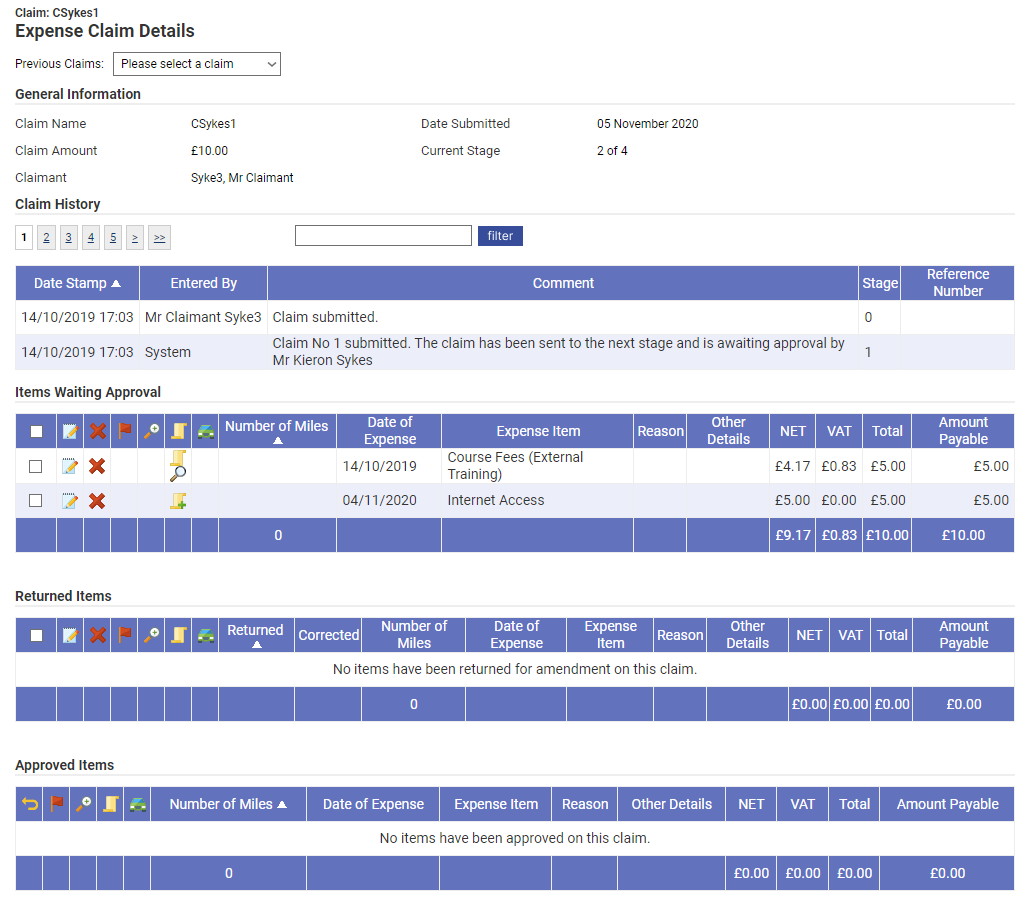
- The Expense Claim Details page displays a high level overview of the claim. As an approver, it is your responsibility to check each expense thoroughly before deciding to approve or reject each individual item or the full claim. The grid will display concise information about each expense and by using the icons, you can further investigate.

Option Description 
Click to open the expense for further information not currently displayed on screen. You can also amend any details you think are incorrect. 
Click to remove the expense from the claim. This will send an email to the claimant explaining that the expense has been deleted. 


Click to reveal a detailed explanation of why the expense has been flagged. This information will help you identify whether or not to approve the expense. Indicates that an expense has been split. This might be a Lunch expense where a portion will be charged to subsistence, and a portion will be charged to entertainment. 
Attach a scanned receipt. 
View a scanned copy of an attached receipt. 
Show all of the journey steps for the mileage being claimed. Note: Assure Expenses Expedite Validation licenced customers will see
 . For more information, view Validation Results - Approvers.
 - Once you have reviewed the claim, you need to approve or reject it.
- Approving a claim or Expense Items: If you are satisfied that the entire claim is correct you can select all of Expense Items by clicking the check box in the column header. If you only want to approve individual Expense Items, select the check box next to those items you wish to approve. You can then click Allow Selected from the Page Options menu. These Expense Items will then appear in the Approved Items section.

Note: For more information on how to return a claim, view Return an incorrect Claim or Expense Item.
- Approving a claim or Expense Items: If you are satisfied that the entire claim is correct you can select all of Expense Items by clicking the check box in the column header. If you only want to approve individual Expense Items, select the check box next to those items you wish to approve. You can then click Allow Selected from the Page Options menu. These Expense Items will then appear in the Approved Items section.
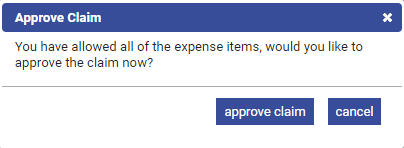
- Once all of the expenses have been allowed, a notification will display which asks if you would like to approve the claim.

Once you approve the claim, you may be required to accept the declaration which appears. This action will send an email to the next approver in the Signoff Group and the claim will disappear from your list of claims to approve.- If you are the last stage in the Signoff Group and have One Step Authorisation enabled, clicking Approve Claim will approve the claim and allocated the claim for payment. No further action will need to be taken.
- If you are the last stage in the Signoff Group and do not have One Step Authorisation enabled, you will have one more step to complete before the claim is marked for payment. After you have clicked Approve Claim, you will be returned to the Check & Pay Expense page. You will then need to submit the claim for payment by clicking Allocate For Payment.

- If you are the last stage in the Signoff Group and have One Step Authorisation enabled, clicking Approve Claim will approve the claim and allocated the claim for payment. No further action will need to be taken.


