Permissions
You will require the following permissions:
- In order to access the 'My Advances' menu, you will require a Signoff Group to be set for 'Advances' within your employee record
Here we will be showing you how to request an advance to help you out with high expense costs as well as viewing your existing advances.
View My Advances
- Tap the Navigation Menu
 and then tap My Profile.
- Within the 'My Details' section, tap My Advances. This will display a list of all your existing advances, however, settled advances will not be displayed.
Your advances will be split into relevant sections based on their current status. The sections are:- Pending Advances
- Approved Advances
- Rejected Advances
- Disputed Advances
- Paid Advances
Note: For advances that have been rejected/returned to you, tap the menu
 and then tap Edit or Delete.
- Tap an advance to view further details. The fields which may be displayed include:
Field Description Name The name entered for the advance. Status The current status of the advance (Pending, Approved, Rejected, Disputed, or Paid) Amount Displays the amount requested in the base currency. If the requested currency is different to your organisation's base currency, this will display the converted amount. Used Displays the amount of the advance which has been used on expense items. Available Displays the amount of the advance which has not been used yet and is still available. Reason The reason for requesting the advance. Requested Currency The currency that the advance has been requested in. Exchange Rate Displays the exchange rate if you request a currency which is different to your organisation's base currency.
Note: An exchange rate must be configured between the base currency and the requested currency in order to request the advance.Foreign Amount Displays the amount requested in the foreign currency if the requested currency is different to your organisation's base currency. Required By The date which the claimant has requested that advance is provided by. Approver Displays the name of the user that is responsible for approving the advance. Approved Shows whether the advance has been approved or not. Stage Displays which signoff stage the approval is at. Rejected Shows whether the advance has been rejected or not. Reason for Rejection If the advance has been rejected, this displays the approver's reason for rejection. Corrected/Disputed Shows whether the advance has been corrected/disputed. Dispute If the advance has been previously rejected and disputed, this displays your reason for dispute. Paid Shows whether the advance has been paid or not. Issue Number A unique number which is assigned when the advance has been moved from 'Approved Advances' to 'Paid Advances'. Settled Shows whether the advance has been settled or not. 
 and then tap My Profile.

 and then tap Edit or Delete.
Request an Advance
- Tap the Navigation Menu and then tap My Profile.
- Within the 'My Details' section, tap My Advances. This will display a list of all your existing advances.
- Tap
 . This will open the 'Request Advance' page.
 - Enter the following details:
Field Description Advance Name Enter the name for this advance. Amount Enter the amount required for this advance. Required By Select the date which you require this advance by. Currency Select a currency from the list of countries. This will be prepopulated with the primary currency from within your employee record. Reason for Request Enter the reason why you require this advance. 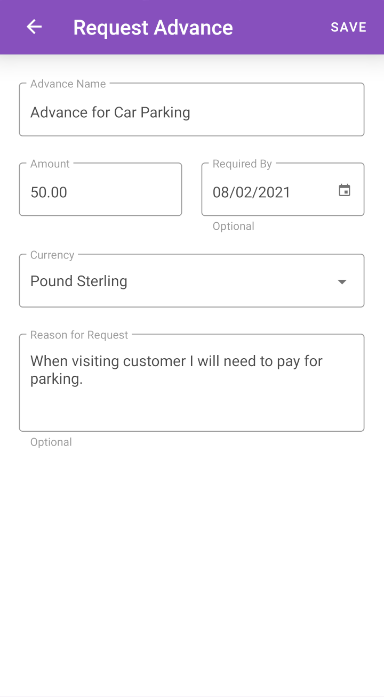
- Tap SAVE. This will create the advance and send it to the approver set within your 'Advances Signoff Group'.
 . This will open the 'Request Advance' page.
