Permissions
You will require an Access Role with the following permissions:
- General Options
- Employees
- Project Codes
Add a Project Code
- Navigate from the Home page to Administrative Settings | Base Information | Project Codes. This will display a list of the existing project codes configured by your organisation.
- Click Add Project Code from the Page Options menu.


- Complete the following fields:
Field Description Project Code* Enter the project code/project code name. Description Enter a description of the project code to help users differentiate from other project codes. Rechargeable Select the checkbox to enable a flag that indicates when an expense is rechargeable back to a client. Therefore, when an expense item is charged to a project code which is rechargeable, this information can easily be filtered within a report. 
- Click Save to store the project code. This will now display in the list of existing project codes on the Project Codes menu.
Configure the General Options
- Navigate from the Home page to Administrative Settings | Tailoring | General Options.
- Click New Expenses from the Page Options menu.
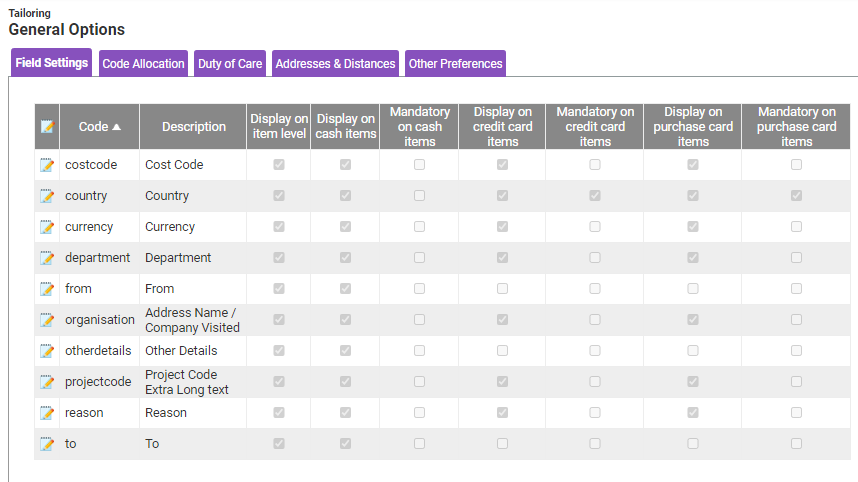
- Within the Field Settings tab, the grid shows which fields are displayed on the Add/Edit Expense page.

- Click
 next to the projectcode field to open the Project window.
- Select from the following options:
Option Description Display as Enter a name the project will be displayed as on the Add/Edit Expense page. Display on individual item Display the project code allocation under the individual Expense Item on the Add/Edit Expense page. Display for cash Display the project code allocation on cash expenses. Mandatory on cash items It is mandatory to select a project code for cash expenses. Display on credit card items Display the project code allocation on credit card expenses. Mandatory on credit card items It is mandatory to select a project code on credit card expenses. Display on purchase card items Display the project code allocation on purchase card expenses. Mandatory on purchase card items It is mandatory to select a project code on purchase card expenses. - Click Code Allocation.

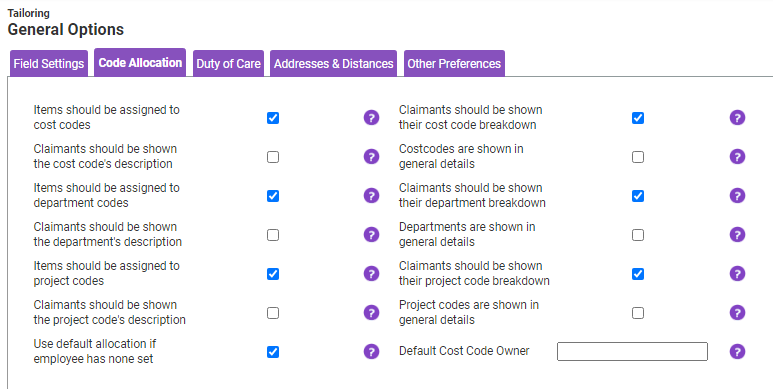
- Select from the following options:
Option Description Items should be assigned to project codes Select this if your organisation allocates expenses spend to specific project codes. If selected, a claimant will be able to associate each of their Expense Items to a project code. Claimants should be shown their project code breakdown This will allow a claimant to view the project code allocation that their Expense Items are assigned to.
By default, if this option is selected, the claimant will be able to alter the project code allocation of the Expense Item. If the claimant should be restricted from altering the project code allocation you will be required to edit their Access Role. Ensure that the Can edit project code option is not active within the Access Role.
Note: This option must be active in order to define the default project code for an employee.Claimants should be shown the project code's description This will display a friendly description which may help a claimant identify the correct project code. The project code description field will display instead of the project code label.
The description can be set within the project code by navigating to Administrative Settings | Base Information | Project Codes.Project codes are shown in general details This will display the project code allocation within the General Details section of the Add/Edit Expense page.
Selecting this option will restrict claimants from being able to split their project code allocation using percentages.Use default allocation if employee has none set Select this option to hide the claimant's project code allocation when adding an expense, but still assign their default code allocation to the expense. - Click Save to store the changes.
Configure an Employee's Cost Centre Breakdown
- Navigate from the Home page to Administrative Settings | User Management | Employees.
- Search for the appropriate employee and click
 .
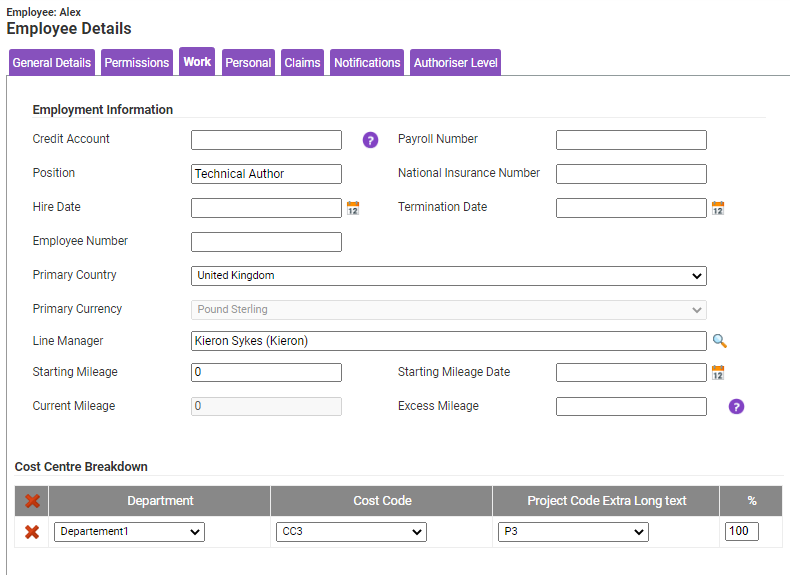
. - Click Work, located under the Employee Details menu.
- Locate the Cost Centre Breakdown section and then select the claimant's default project code using the drop down list.
- If the claimant is permitted to split expenses across multiple project codes, set the % field to a number less than 100%. This will create a new row where you can select another project code and then define the percentage split.

- If the claimant is permitted to split expenses across multiple project codes, set the % field to a number less than 100%. This will create a new row where you can select another project code and then define the percentage split.
- Click Save to store the changes against this employee.


 next to the projectcode field to open the Project window.


