Permissions
You will require the following permissions:
- Your account must be configured correctly so that you are able to send receipts to your Receipt Wallet from your email inbox. To learn more, visit Mobile - Enable Email-In.
Email-in is the easy way to add expenses from receipts in your email inbox. This guide will show you how to send your receipts to your Receipt Wallet from your email inbox.
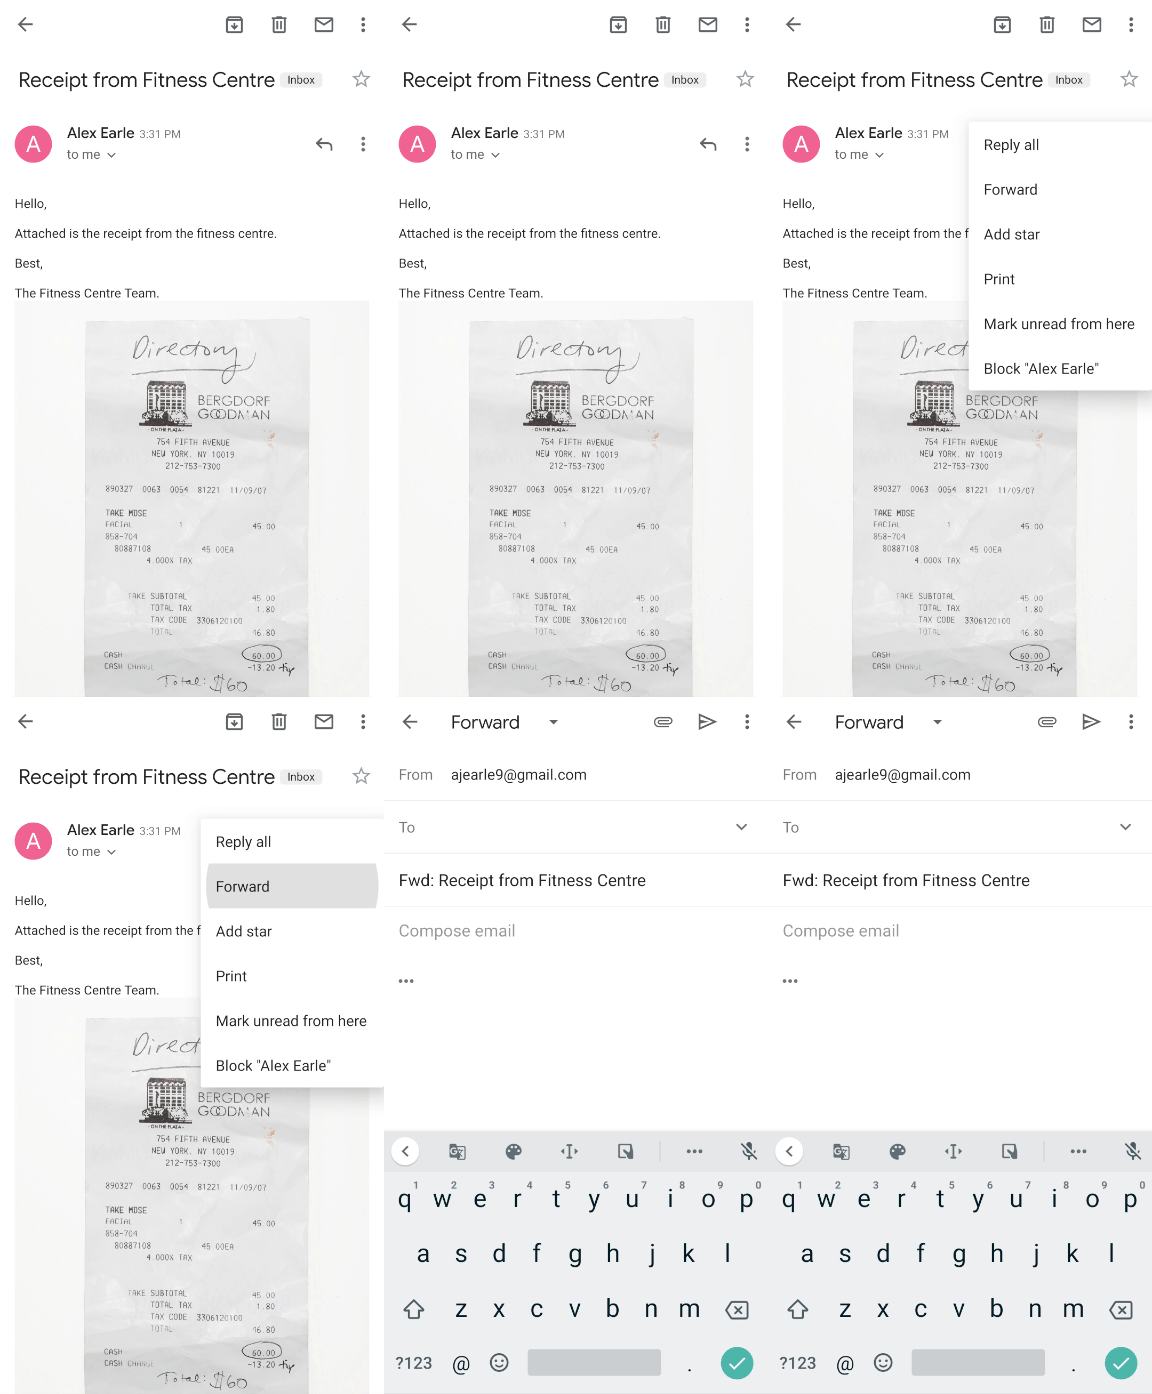
- Within your email inbox, open the email that you want to send to your Receipt Wallet and then tap Forward.

Note: Accepted file formats for attachments are: .jpeg, .gif, .png, and .pdf. You can also send an email without any attachments; we’ll still turn it into a receipt image and pop it into your Receipt Wallet for you. Emails can't exceed 10MB. Please be aware that some email providers will attach files to your email, which may take it over the limit.
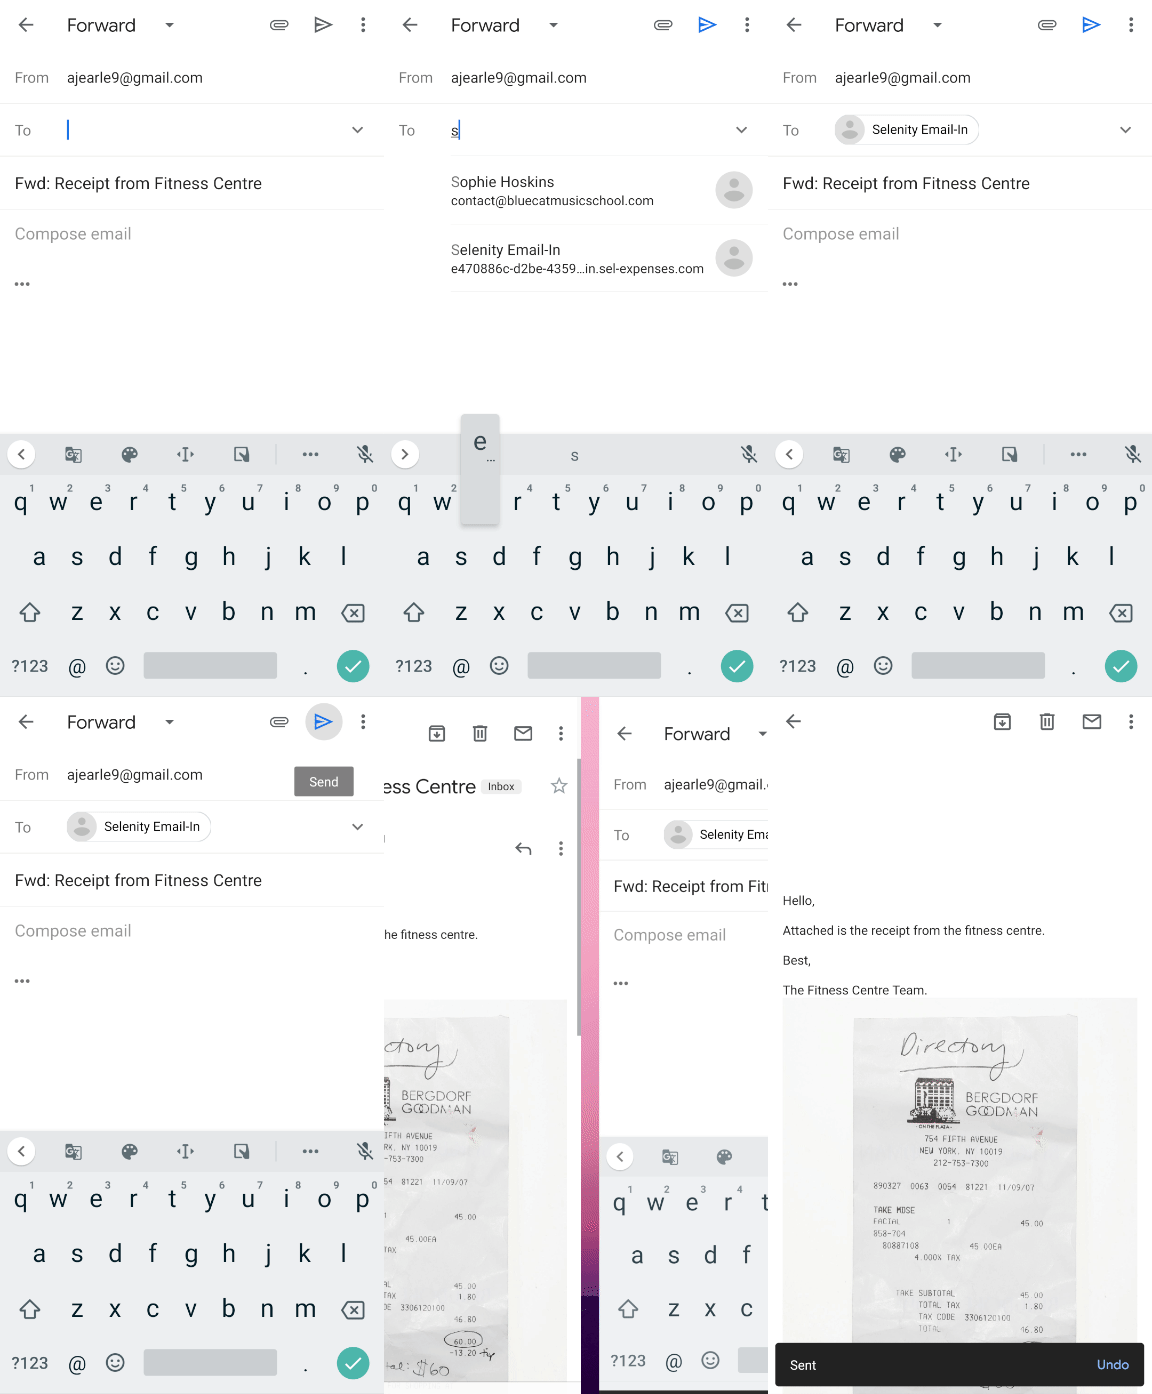
- Enter the contact or type the unique email address that was generated for you when enabling the Email-in feature, and then send the email. For more information, view Mobile - Enable Email-In.

Note: If the email address that you send your email to is incorrect, you will receive a reply stating that the email address is invalid.
At this point your receipt will be converted into an image and placed into your Receipt Wallet. To continue the process, visit Mobile - Add an Expense.


