Permissions
You will require the following permissions:
- User Management
- Access Roles
Create an Access Role
A user's Access Role determines the areas of Assure Expenses that they can access, what data they can view and/or edit and the items that they can claim.
- Navigate from the Home page to Administrative Settings | User Management | Access Roles.
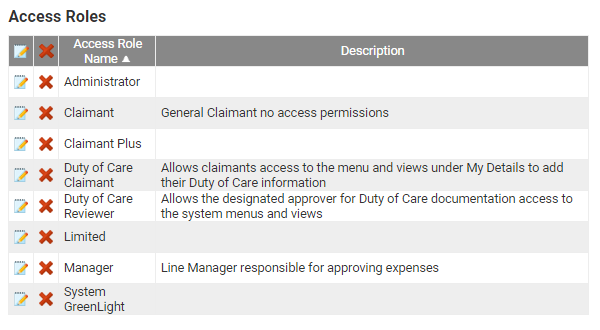
- From the Page Options menu, click New Access Role. This will direct you to the Access Role Details page.

- Enter a Role Name and a Description.

- If this role will have permission for the Reports feature, define which data can be reported on.

Note: If a user has more than one Access Role, the report data that they can view is determined by the Access Role with the fewest permissions. This also applies to running financial exports.
- Choose the Product Access for the Access Role by selecting the appropriate check boxes. Leaving a check box unticked will restrict the users, who are assigned to this Access Role, from accessing the product using that particular method.

- Select the appropriate check boxes to select if the role can edit Project Codes, Cost Codes or Departments.

- Enter any claim limits if required. This will determine the maximum and minimum amount that the users assigned to this Access Role will have permission to claim for.

- Select whether an employee must have an active bank account to claim expenses. If this is not selected, users will not be able to claim expenses without setting up their bank details in Assure Expenses.

- Select the appropriate Access Role Elements for the Access Role. This table provides you with the functionality to build a finer security policy, allowing you to specify access to certain elements of the product only.
- If you select the box adjacent to the Element heading, all subsequent boxes within that section will be selected.
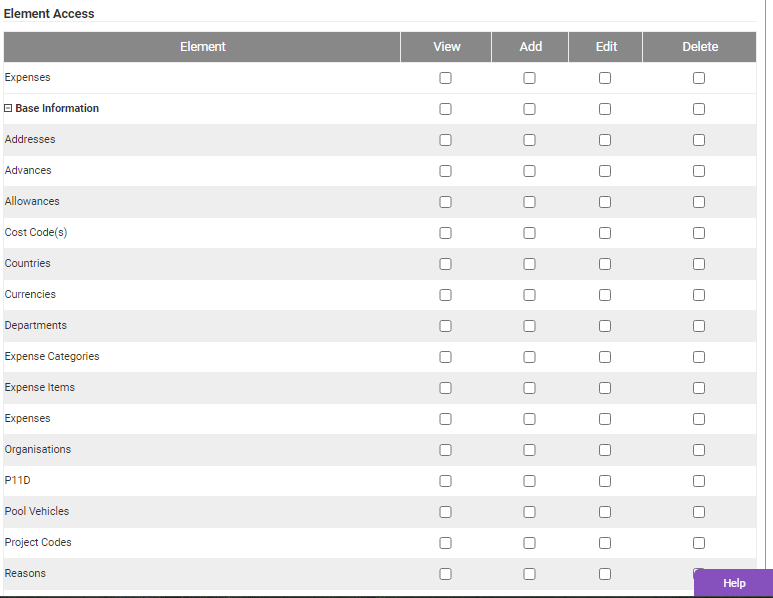
- If you select the box adjacent to the Element heading, all subsequent boxes within that section will be selected.
- If you require the ability to control which fields can be reported on within Assure Expenses, you can specify this per access role. For more information on how to control the reportable fields, click the Manage Reportable Fields on an Access Role tab at the top of this article.
- Click Save once you have finished configuring the access role.
Manage Reportable Fields on an Access Role
- From within the Access Role that you want to define the reportable fields for, click the Reportable Fields tab.
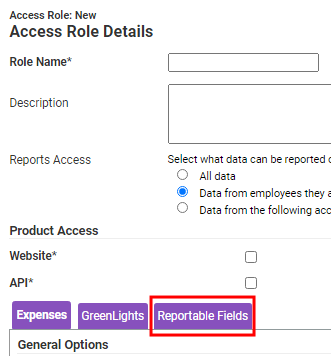
- Specify the Exclusion Type which you want to apply to the Access Role:

Note: If a field has been set as 'exclude' on one access role and then set as 'include' on another access role, the default will always be 'exclude' for users who have both roles.
Access Role can see all data Allows users with this access role to report on all available fields within Assure Expenses. Include selected fields Allows users with this access role to report on the fields which have been selected under the Product Area. Exclude selected fields Prevents users with this access role from being able report on the fields which have been selected under the Product Area.
Note: If a field has been set as 'exclude' on one access role and then set as 'include' on another access role, the default will always be 'exclude' for users who have both roles. - Select the Product Area from the drop-down list. Depending upon which product area you have selected, a list of related fields will display in the Fields section. For example, selecting 'Employees' as the product area will allow you to define whether fields such as their bank Account Number and Account Type are reportable or not.
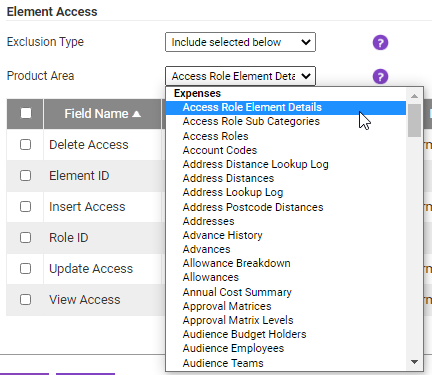
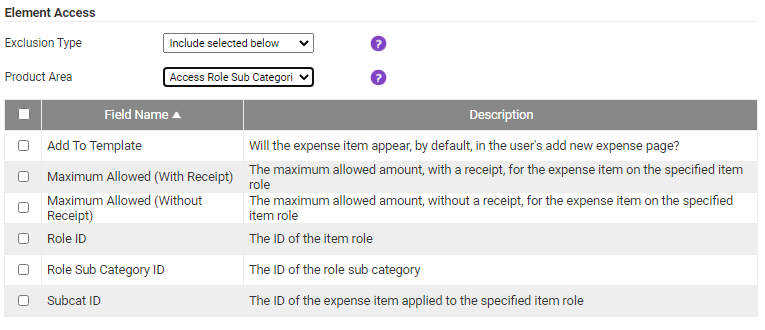
- Select the check boxes against the fields which you want to include/exclude from the list of reportable fields. You can swap between product areas and your changes will be stored.

- Click Save to store the changes to the access role. Trying to report on field which you are not permitted to report on will display 'restricted', in place of the data that would usually be returned.


