Permissions
You will require the following permissions:
- The relevant item role that allows you to claim these expense types.
Note: To edit vehicle documentation, navigate from the Home page to Driver Compliance | My Driver Documents | My Vehicle Documents. On the required document, click  and input your new information. When you are satisfied, click Save.
Breakdown Cover
- Navigate from the Home Page to Driver Compliance | My Driver Documents | My Vehicle Documents. This will display a list of documents for each of your vehicles registered within Assure Expenses.

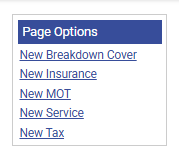
- Click New Breakdown Cover in the Page Options menu.
- Complete the Claimant Breakdown Cover Form that opens.
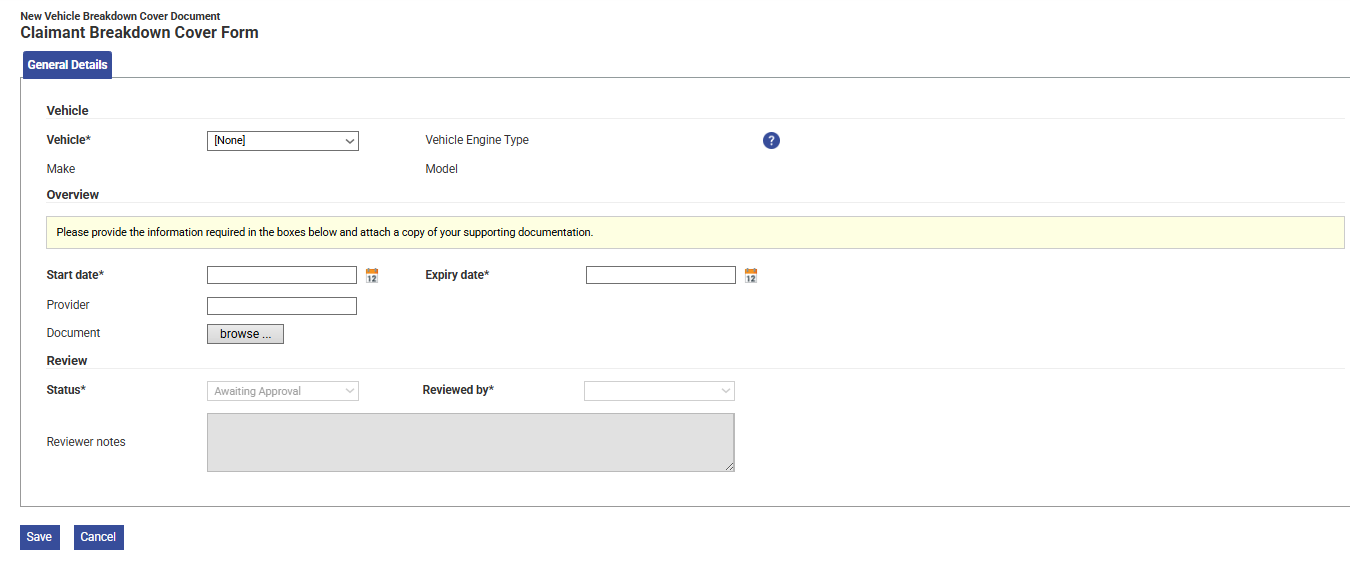
- Use the Vehicle drop-down list to select the vehicle that the new document is related to. The vehicle details will automatically populate.
- Complete the following fields:
Feature Description Start date* The start date of the vehicle breakdown cover. Expiry date* The end date of the vehicle breakdown cover. Provider Enter the company who provides the cover. Document Click browse to locate the breakdown cover document you wish to upload.
- Click Save.
Note: If you receive the following error when saving, 'Selected file type is not currently supported', the file type of the uploaded document has not been configured by your organisation. You will have to change the format of your file and try again in order to upload your documentation.
Your administrator determines which file types can be uploaded within Assure Expenses. If you want to find out which file types are allowed, contact your administrator.
Note: If an approver fails one of your pending Duty of Care documents, you will receive a system generated email prompting you to take action.
Additional Information: If you edit and then save one of your duty of care documents after it has already been approved, the current document review is invalidated and an email is sent to your approver requesting a new review. You will be unable to claim mileage until the review has been completed and marked as "Reviewed - OK".
Insurance
- Navigate from the Home Page to Driver Compliance | My Driver Documents | My Vehicle Documents. This will display a list of documents for each of your vehicles registered within Assure Expenses.

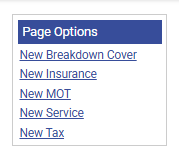
- Click New Insurance in the Page Options menu.
- Click Save. This will direct you to the Claimant Insurance Form.
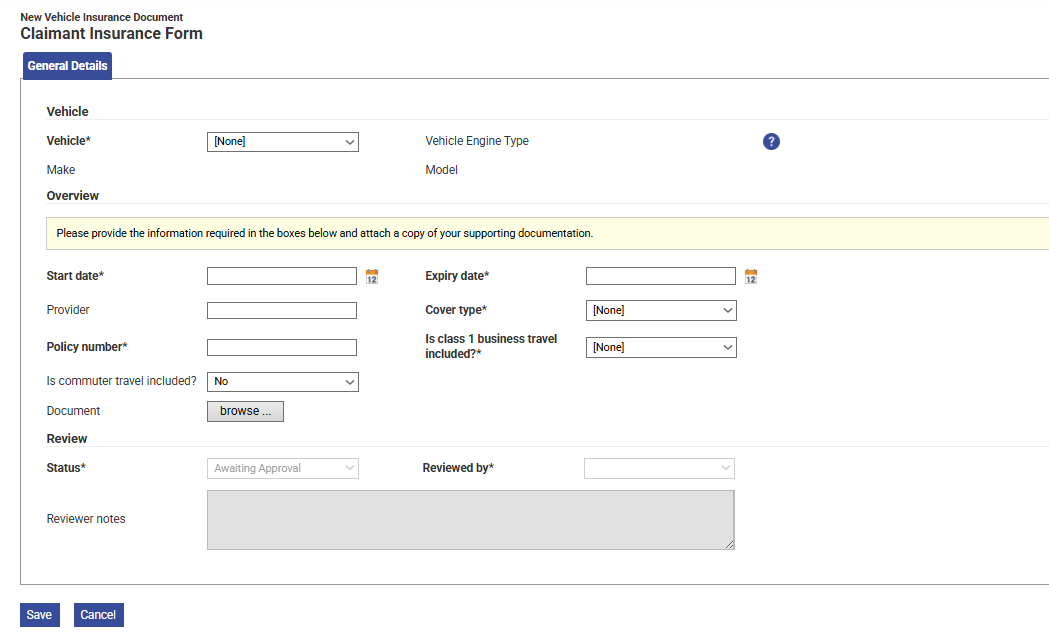
- Use the Vehicle drop-down list to select the vehicle that the new document is related to. The vehicle details will automatically populate.
- Using the information from your insurance certificate, complete the following fields:
Items marked with * are mandatory.Feature Description Policy number* Enter the Policy Number displayed on the insurance certificate. Start date* Enter the insurance start date using the date picker or DDMMYYYY format. Expiry date* Enter the insurance expiry date using the date picker or DDMMYYYY format. Cover type* Select the type of cover from the drop-down list. Provider Enter your insurance provider's name from the insurance certificate. Is class 1 business travel included?* Select whether the insurance covers class 1 business travel. Is commuter travel included? Select whether the insurance covers commuter travel. Document Click browse to select and upload an image of your insurance document.
- Click Save.
Note: If you receive the following error when saving, 'Selected file type is not currently supported', the file type of the uploaded document has not been configured by your organisation. You will have to change the format of your file and try again in order to upload your documentation.
Your administrator determines which file types can be uploaded within Assure Expenses. If you want to find out which file types are allowed, contact your administrator.
Note: If an approver fails one of your pending Duty of Care documents, you will receive a system generated email prompting you to take action.
Additional Information: If you edit and then save one of your duty of care documents after it has already been approved, the current document review is invalidated and an email is sent to your approver requesting a new review. You will be unable to claim mileage until the review has been completed and marked as "Reviewed - OK".
MOT
This guide explains how to add vehicle MOT documentation manually. If Vehicle Check is enabled for your organisation, the vehicle MOT document will be recorded automatically when adding the vehicle (if required by your organisation). Contact your administrator for more information.
- Navigate from the Home Page to Driver Compliance | My Driver Documents | My Vehicle Documents. This will display a list of documents for each of your vehicles registered within Assure Expenses.

- Click New MOT in the Page Options menu.

- Click Save. This will direct you to the Claimant MOT Form.
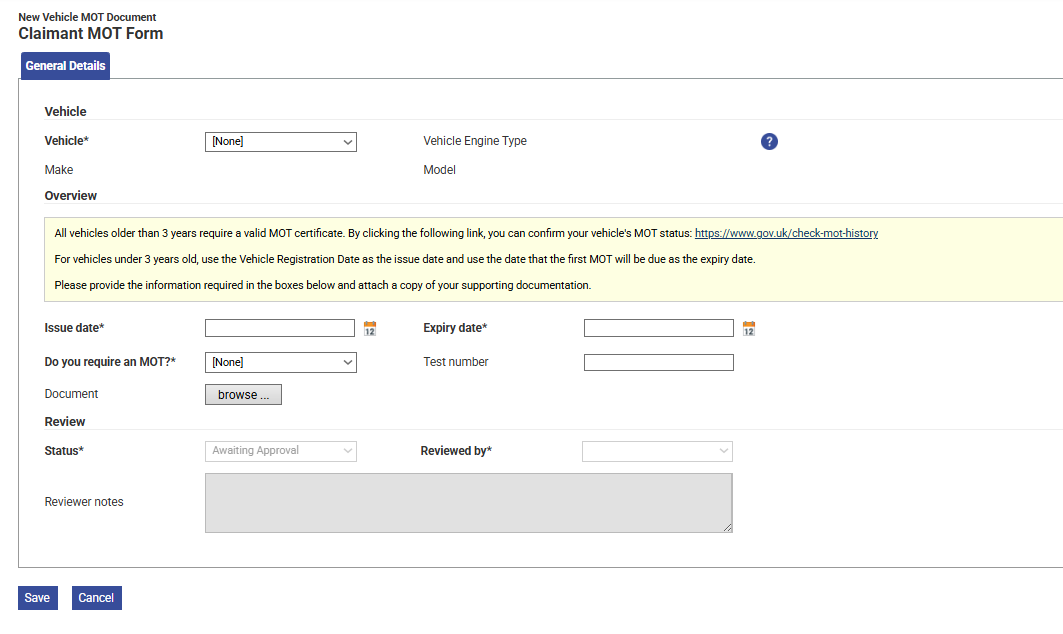
- Use the Vehicle drop-down list to select the vehicle that the new document is related to. The vehicle details will automatically populate.
Note: You can confirm your vehicle MOT status by clicking on the vehicle enquiry link and use the information to confirm the Test Number and Expiry date status.
- Using the information from the link above, complete the following fields:
Feature Description Do you require an MOT?* Choose Yes or No. Vehicles less than 3 years old do not require an MOT. Test Number Enter the MOT Test Number from the Vehicle Enquiry Service using the link above. Issue date* Enter the MOT issue date using the date picker or DDMMYYYY format. Expiry date* Enter the MOT expiry date using the date picker or DDMMYYYY format. Document Click browse to select and upload an image of your MOT Certificate.
- Click Save.
Note: If you receive the following error when saving, 'Selected file type is not currently supported', the file type of the uploaded document has not been configured by your organisation. You will have to change the format of your file and try again in order to upload your documentation.
Your administrator determines which file types can be uploaded within Assure Expenses. If you want to find out which file types are allowed, contact your administrator.
Note: If an approver fails one of your pending Duty of Care documents, you will receive a system generated email prompting you to take action.
Additional Information: If you edit and then save one of your duty of care documents after it has already been approved, the current document review is invalidated and an email is sent to your approver requesting a new review. You will be unable to claim mileage until the review has been completed and marked as "Reviewed - OK".
If Vehicle Check is enabled for your organisation and the vehicle MOT has expired, a new lookup will be performed to retrieve the MOT document when next claiming using that vehicle. If the MOT is still invalid when the lookup is performed, any new MOT information will need to be recorded manually using the process above.
Service
- Navigate from the Home Page to Driver Compliance | My Driver Documents | My Vehicle Documents. This will display a list of documents for each of your vehicles registered within Assure Expenses.

- Click New Service in the Page Options menu.
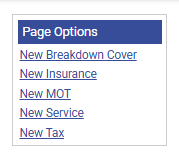
- Click Save. This will direct you to the Claimant Service Form.
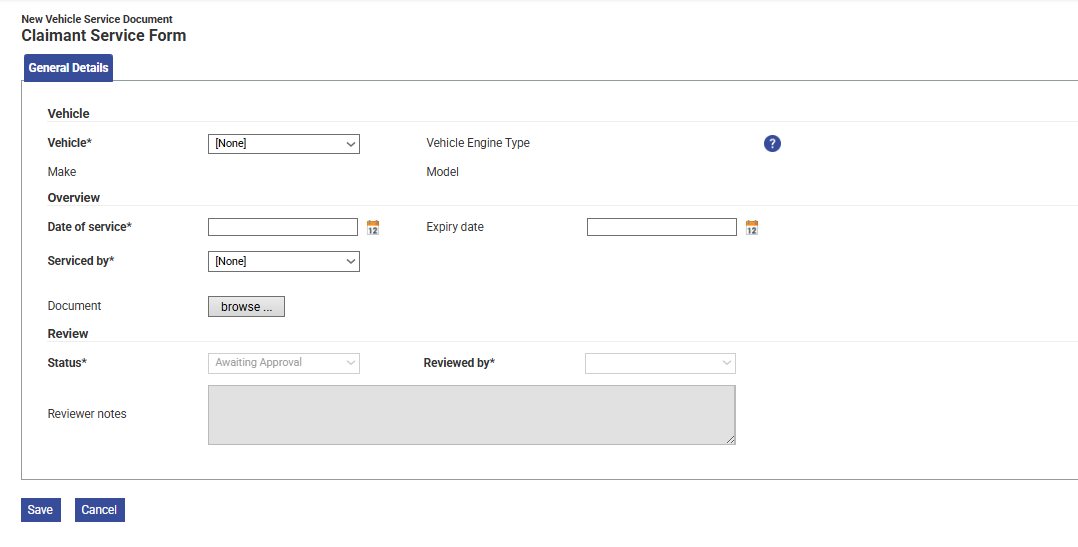
- Use the Vehicle drop-down list to select the vehicle that the new document is related to. The vehicle details will automatically populate.
- Using the information from your service document, complete the following fields:
Feature Description Date of service* Enter the date of service using the date picker or DDMMYYYY format. Serviced by* Using the drop-down list, choose who provided the service. Document Click browse to select and upload an image of your Service document.
- Click Save.
Note: If you receive the following error when saving, 'Selected file type is not currently supported', the file type of the uploaded document has not been configured by your organisation. You will have to change the format of your file and try again in order to upload your documentation.
Your administrator determines which file types can be uploaded within Assure Expenses. If you want to find out which file types are allowed, contact your administrator.
Note: If an approver fails one of your pending Duty of Care documents, you will receive a system generated email prompting you to take action.
Additional Information: If you edit and then save one of your duty of care documents after it has already been approved, the current document review is invalidated and an email is sent to your approver requesting a new review. You will be unable to claim mileage until the review has been completed and marked as "Reviewed - OK".
Tax
This guide explains how to add vehicle tax documentation manually. If Vehicle Check is enabled for your organisation, the vehicle tax document will be recorded automatically when adding the vehicle (if required by your organisation). Contact your administrator for more information.
- Navigate from the Home Page to Driver Compliance | My Driver Documents | My Vehicle Documents. This will display a list of documents for each of your vehicles registered within Assure Expenses.

- Click New Tax in the Page Options menu.
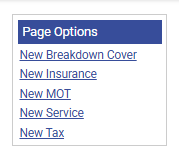
- Click Save. This will direct you to the Claimant Tax Form.
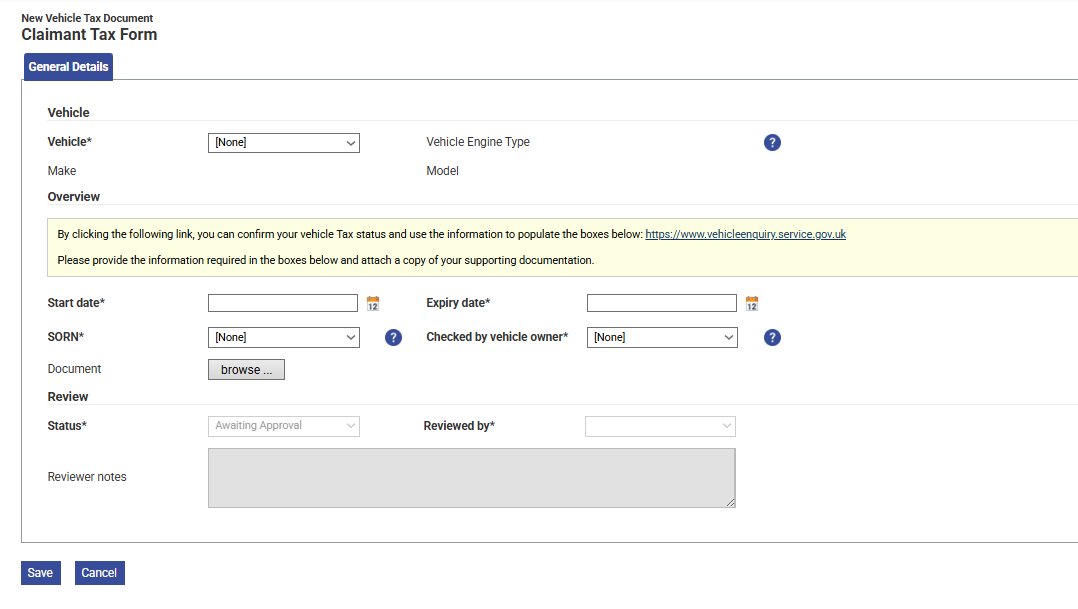
- Use the Vehicle drop-down list to select the vehicle that the new document is related to. The vehicle details will automatically populate.
- Using the information from the link below, complete the following fields:
Note: By using the vehicle enquiry link on this page, you can confirm your vehicle tax status and use the information to confirm the Expiry Date and SORN (Statutory Off Road Notification) status.
Feature Description Expiry date* Enter the expiry date using the date picker or DDMMYYYY format. SORN* If you declare your vehicle as SORN, you will not be able to submit a claim against that vehicle until a valid tax document has once again been registered. Checked by vehicle owner* By selecting Yes, you are confirming that you have checked the vehicle is taxed to the expiry date. Document Click browse to select and upload an image of your Tax document.
- Click Save.
Note: If you receive the following error when saving, 'Selected file type is not currently supported', the file type of the uploaded document has not been configured by your organisation. You will have to change the format of your file and try again in order to upload your documentation.
Your administrator determines which file types can be uploaded within Assure Expenses. If you want to find out which file types are allowed, contact your administrator.
Note: If an approver fails one of your pending Duty of Care documents, you will receive a system generated email prompting you to take action.
Additional Information: If you edit and then save one of your duty of care documents after it has already been approved, the current document review is invalidated and an email is sent to your approver requesting a new review. You will be unable to claim mileage until the review has been completed and marked as "Reviewed - OK".
If Vehicle Check is enabled for your organisation and the vehicle tax has expired, a new lookup will be performed to retrieve the vehicle tax document when next claiming using that vehicle. If the vehicle tax is still invalid when the lookup is performed, any new tax information will need to be recorded manually using the process above.


