Permissions
You will require the following permissions:
- No permissions required
The following steps describe the process of adding a vehicle from the 'Change My Details' menu. Alternatively, you may also have the option to add a vehicle when adding a mileage expense. Once you have tapped Add Vehicle, both methods will follow the same steps.
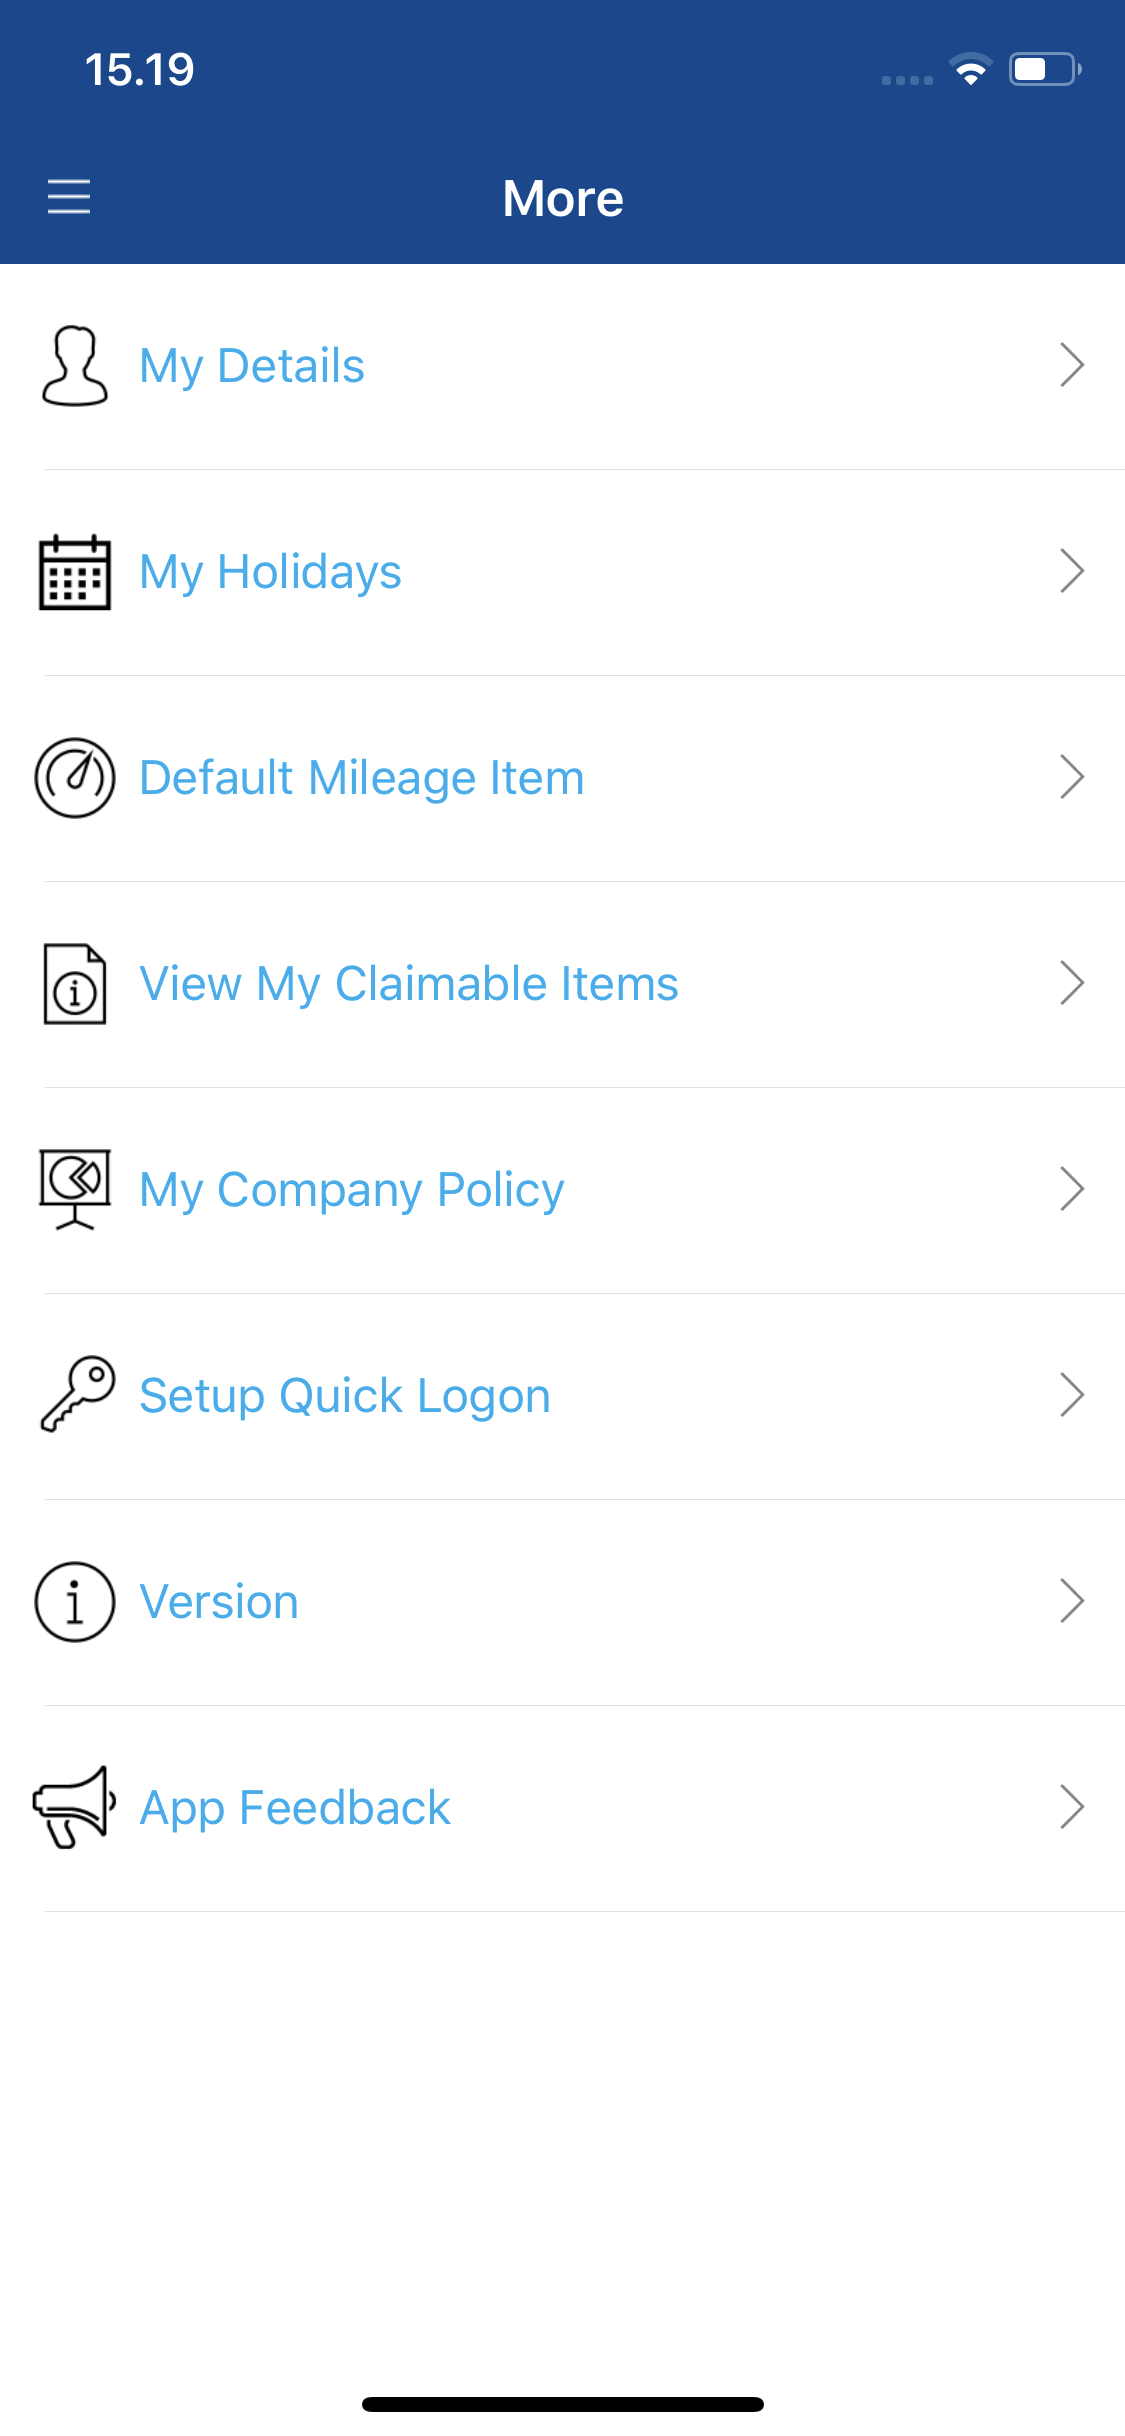
- Log into Expenses Mobile. Tap the Hamburger Menu
 and then tap More.
- Tap My Details.

- Tap Add Vehicle.

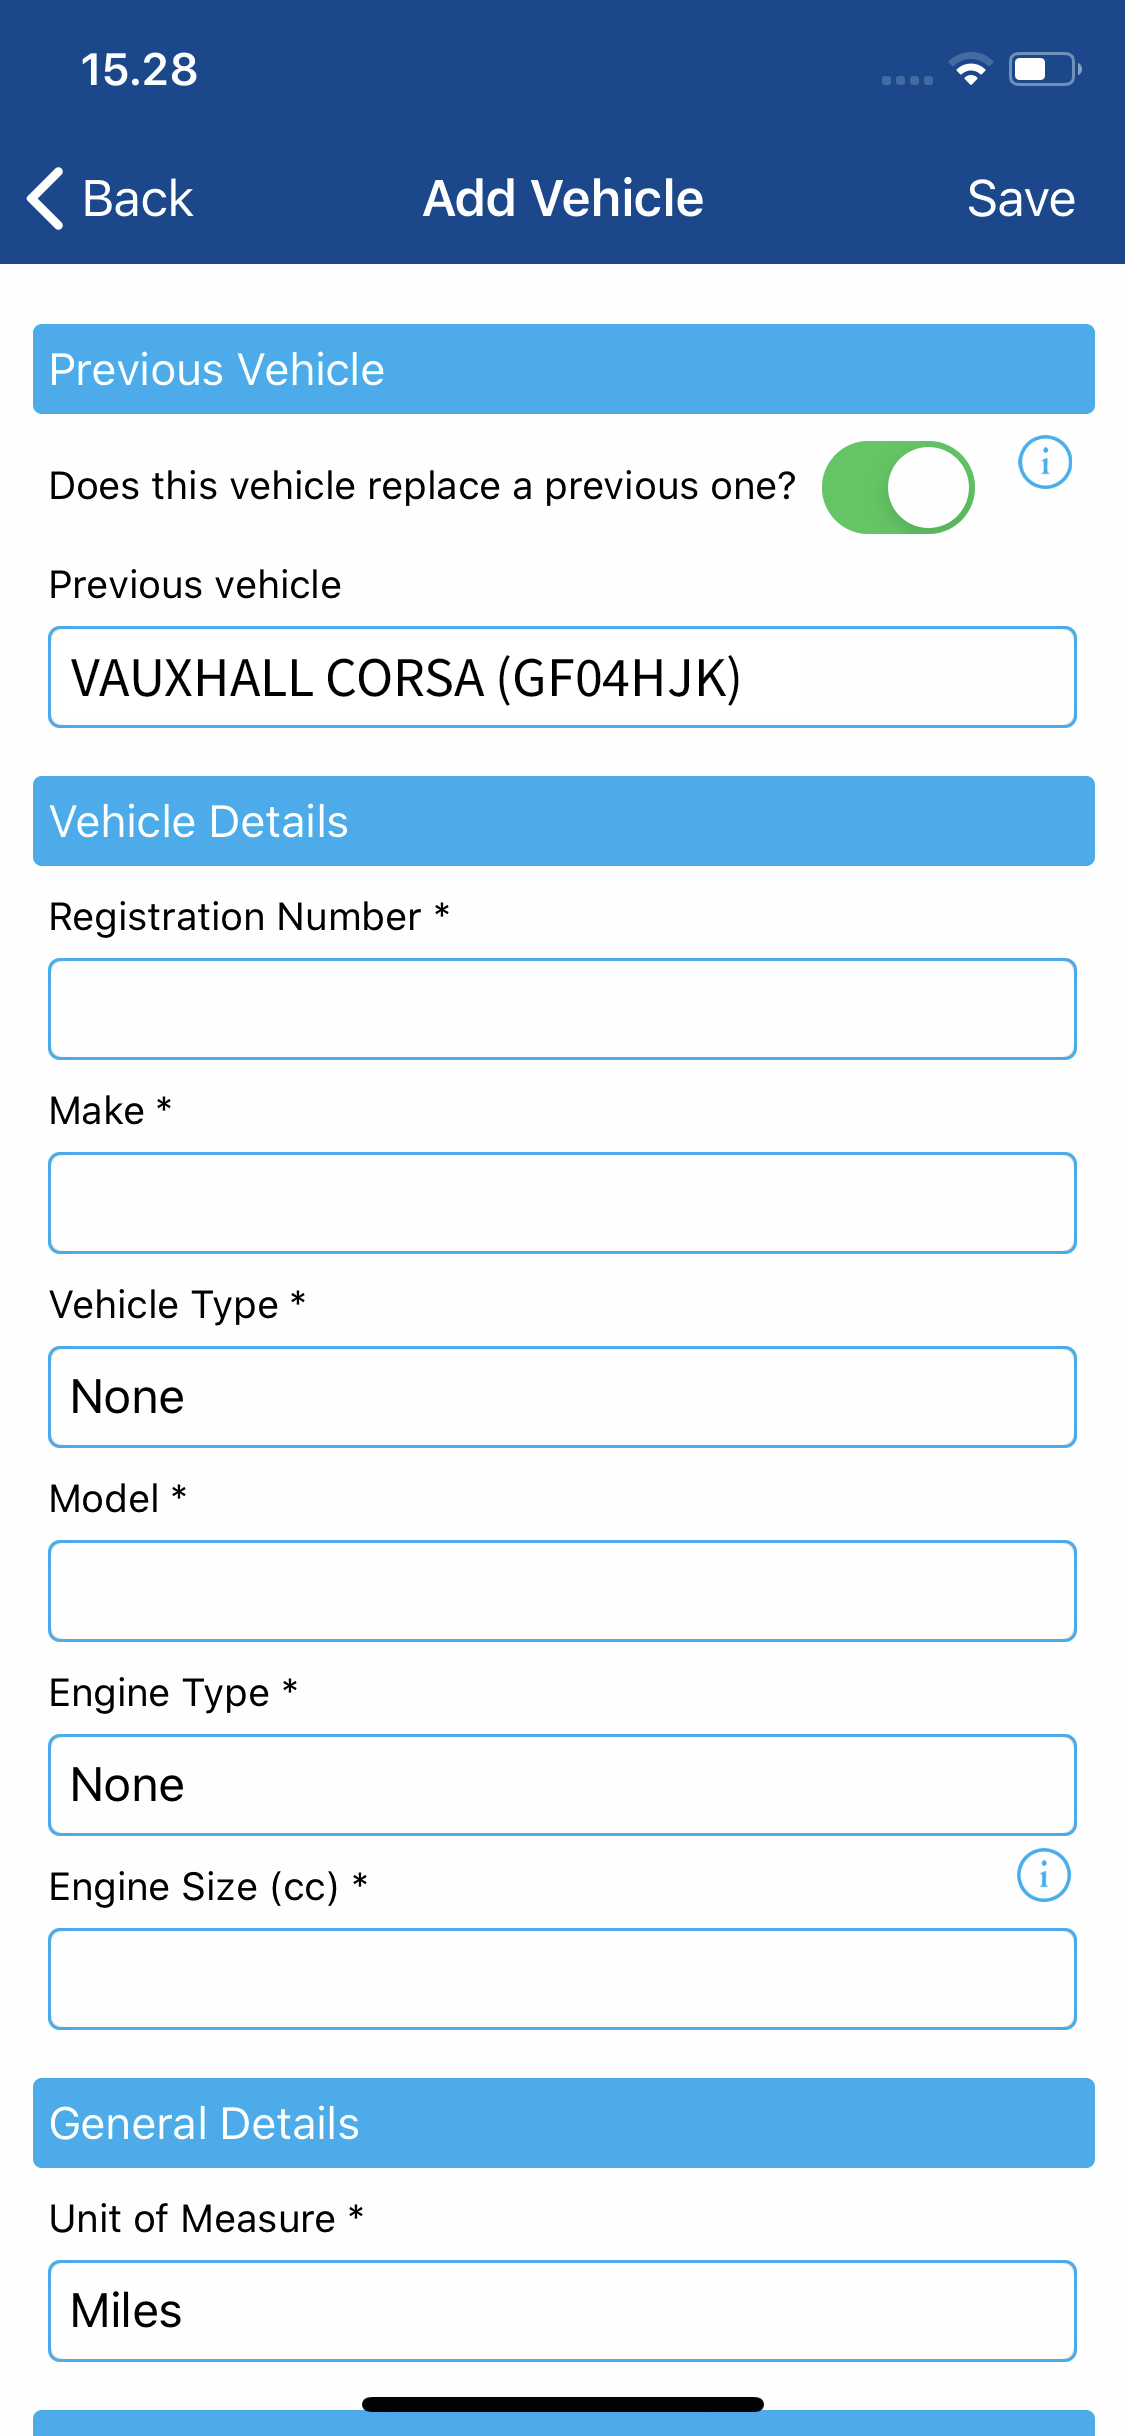
- Use the toggle to select whether the new vehicle you are about to add should replace a previous vehicle.
- If the answer to this is yes, tap the toggle which will display the 'Previous Vehicle' field. You can then tap this field to select the vehicle which will be replaced.

Note: The 'Previous Vehicle' section will not appear if you have no active vehicles.
- If the answer to this is yes, tap the toggle which will display the 'Previous Vehicle' field. You can then tap this field to select the vehicle which will be replaced.
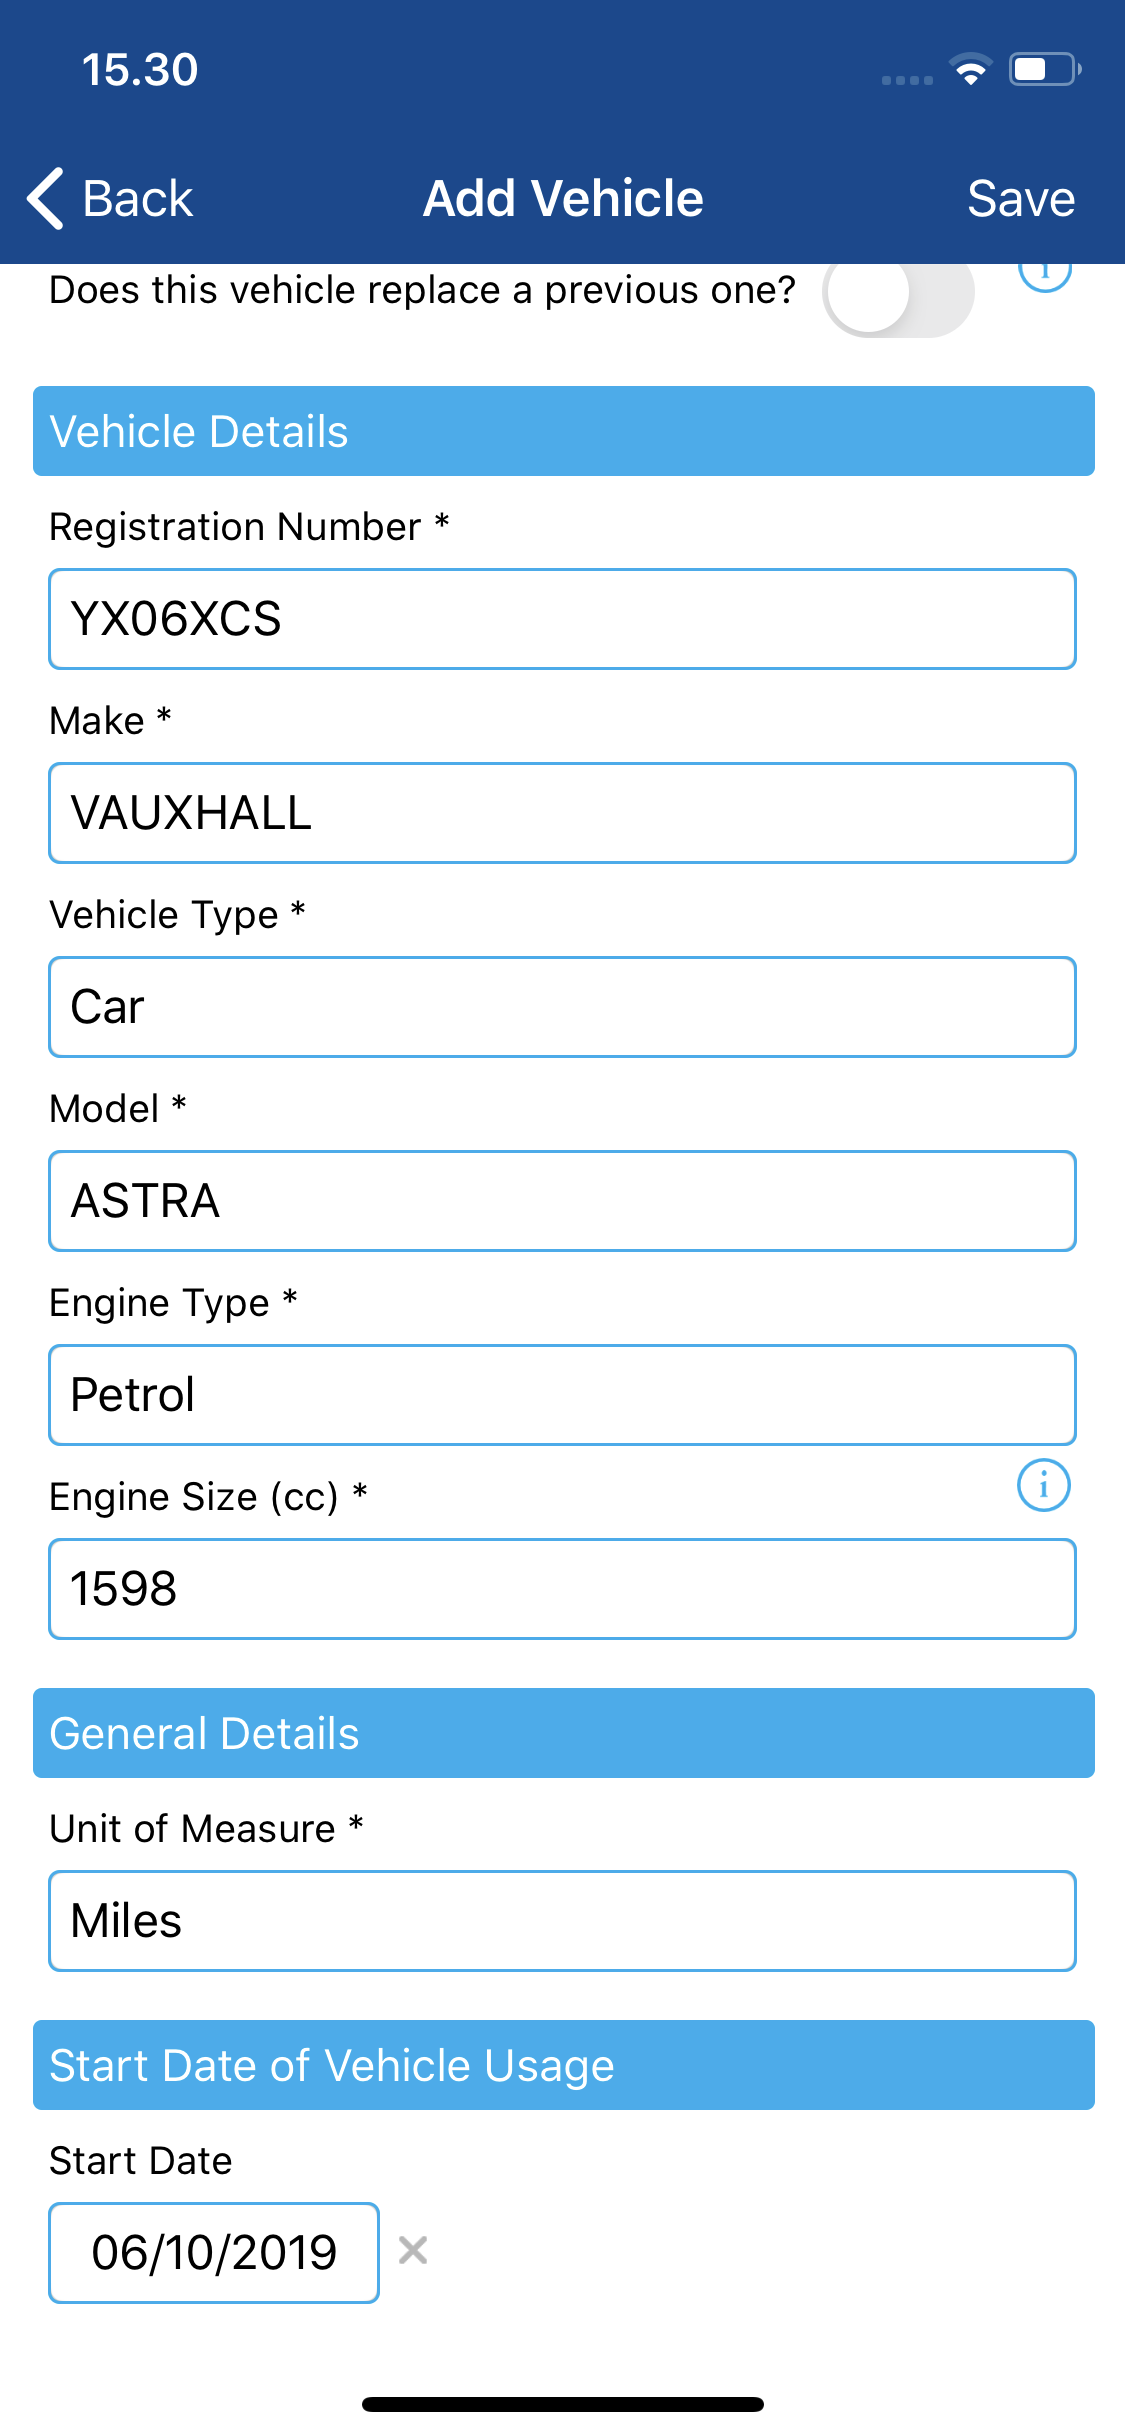
- Complete the Vehicle Details section:
Field Description Registration Number Enter the vehicle registration number to perform a vehicle lookup which will retrieve the Make, Model, Vehicle Type, Engine Type and Engine Size where possible. All fields can still be modified if required.
Note: In some instances, the Make and Model may not be found and will need to be entered manually.
Note: If a vehicle type of Bicycle is selected, this field will not be available.Make Enter the make of the vehicle. Vehicle Type Tap this field and then select a Vehicle Type from the available list. Depending upon the vehicle you select, some of the additional fields may no longer be available. Model Enter the model of the vehicle. Engine Type Select the engine type of the vehicle. Check for non engine vehicles. Engine Size (cc) Enter the engine size of the vehicle (cc).
Note: It is important you select the correct Unit of Measure and Engine Type as this will ensure correct reimbursement for the distanced traveled. Additionally, please make sure you enter the Engine Size in cubic centimeters (cc); for example 1198 instead of 1.2.
Note: The steps below may vary depending upon your organisation's setup.
- Within the General Details section, select a Unit of Measure.
- Enter the Start Date of vehicle usage. If this vehicle is to replace a previous vehicle, the Start Date field is mandatory.
- Select an appropriate Vehicle Journey Rate from the available selection. This will determine the rate of reimbursement that you will receive for journeys in this vehicle.
- Tap Save to store this vehicle information. If your organisation has permitted that a vehicle will automatically be activated after added by a user, this vehicle will then be available for selection. If not, this vehicle will need to be authorised by an administrator before it is available for selection.
Note: After you have saved, a message will appear indicating which additional duty of care documentation is required by your company. This could include your Tax, MOT, Insurance, Service or Breakdown Cover information. When adding these records you will also be required to upload a scanned copy of the documentation.
 and then tap More.


