Permissions
You will require the following permissions:
- No permissions required
Submit a Claim
- Log into Expenses Mobile and navigate to My Claims | Current Claims. Within the Current Claims page you will see a list of your claims which have yet to be submitted.
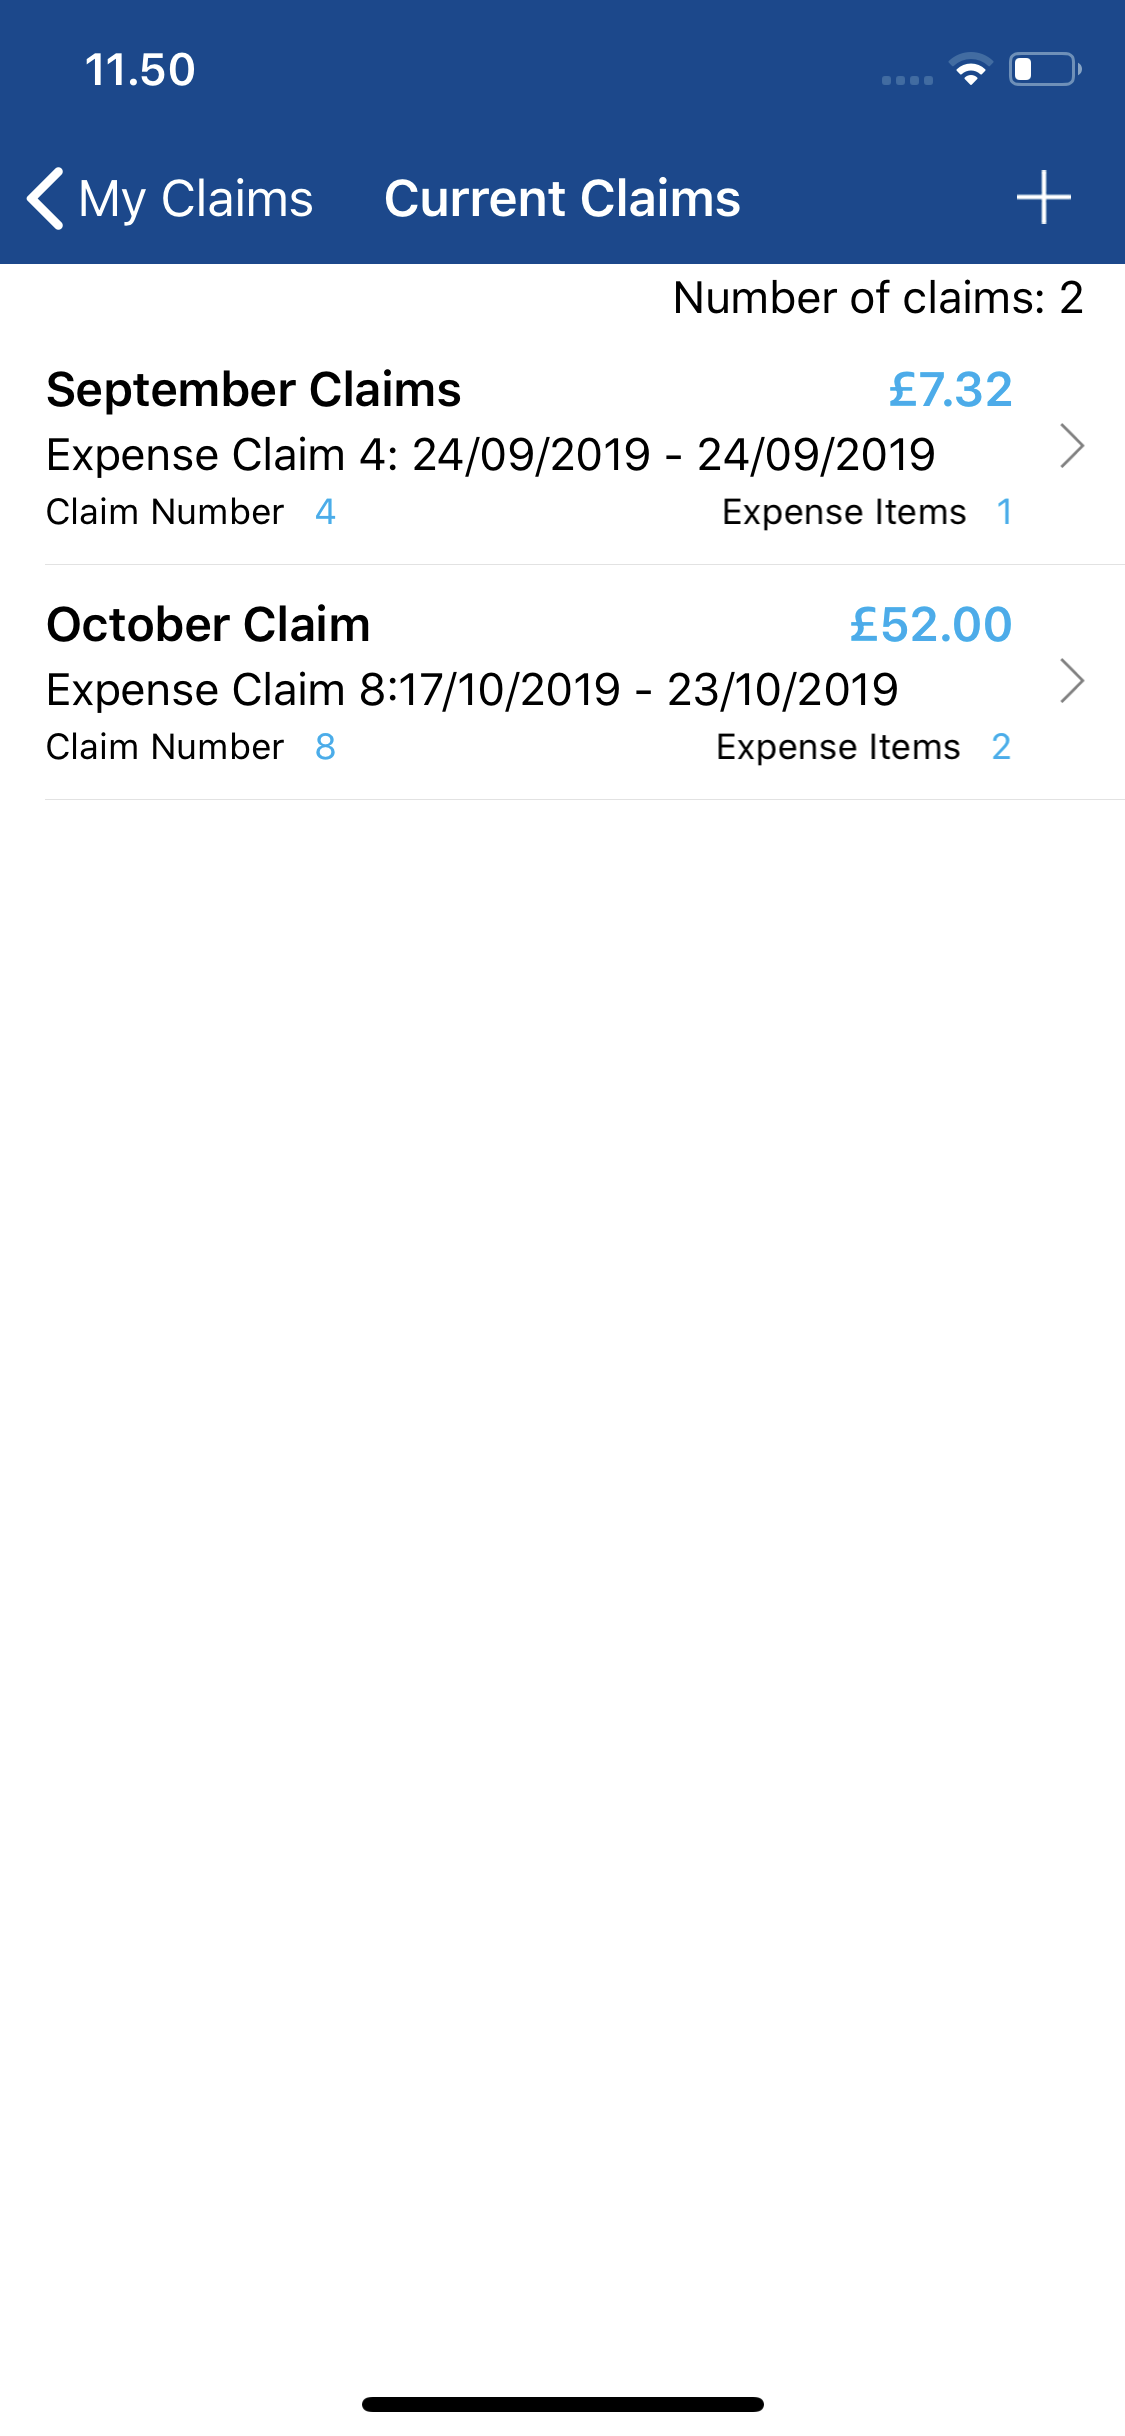
- Navigate to the Claim Details page for the claim which will be submitted. The Claim Details page displays the key information about a claim including each of the expense items which are part of the claim.
iOS Tap the claim that you want to view. This will direct you to the Claim Details page for this claim. Android Tap the claim that you want to view and then tap Expense Items. This will direct you to the Claim Details page for this claim. - You can perform further actions for each expense on this page by bringing up the options menu:
iOS Tap More  to display a list of options.
Android Tap the expense to display a list of options. 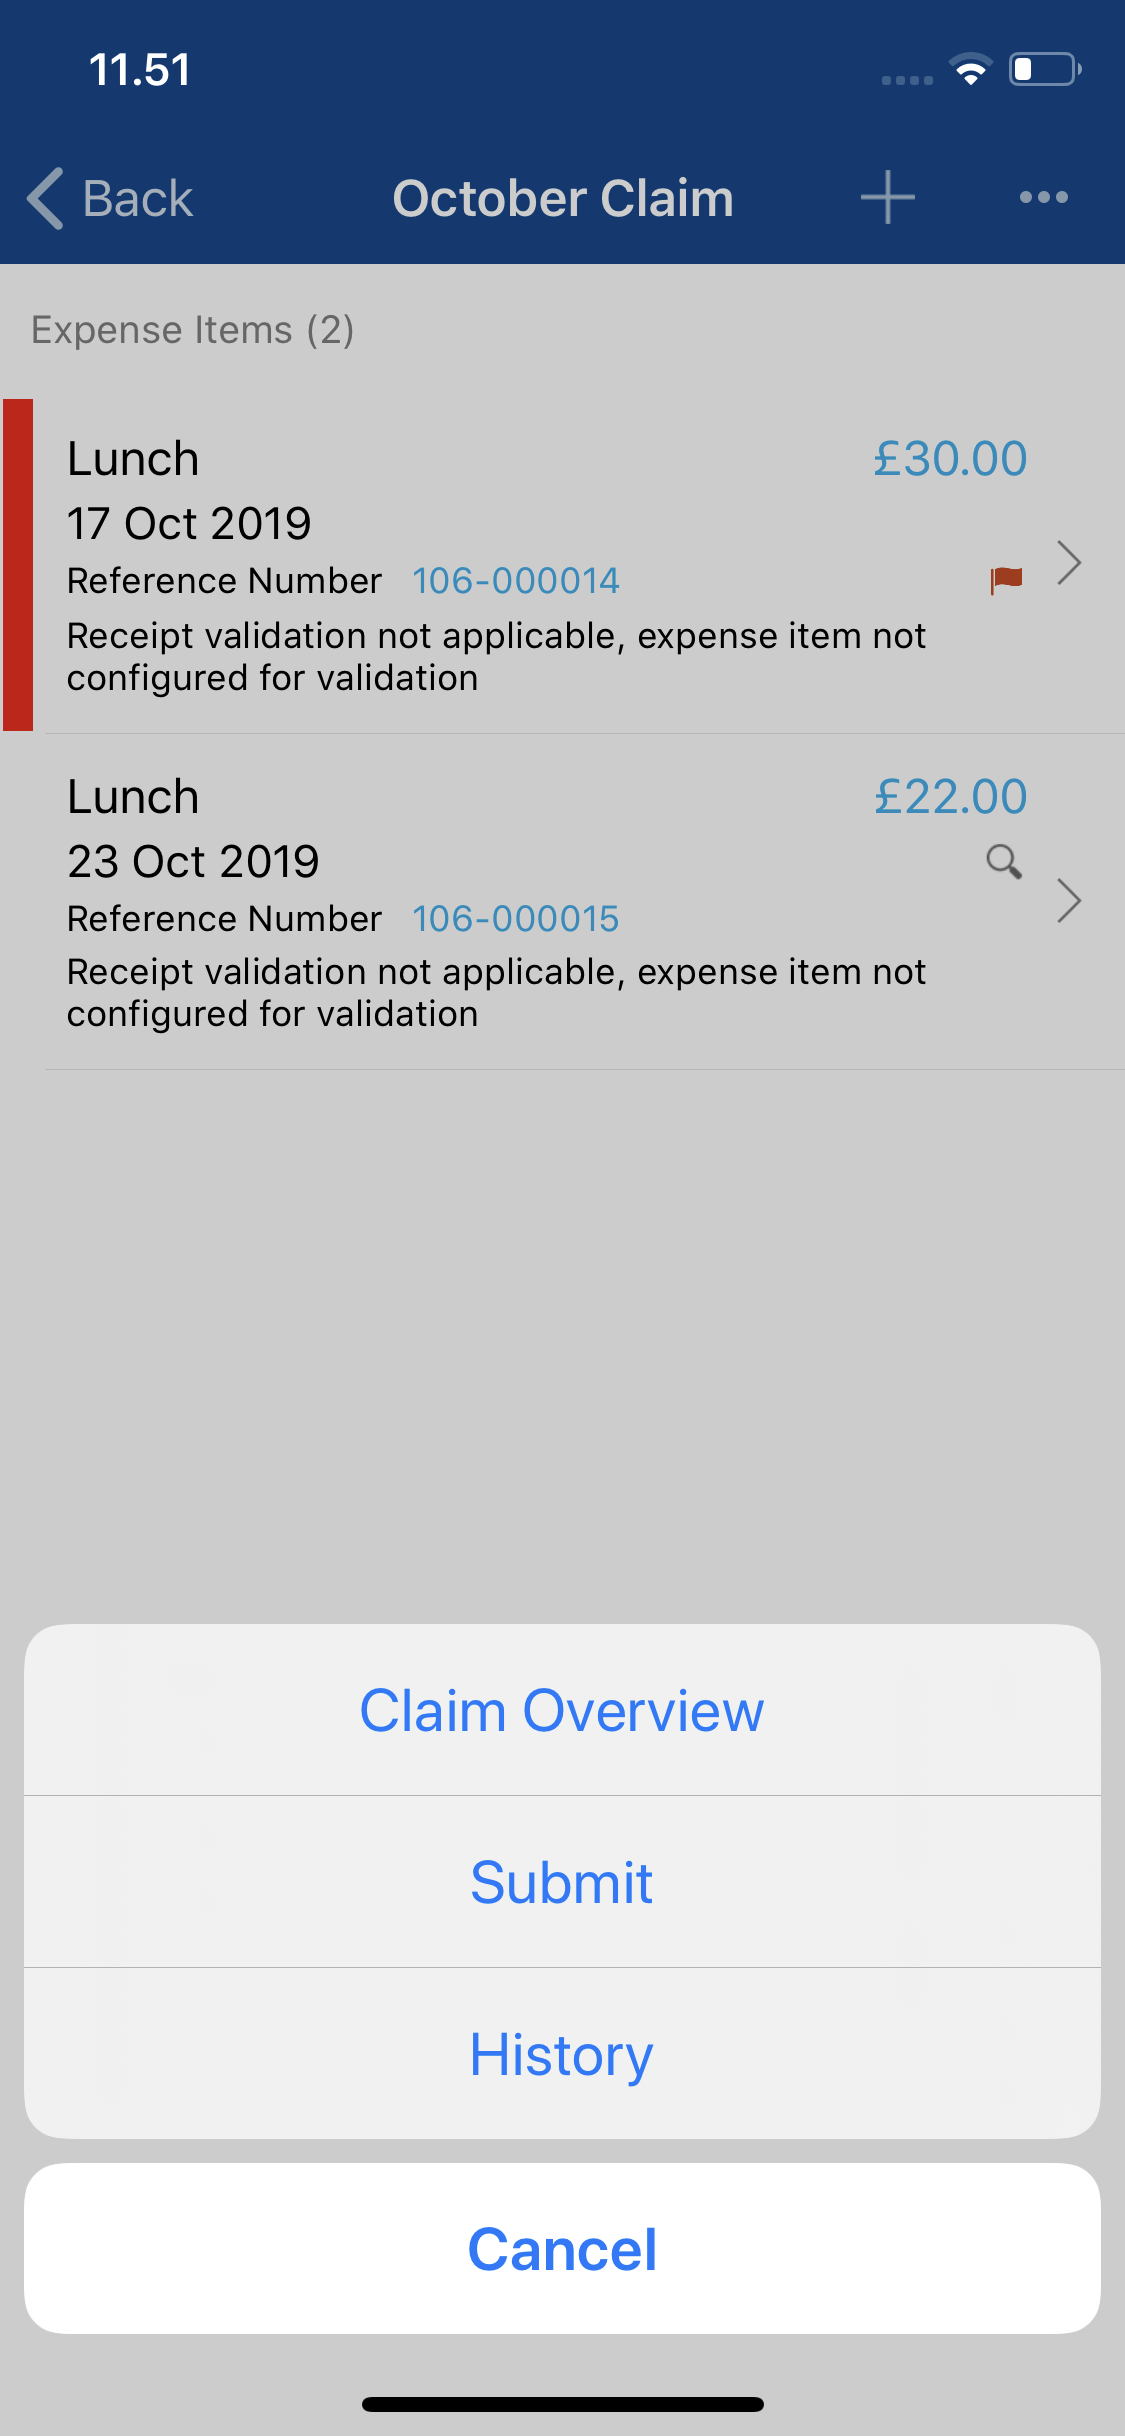
- If any of your expense items have breached policy, they may have been flagged. Flagged expense items will display a small flag icon indicating which type of breach has occurred. For information on how to view the flags against an expense item and provide justifications, read View Flag Information.
- If any of your expense items are blocked for breaching policy, they will need to be corrected or deleted in order to submit the claim. Tap on the Delete expense item button in order to discard this expense from the claim.
Note: Depending upon your organisation's configuration, the details of a flag may be displayed immediately after you have added an expense item to a claim, if it has breached expenses policy.
- A car icon
 indicates a Mileage expense item which contains a journey. You can quickly view this journey by tapping View Journey after opening the options menu for the expense.
- You can perform further actions for each expense on this page by bringing up the options menu:
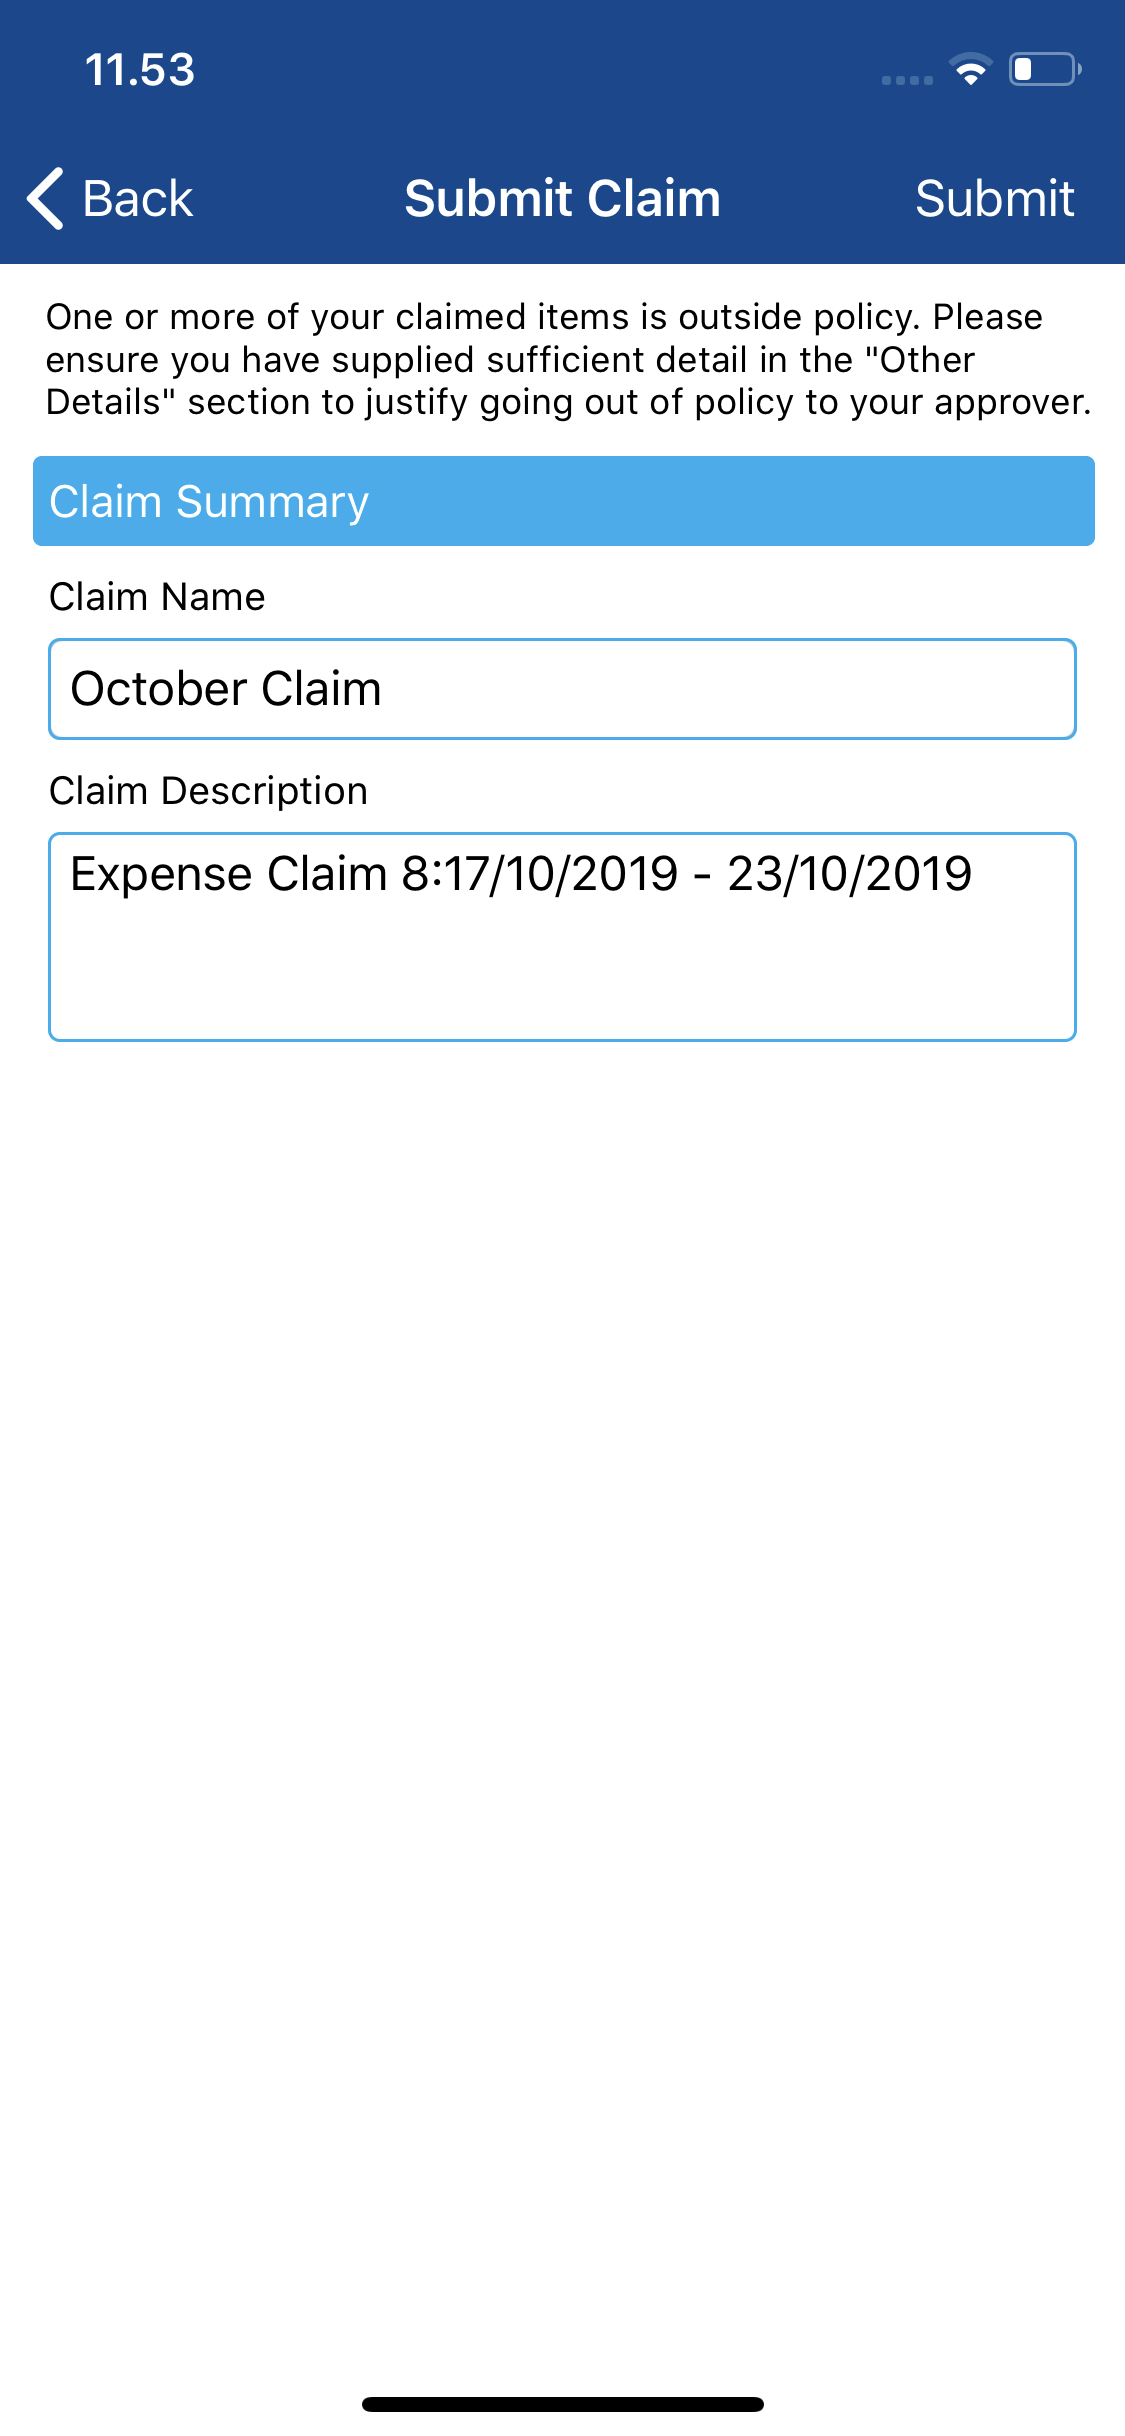
- If the claim is complete and ready to be submitted, tap the Submit. This will display the Claim Summary page which allows you to make amendments to the Claim Name or Claim Description before the claim is submitted into the approval process.
- At this point you may be able to submit your claim or depending upon your organisation's system preferences, you may be required to complete further steps before submitting your claim.
- If the Submit button is displayed, tap this to submit your claim into the approval process.
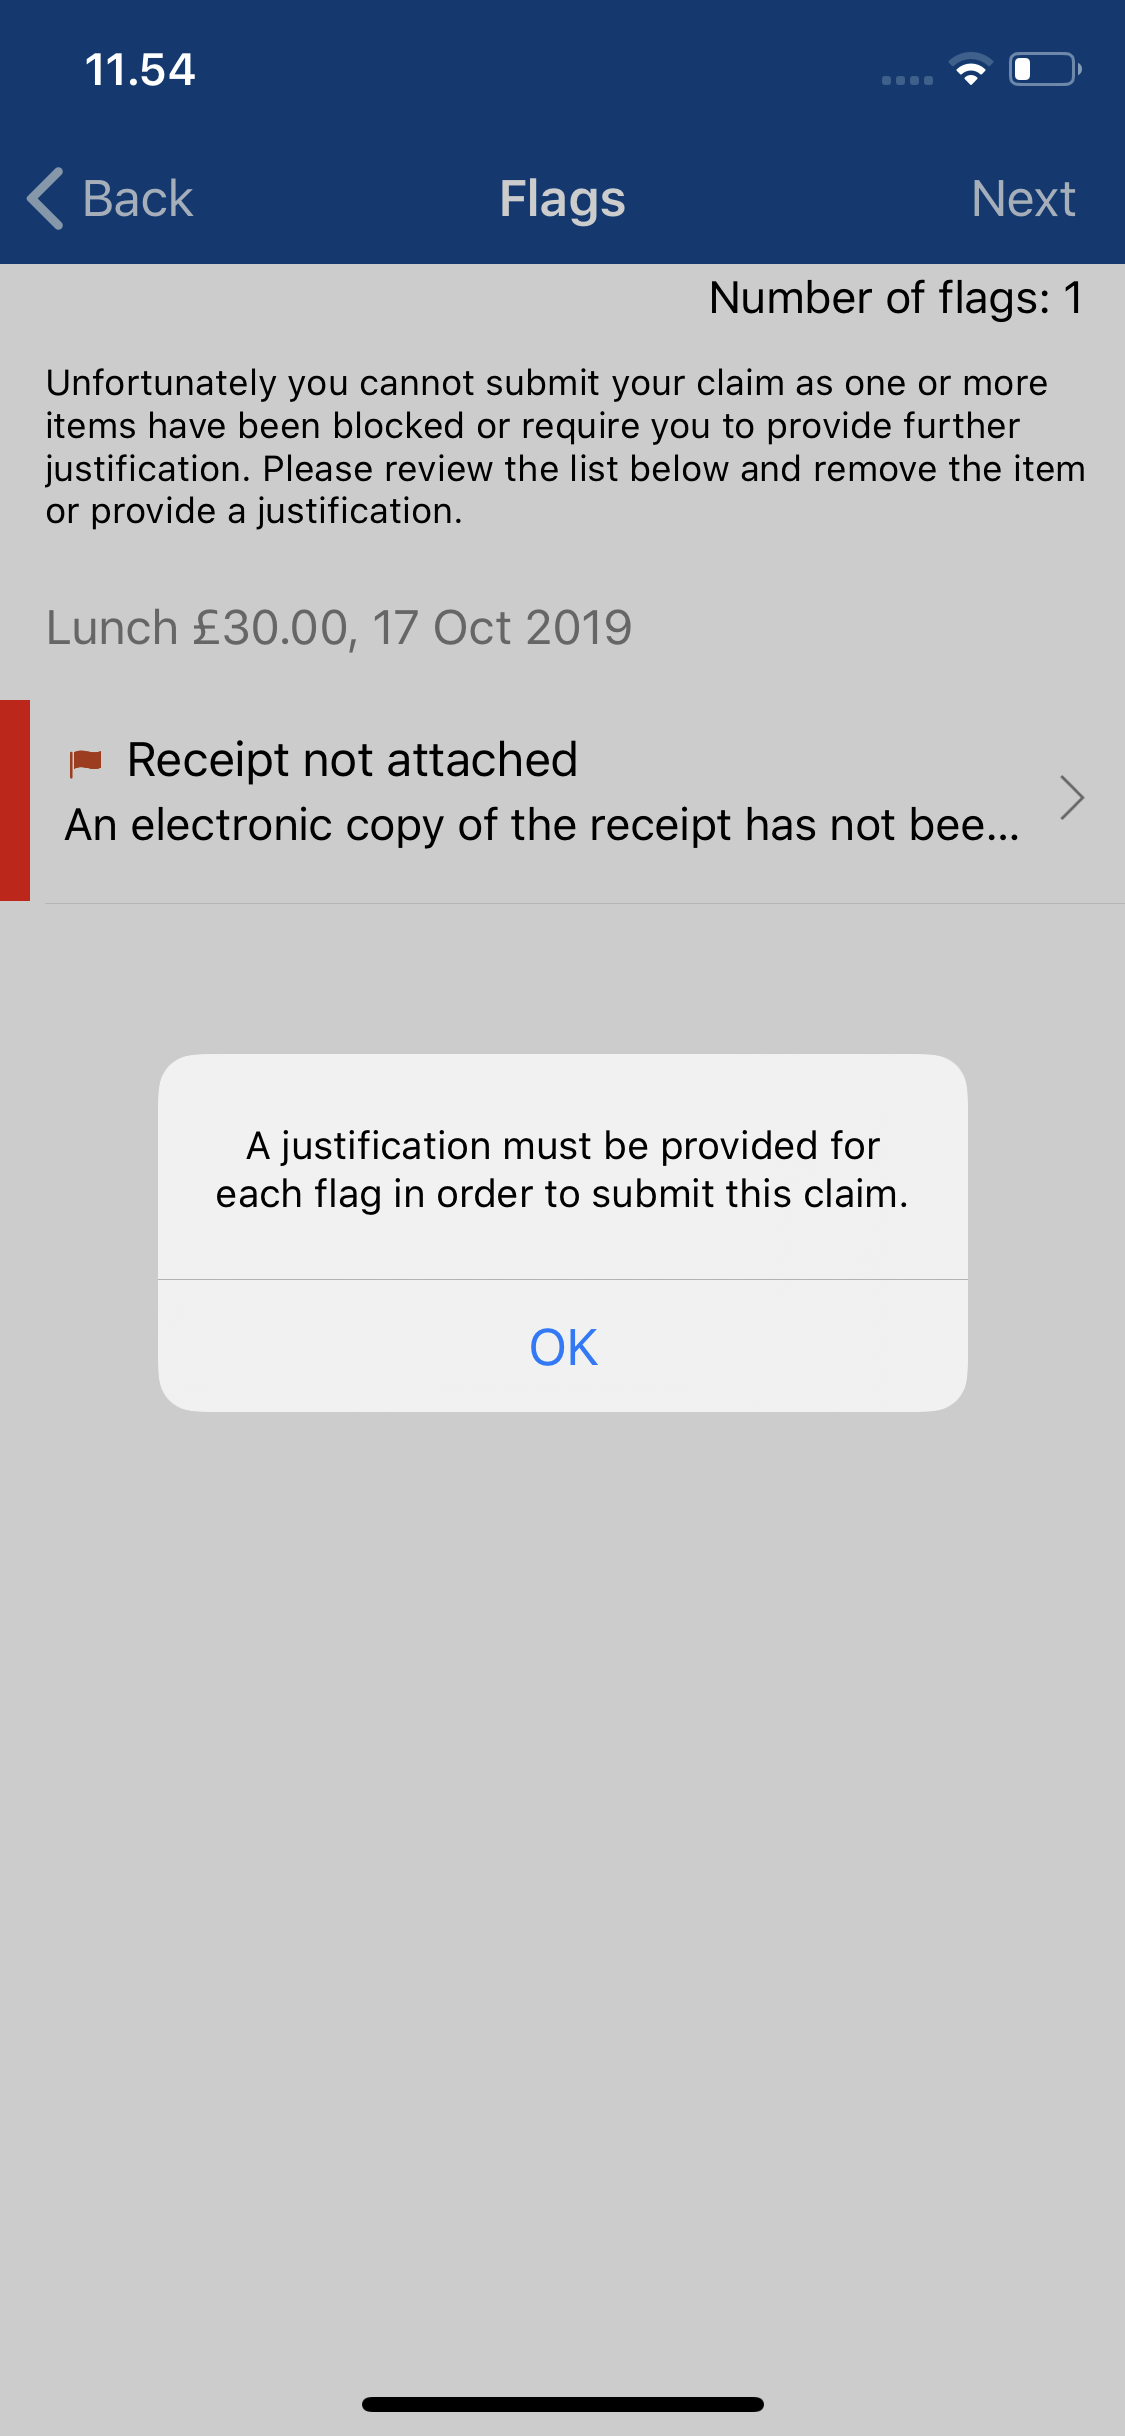
- If the Next button is displayed, you will be required to input further details. More information on the steps that you may need to complete can be found in the links below. The example image shows what happens when a flag needs to be justified. There may be other reasons why you cannot submit your claim immediately.
- (Optional) You may also be required to agree to a declaration in order to submit the claim. If a declaration appears:
- Tap I Agree to submit the claim.
- Tap I Disagree to return to the Claim Summary page.
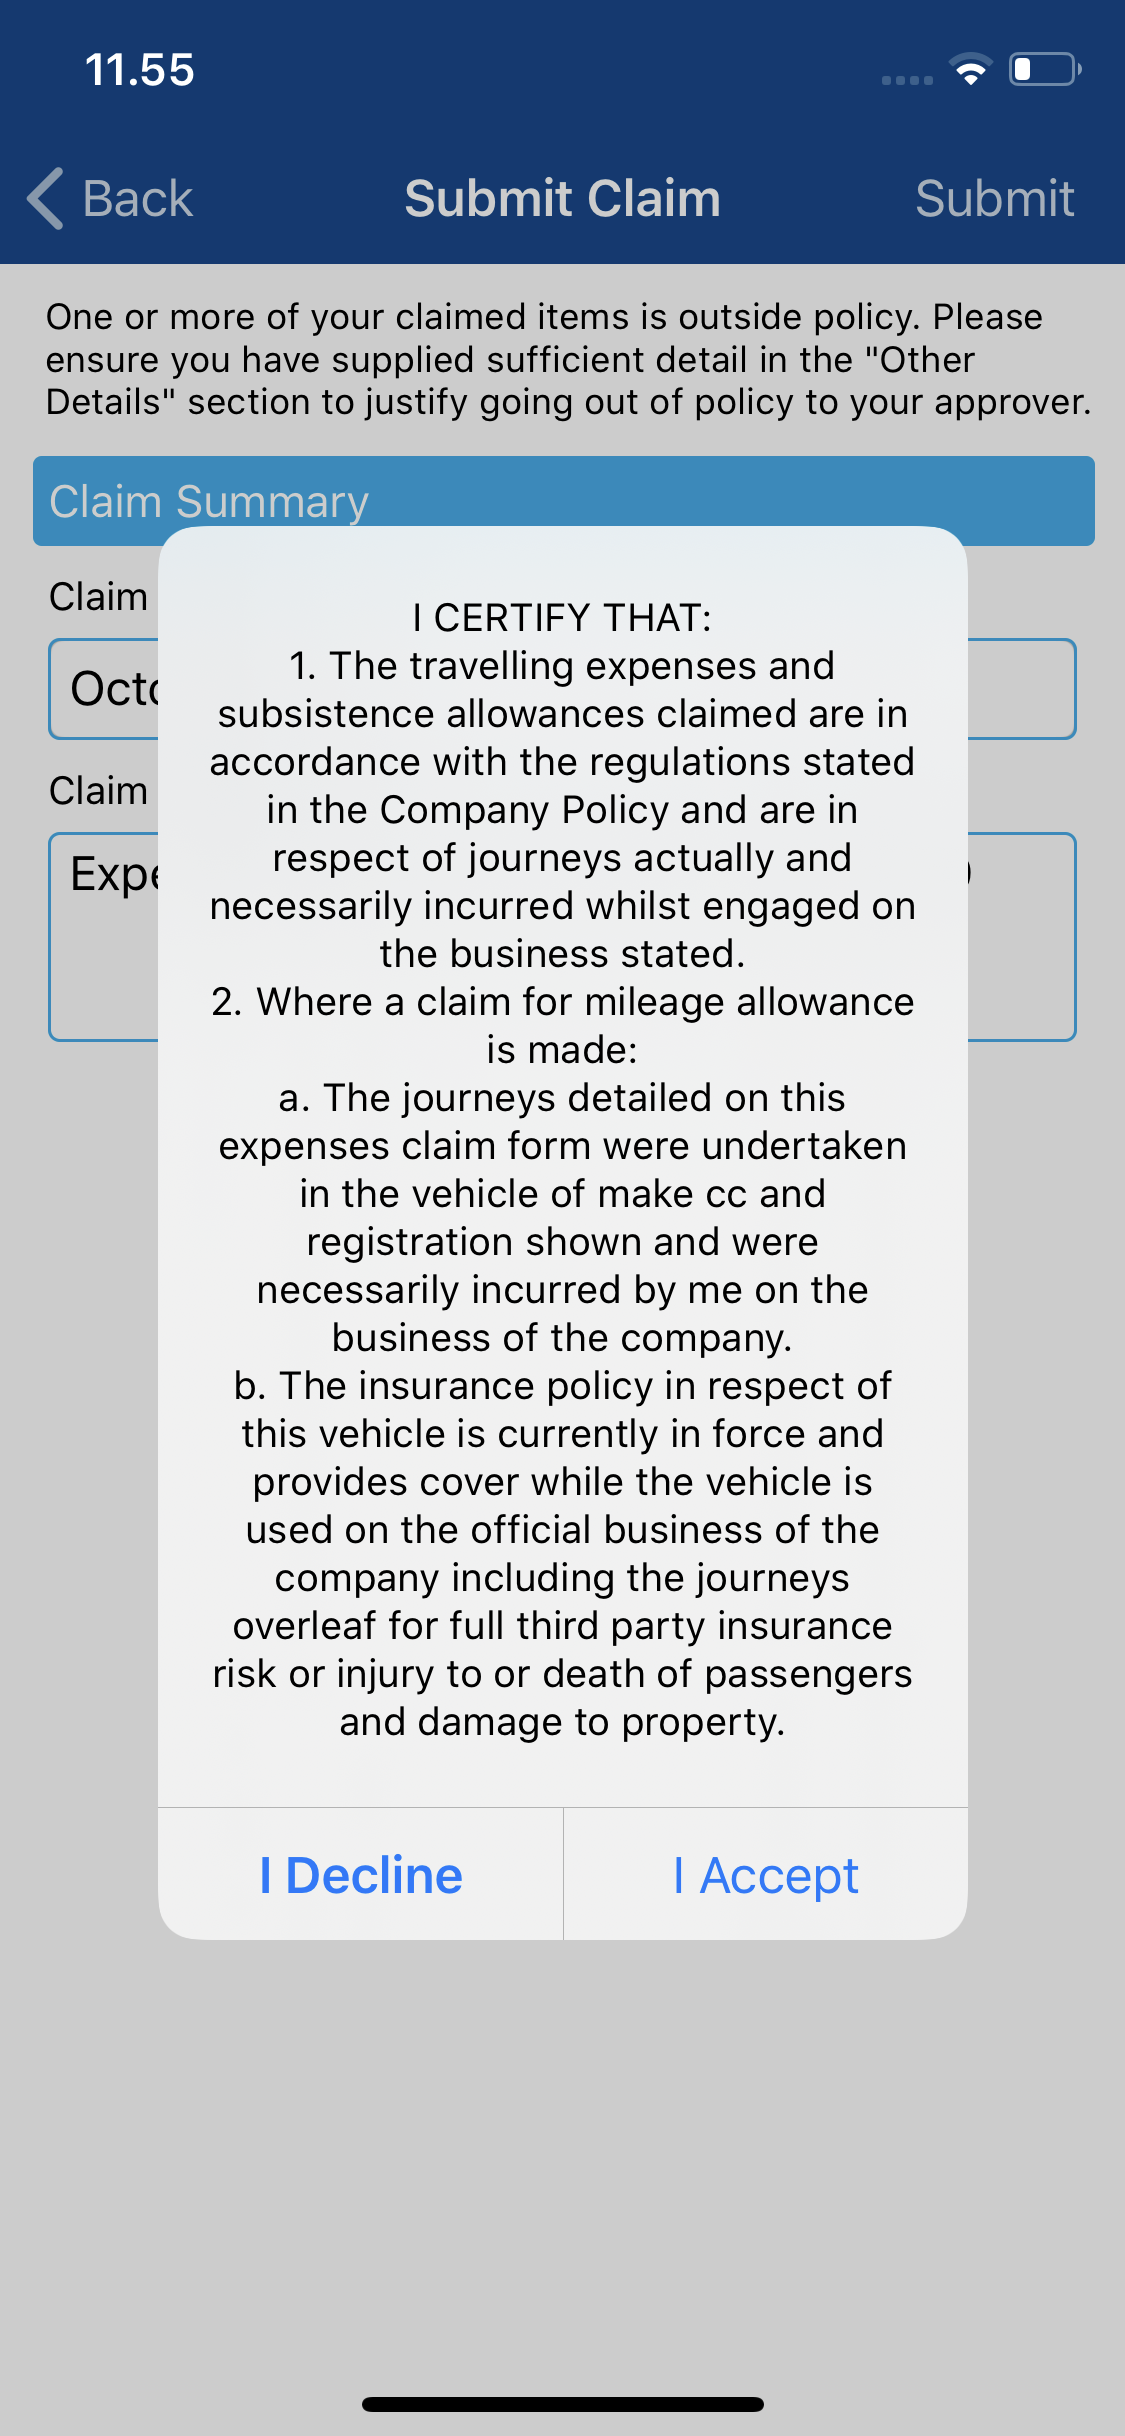
- Tap I Agree to submit the claim.
- If the Submit button is displayed, tap this to submit your claim into the approval process.
- Once submitted, your claim will now be available to view at the following location:
- My Claims | Submitted Claims.
Split your Claim
This page will allow you to select which item types (Cash Items/Credit Card Items/Purchase Card Items) you want to submit with your claim. This will be available if your organisation permits that you can part submit claims and if you have the relevant credit card/purchase card items to reconcile.
Note: If you choose to part submit your claim, the items that are being submitted will automatically be added to a new claim before being submitted. All other items will stay on the original current claim.
Depending upon your organisation's system settings, you may be forced to submit only cash, credit card or purchase card items. Alternatively you may be able to select a combination of cash, credit card and purchase card items.
- After tapping next on the Claim Summary screen, you will be taken to a page which asks Which items would you like to submit?
- You will be presented with one of the following options:
- An Item Type field which will allow you to only select one item type to submit (Cash Items/Credit Card Items/Purchase Card Items). You are only able to select one of these item types as your organisation as specified that cash and credit card items cannot be on the same claim.
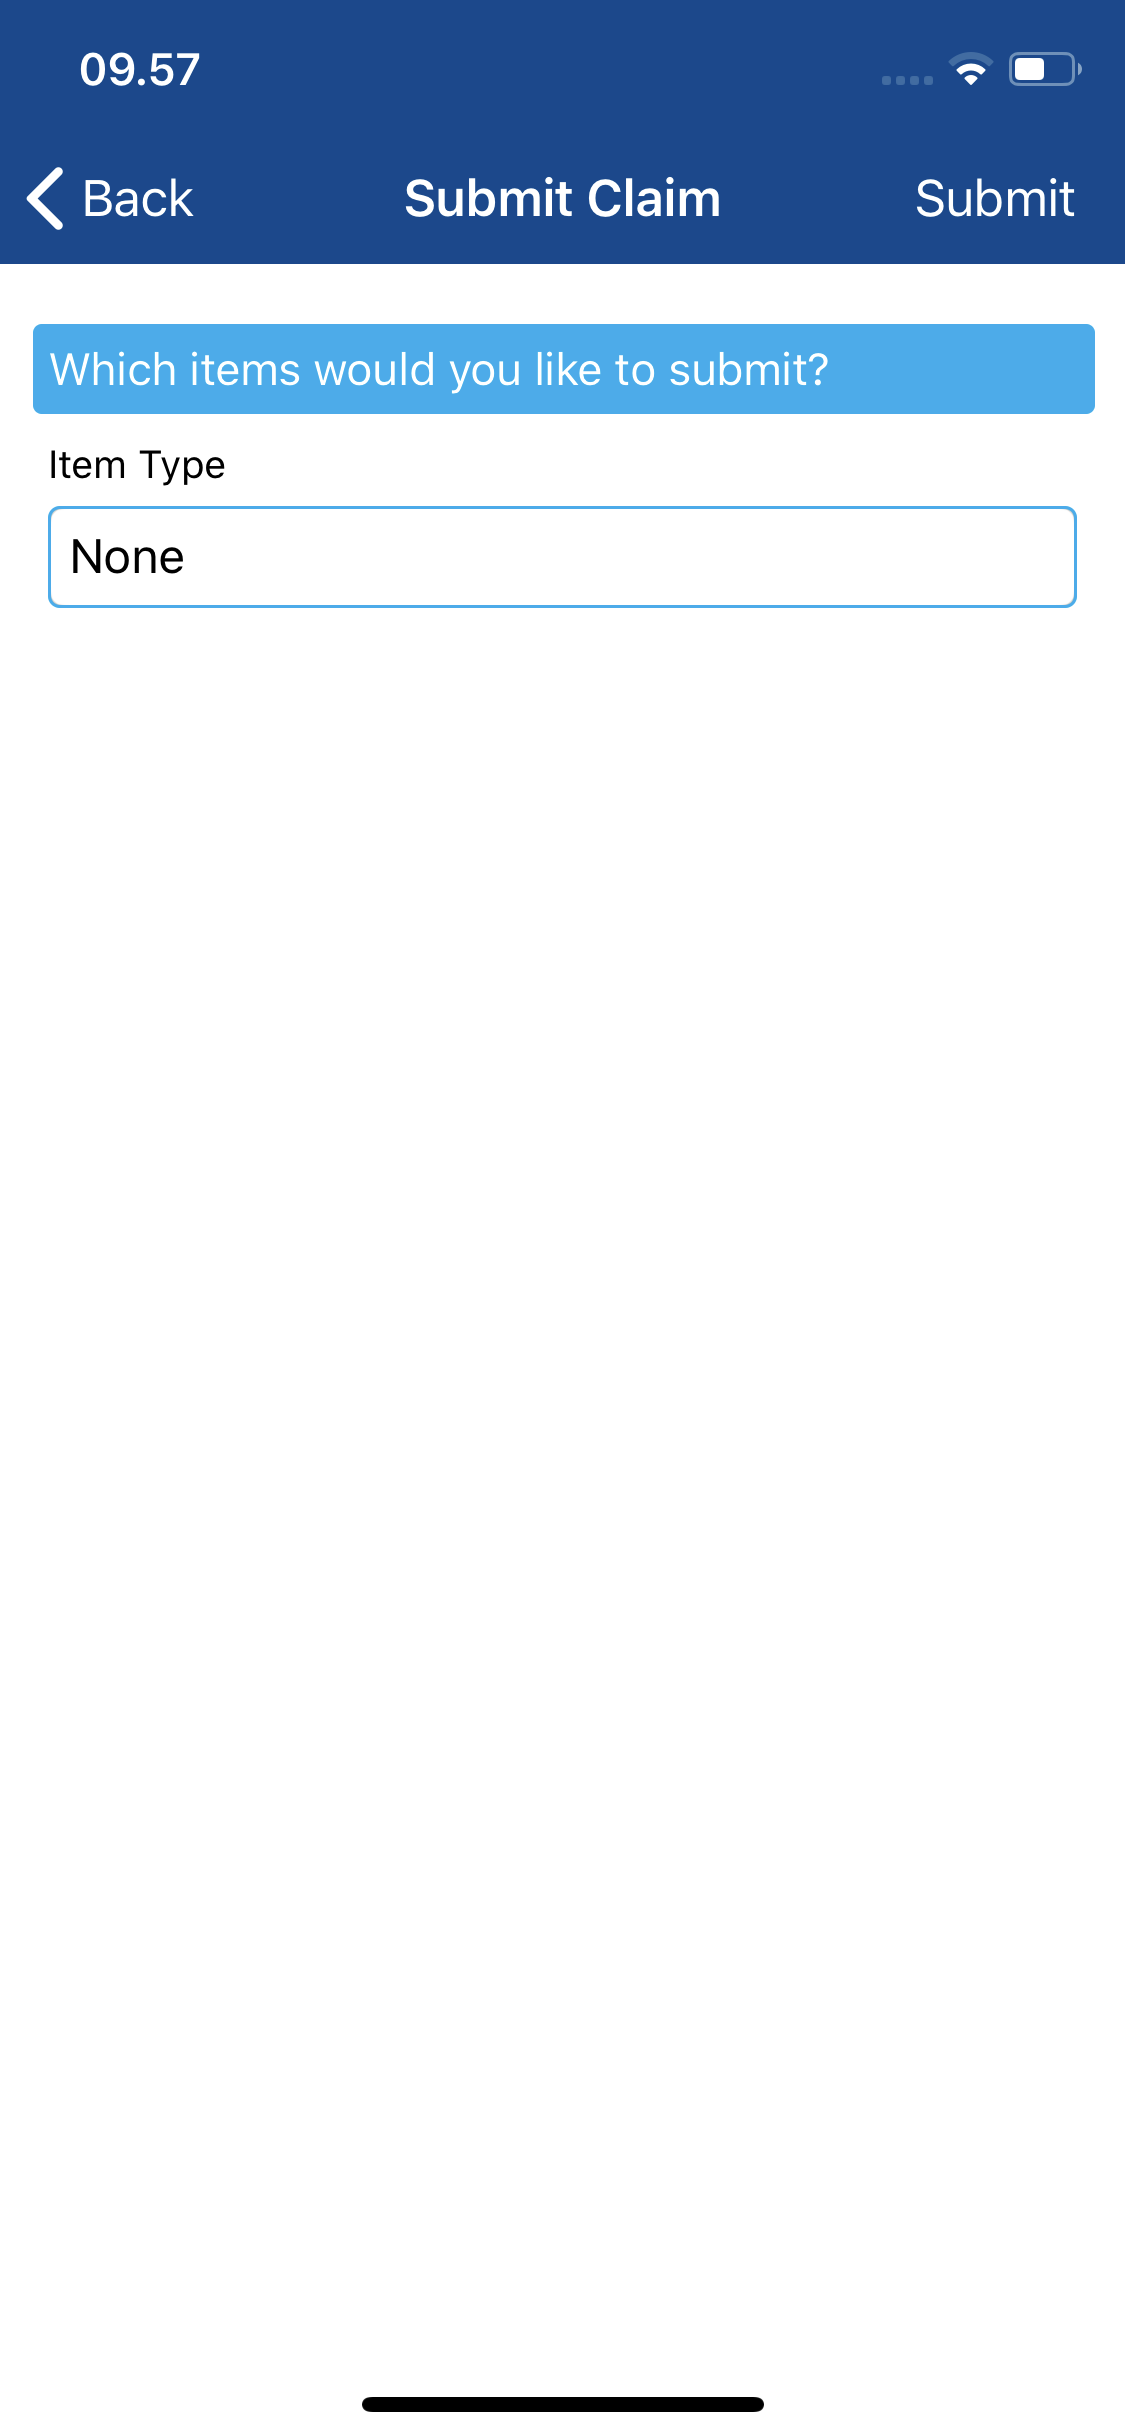
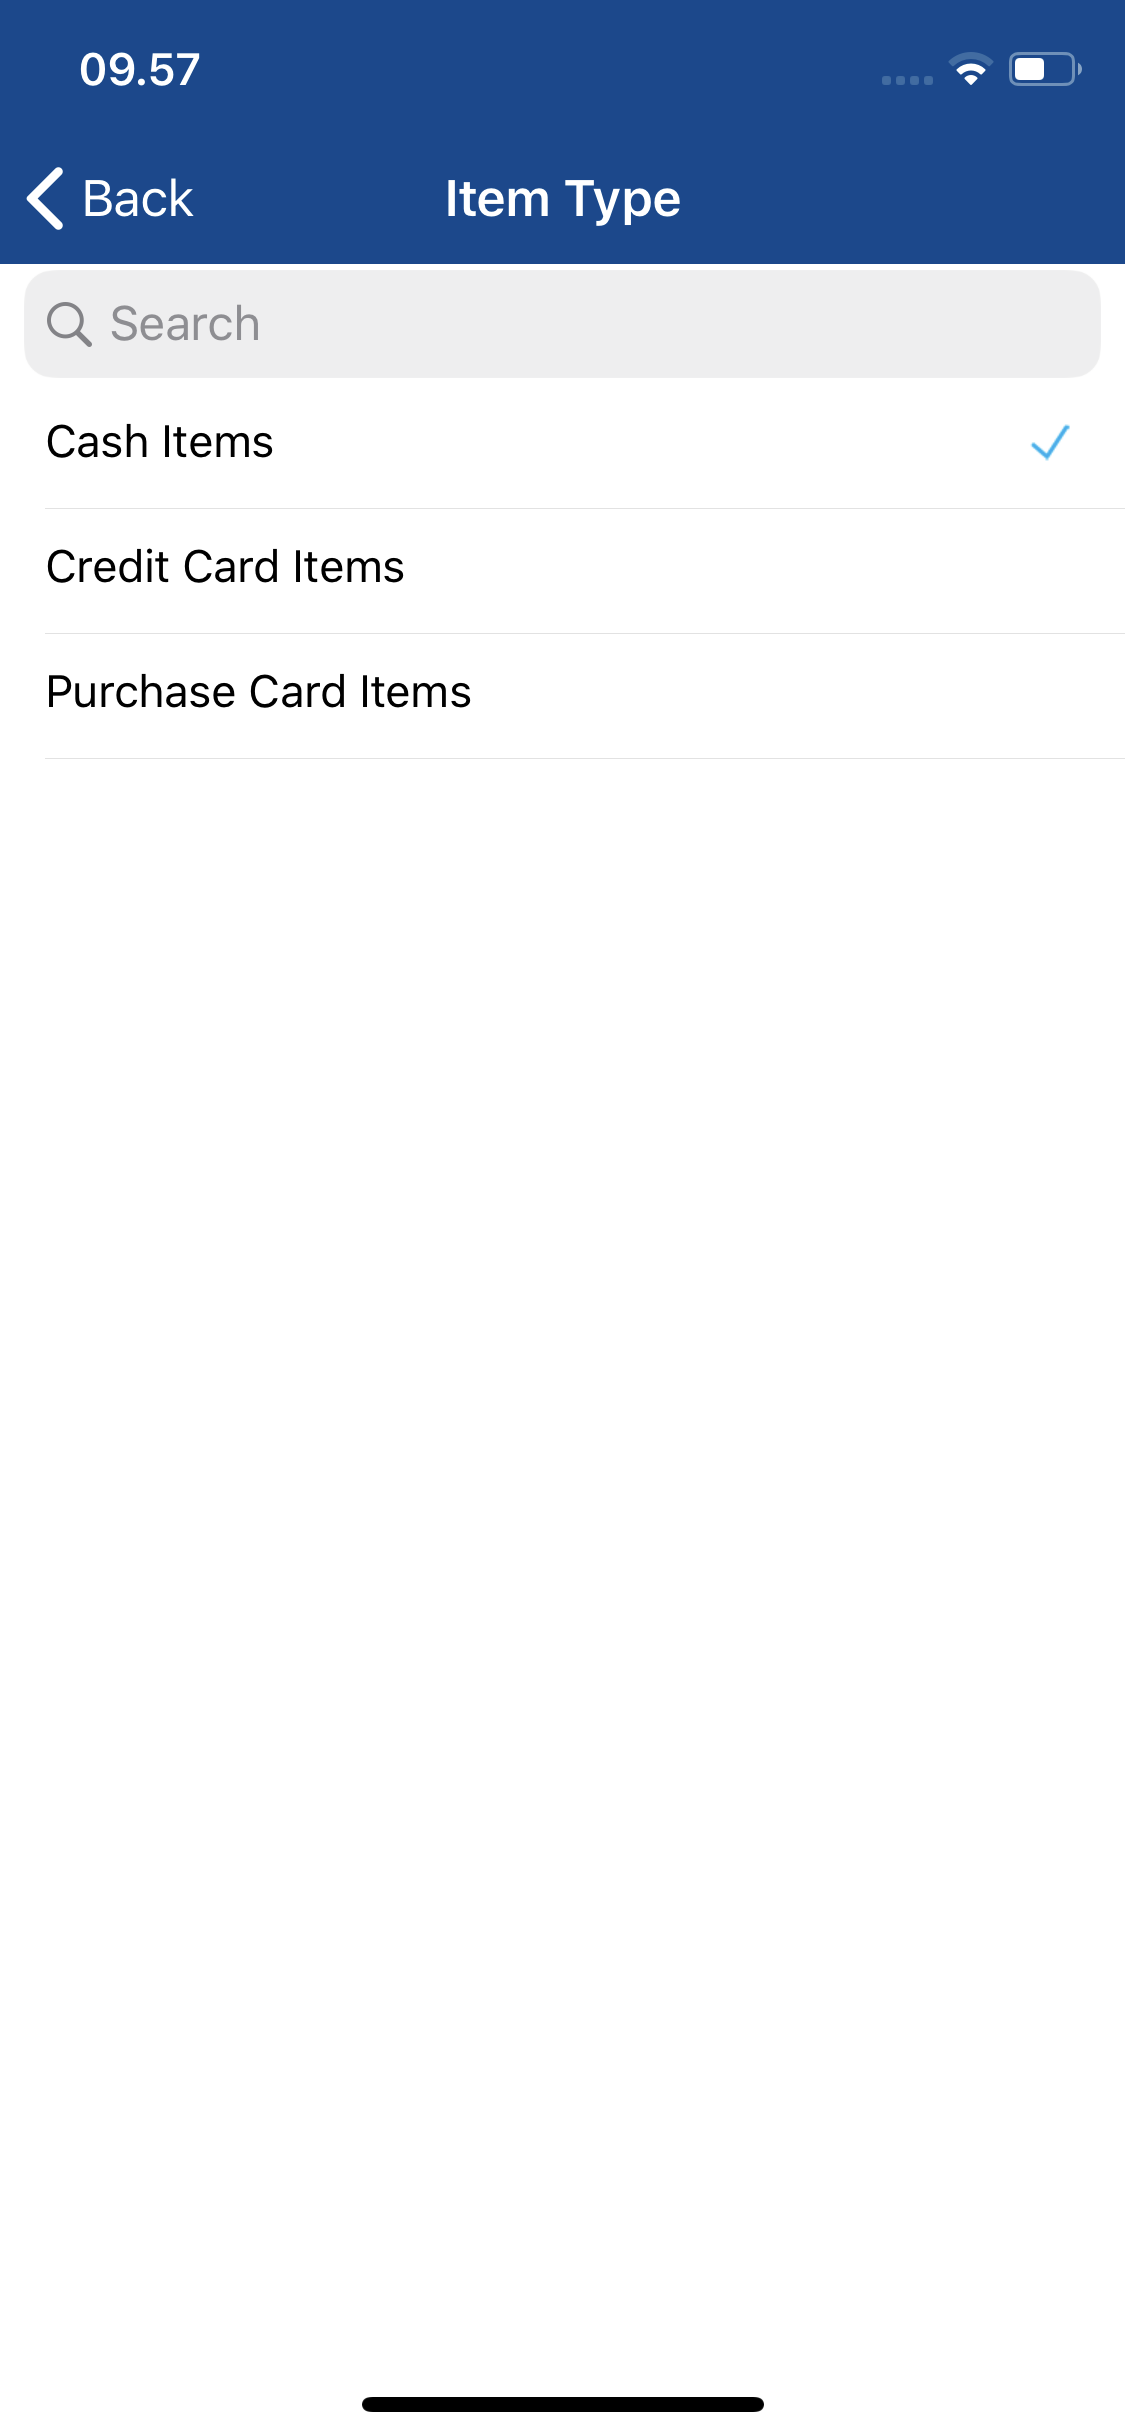
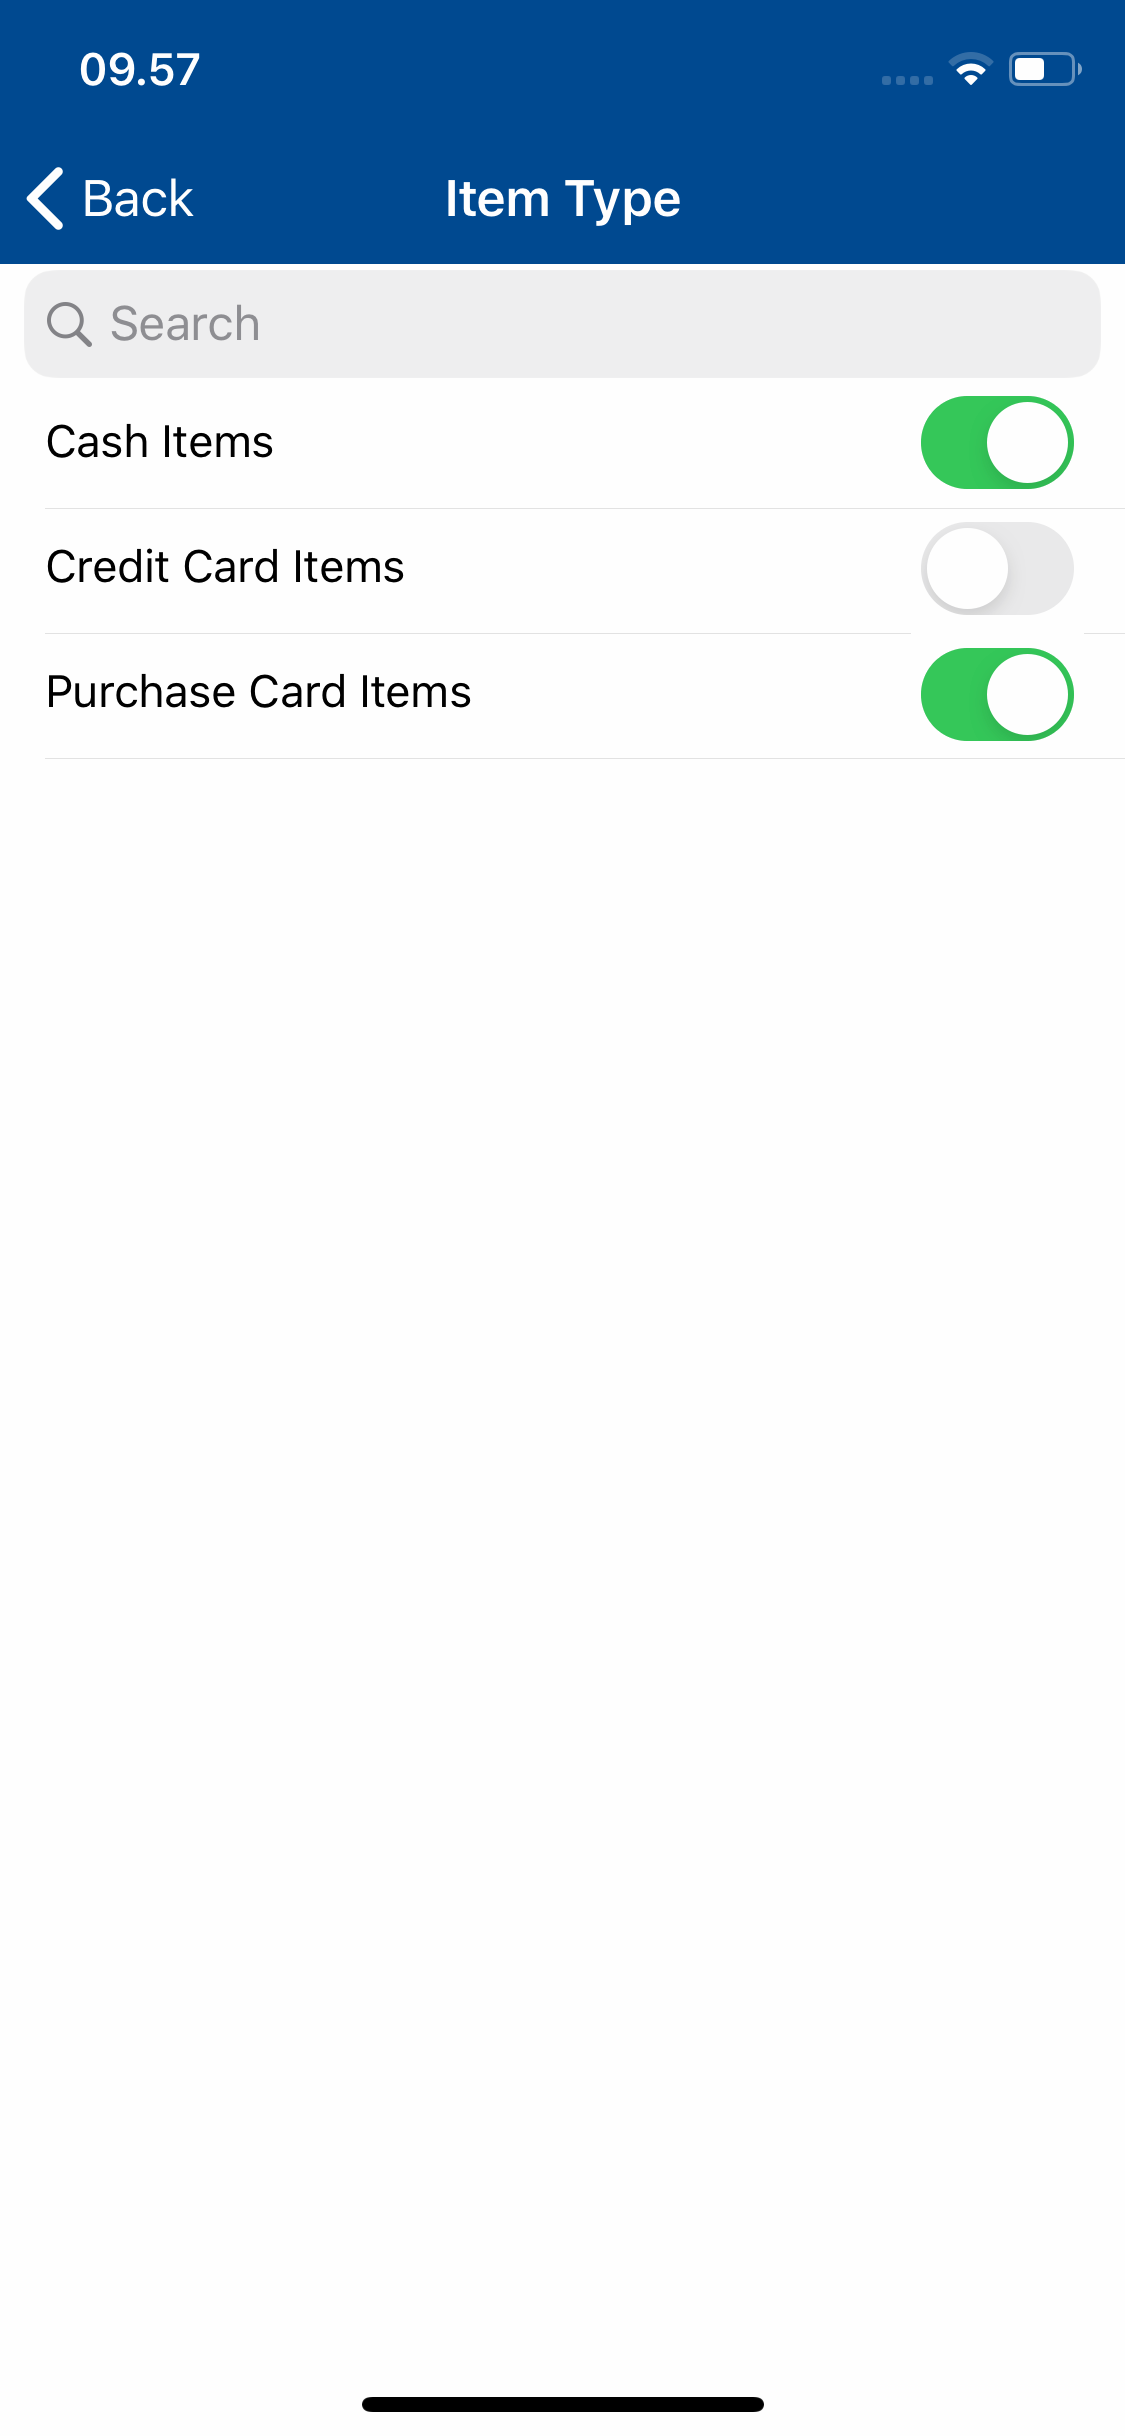
- A list of the item types which you are permitted to submit (Cash Items/Credit Card Items/Purchase Card Items), each with a toggle to allow you to select and deselect.
- An Item Type field which will allow you to only select one item type to submit (Cash Items/Credit Card Items/Purchase Card Items). You are only able to select one of these item types as your organisation as specified that cash and credit card items cannot be on the same claim.
- Once you have made your selection, tap Next/Submit.
Enter Odometer Readings
If you are required to enter odometer readings for your vehicles you will see the Odometer Readings screen. This lists each of your active vehicles and indicates which require new odometer readings, highlighted in red.
- From the Odometer Readings screen, tap on a vehicle which requires new odometer readings. This will show you details of the vehicle and the last odometer reading.
- Enter the vehicle's current odometer reading.
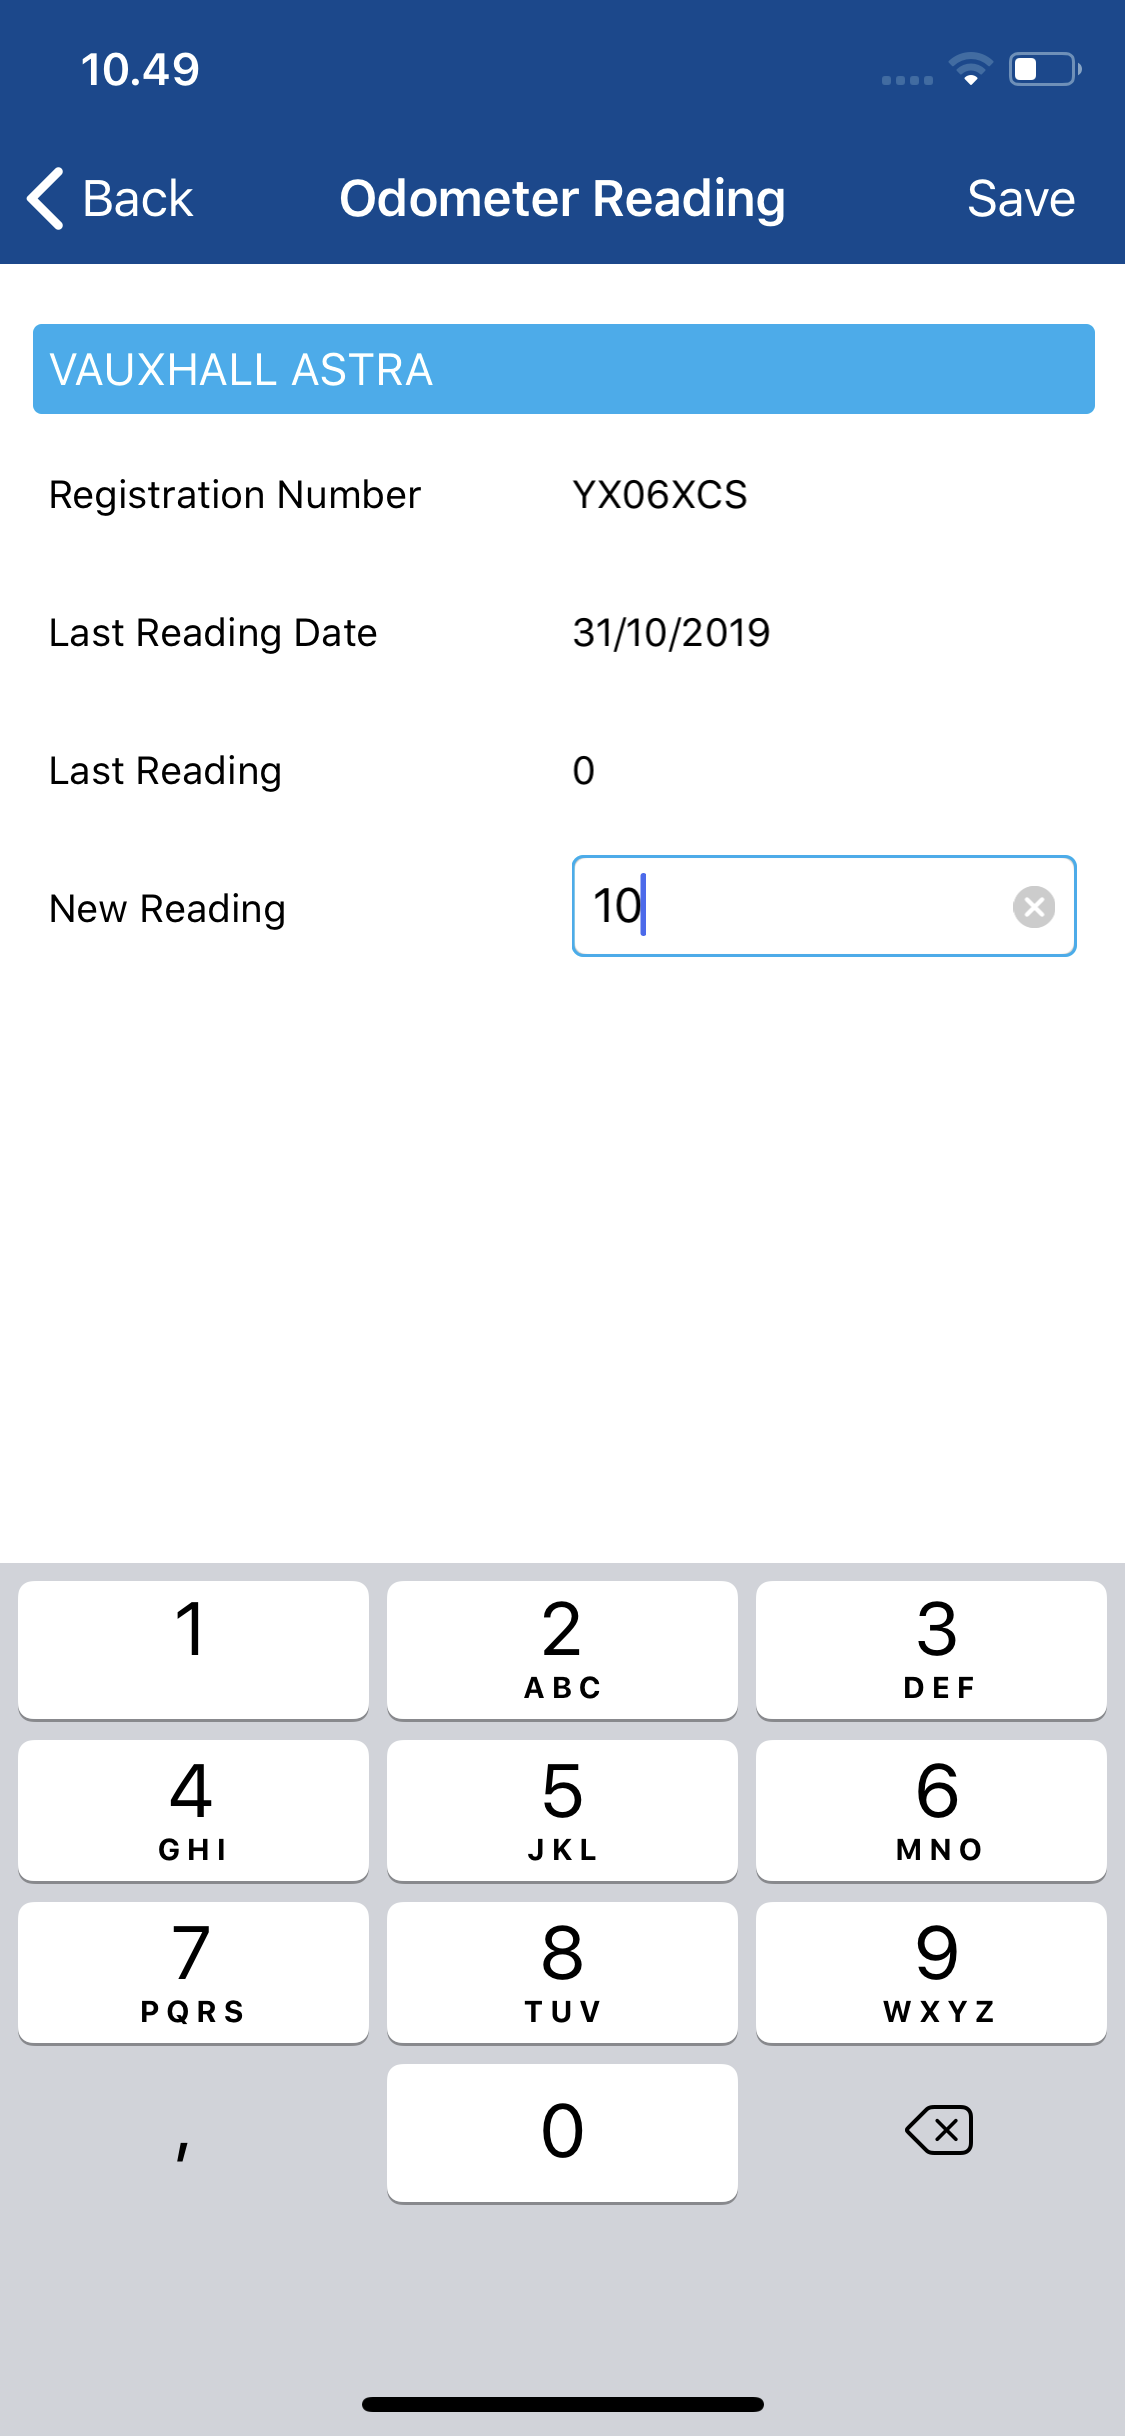
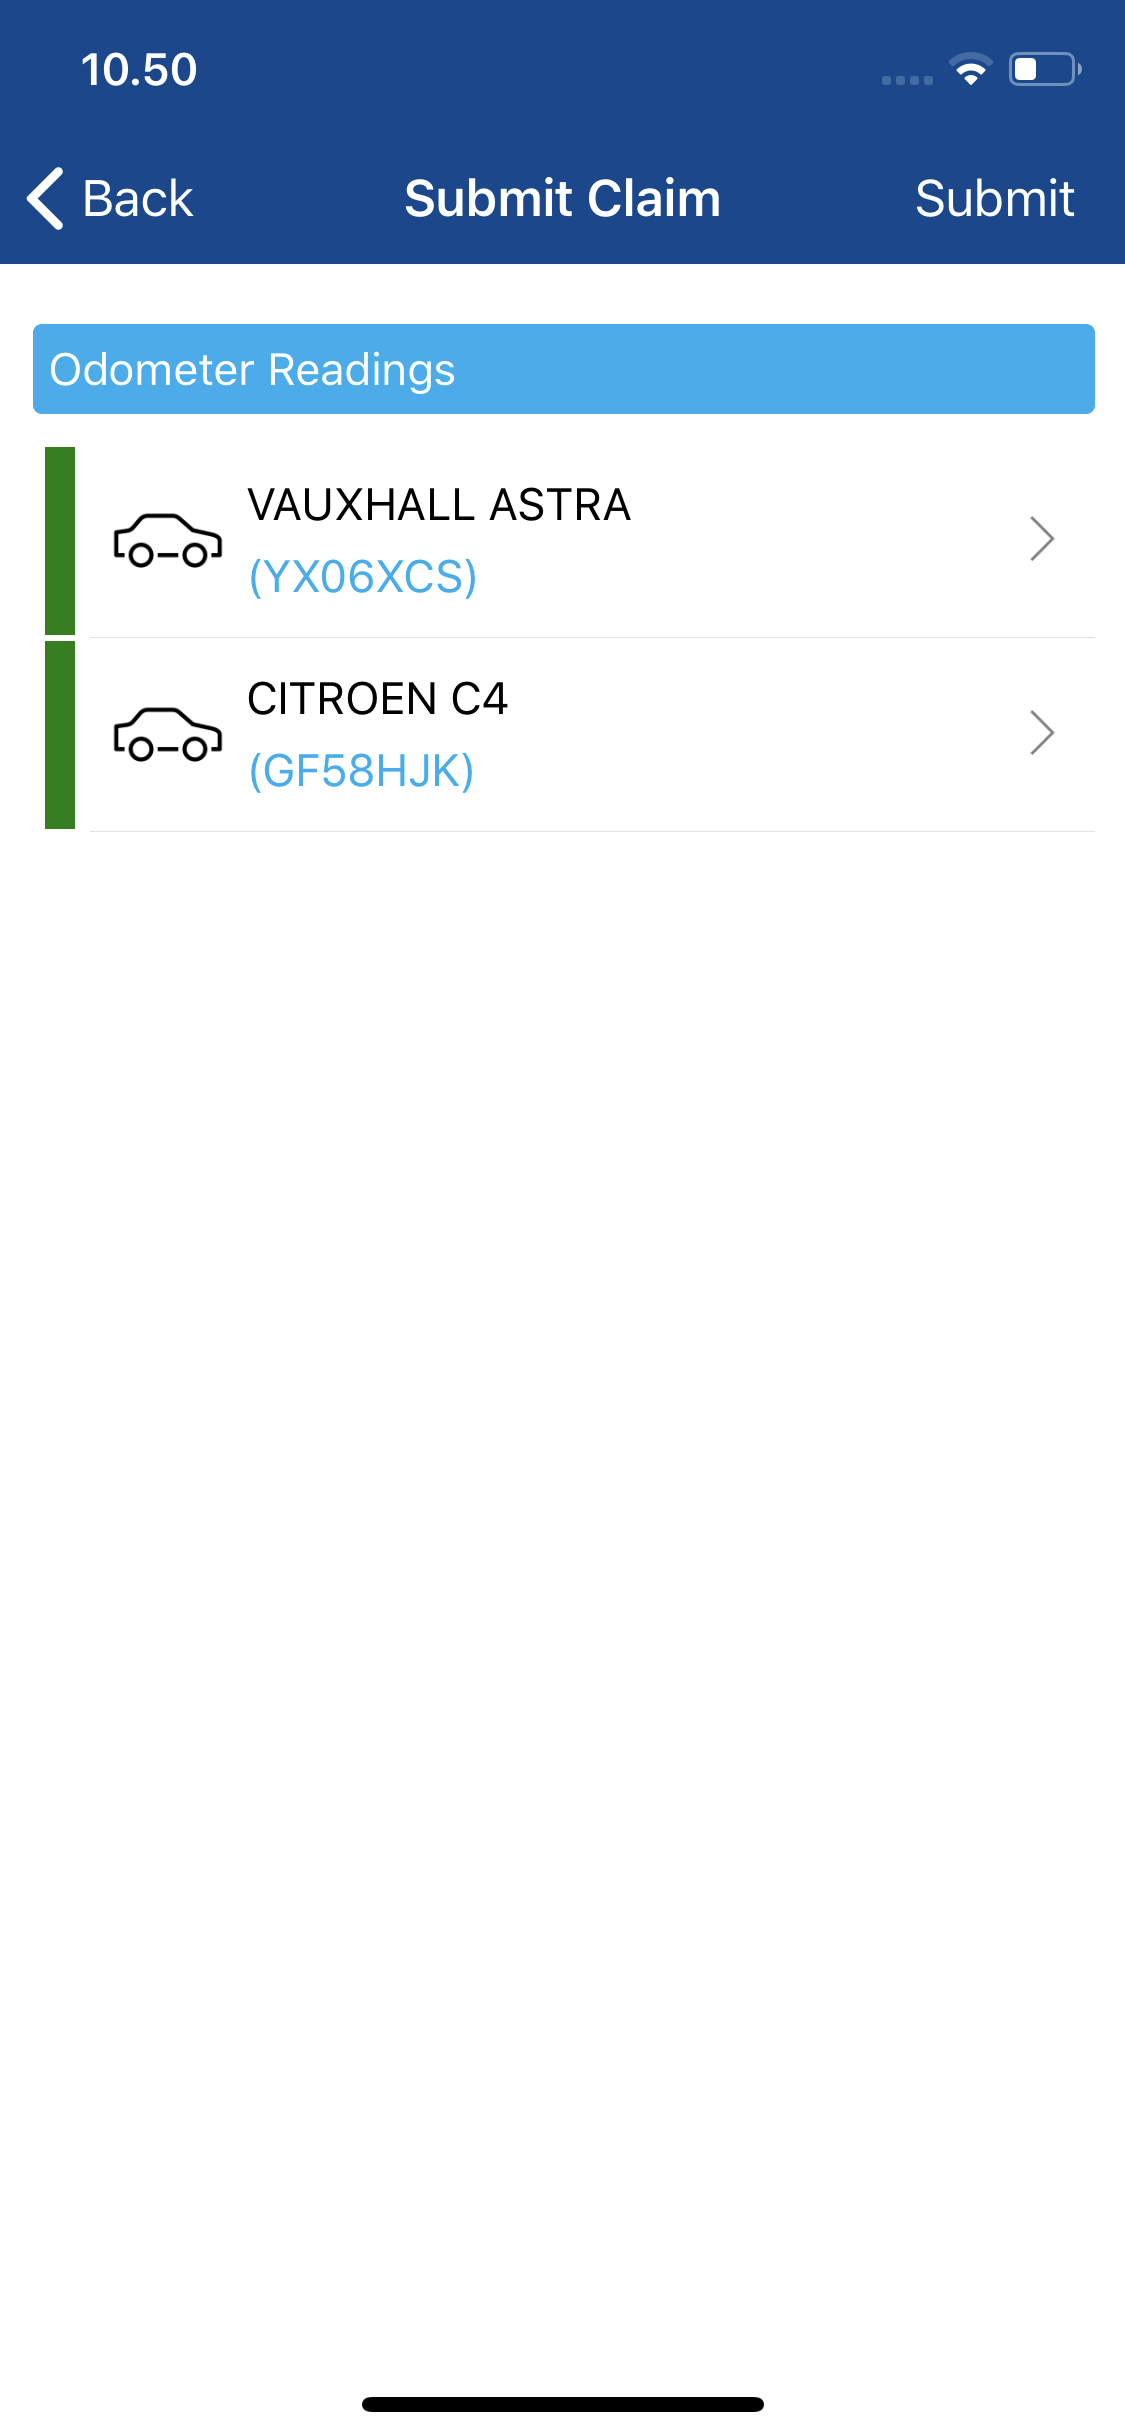
- Tap Save to return to the Odometer Readings screen. The vehicle that you have added a new odometer reading for will now be highlighted in green, indicating that this action is successful.
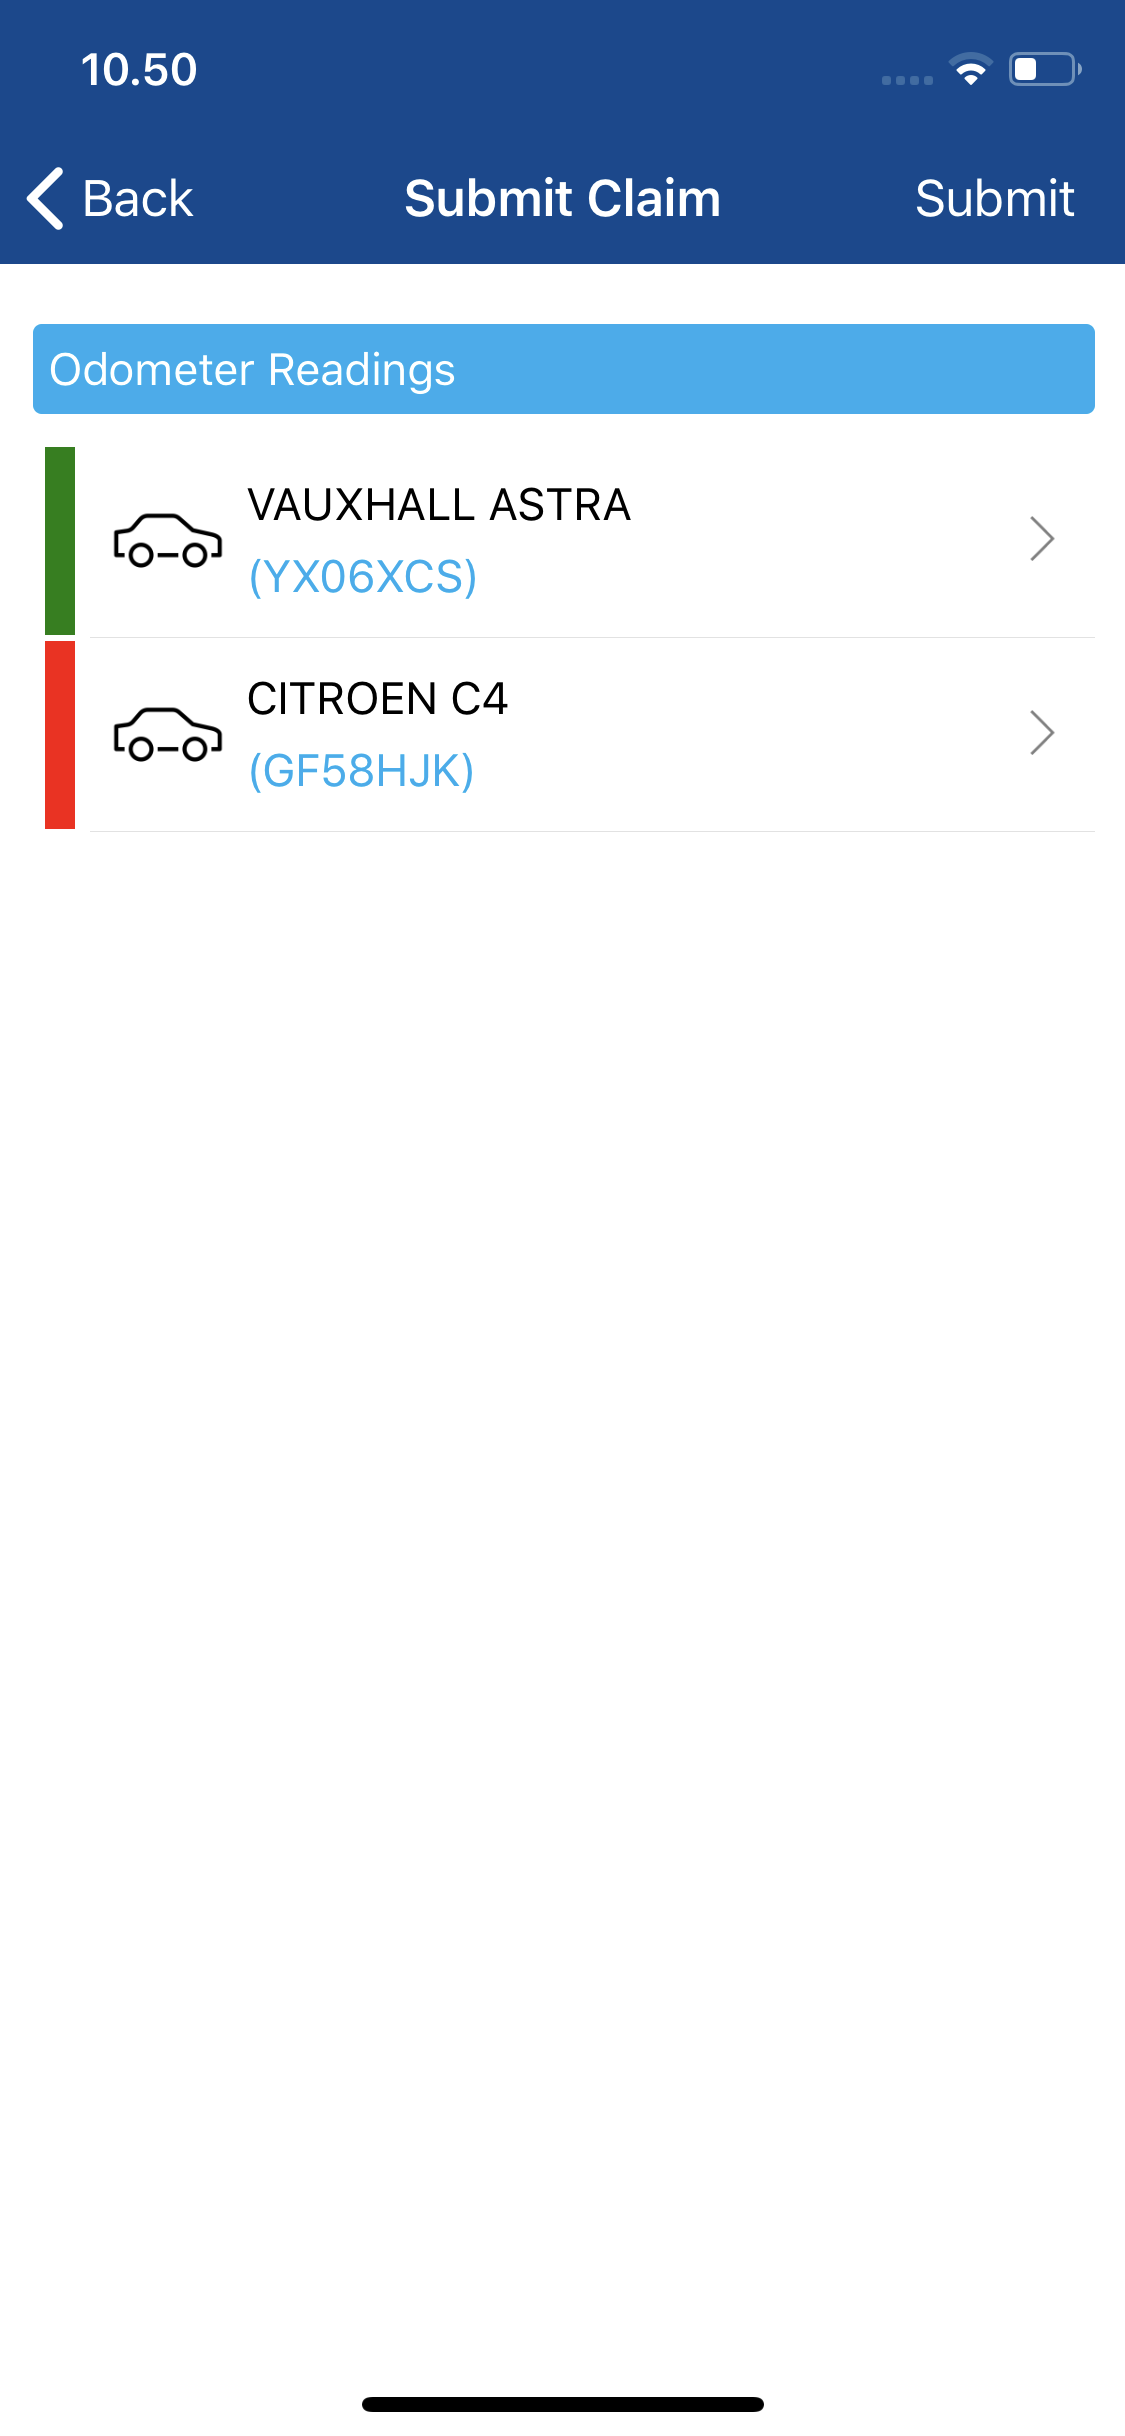
- Repeat this process for any other vehicles which require a new odometer reading.
- (Optional) Select from the drop-down list whether you have incurred business mileage since your last odometer reading.
- Tap Submit to move onto the next stage of the submission process.
Enter Envelope Information
If you are licenced for the Expedite receipt processing service, upon submitting your claim, you will be required to specify whether you wish to send your receipts to Selenity or whether there is no need. This guide takes you through the steps required when sending receipts to Selenity.
- After tapping Submit, a message will appear asking "Do you wish to send the receipts for this claim to the Selenity Expedite Service Centre?".
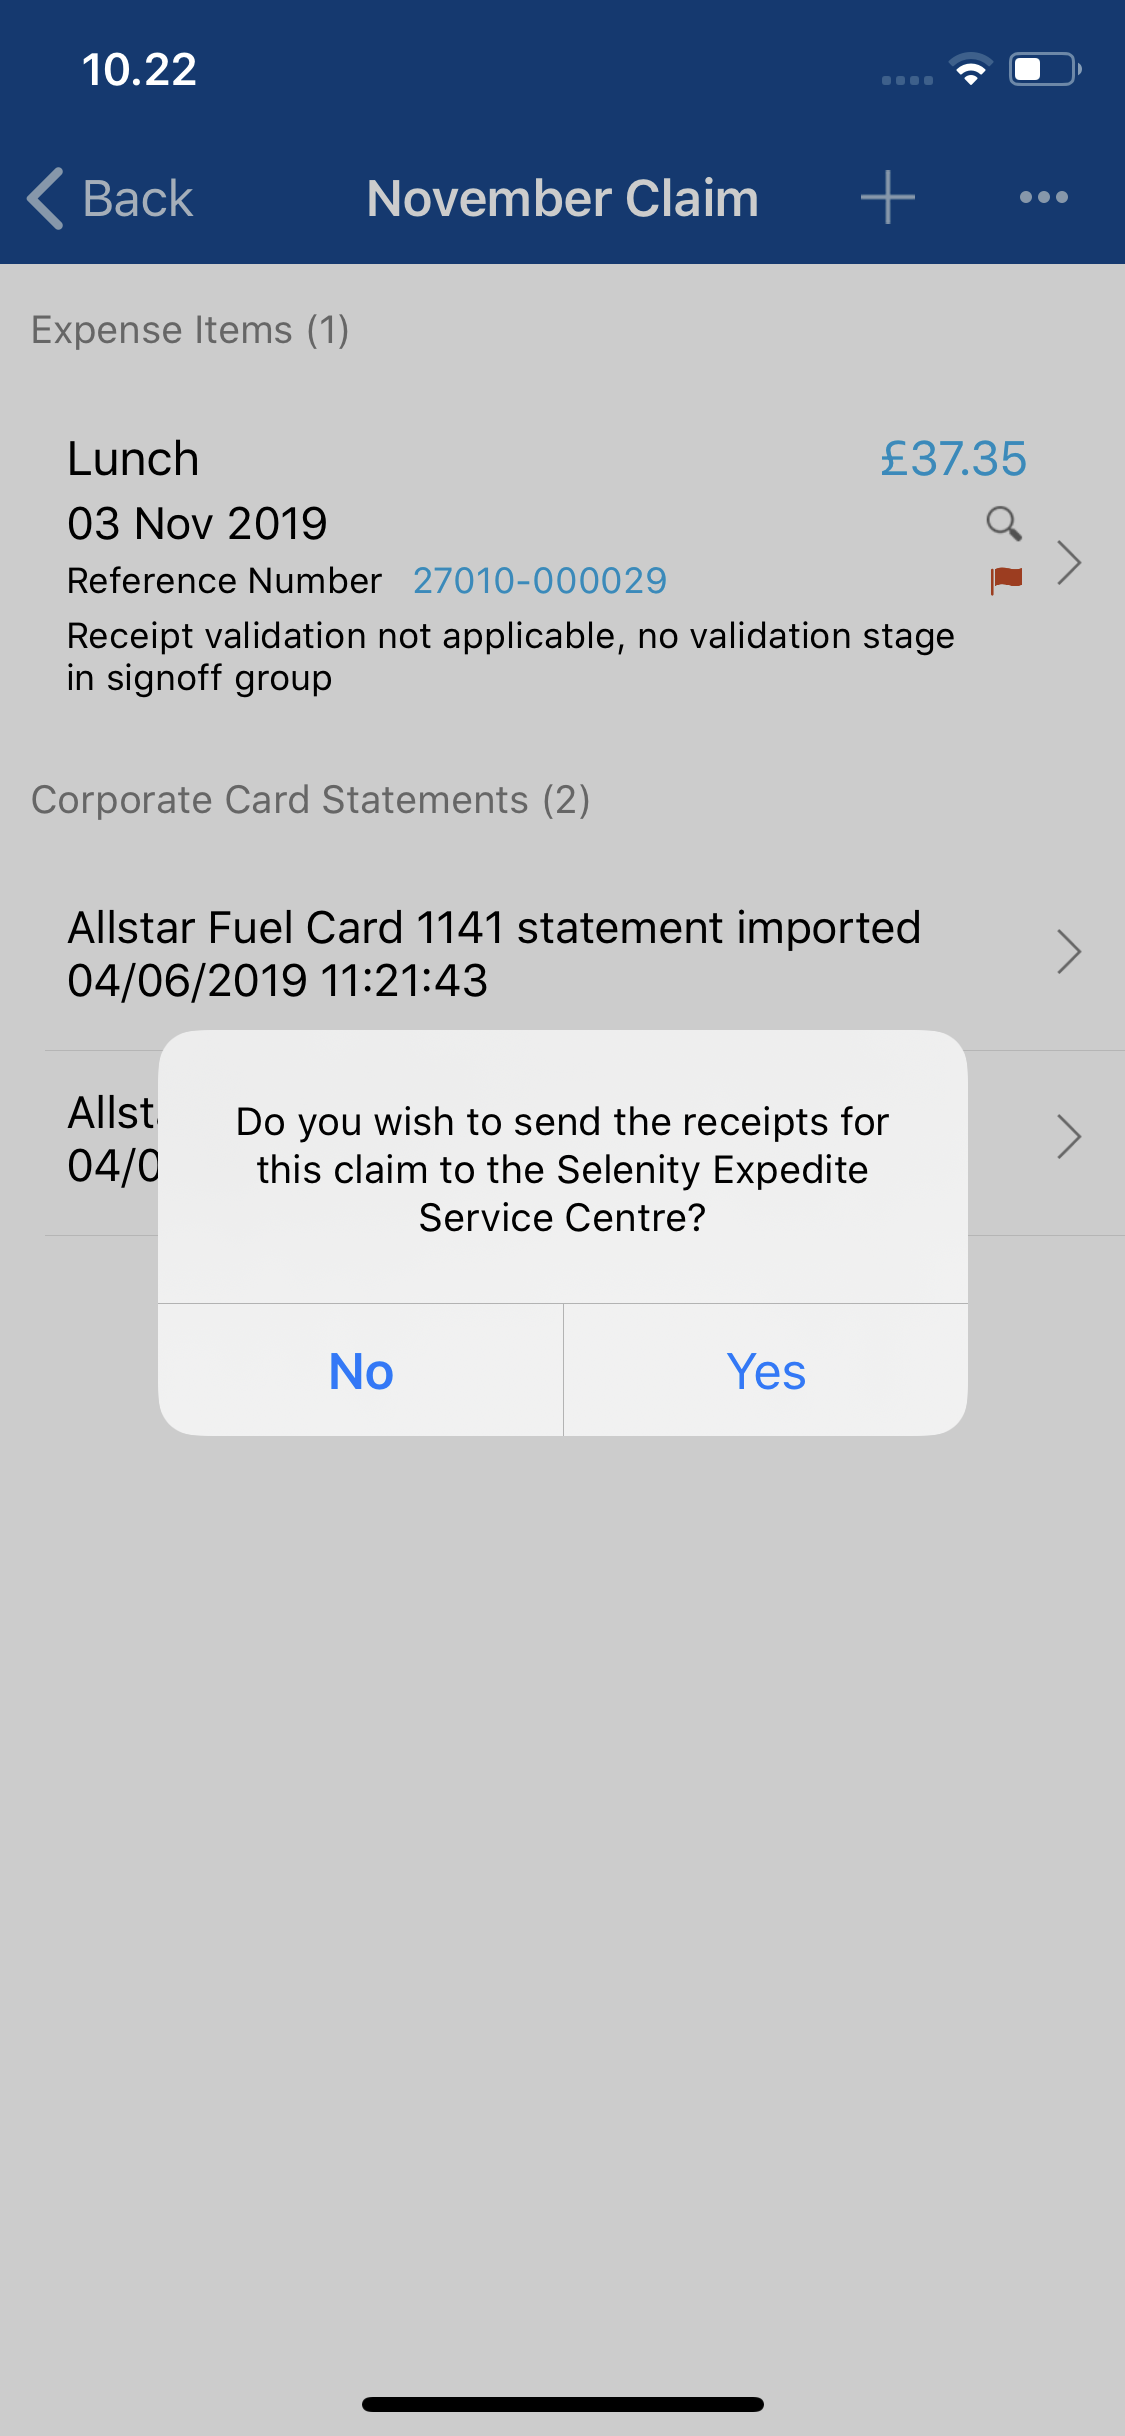
- Tap Yes. This will direct you to the Scan & Attach Info screen which provides you with further details about envelope preparation.
- Tapping No will allow you to continue with the submission process.
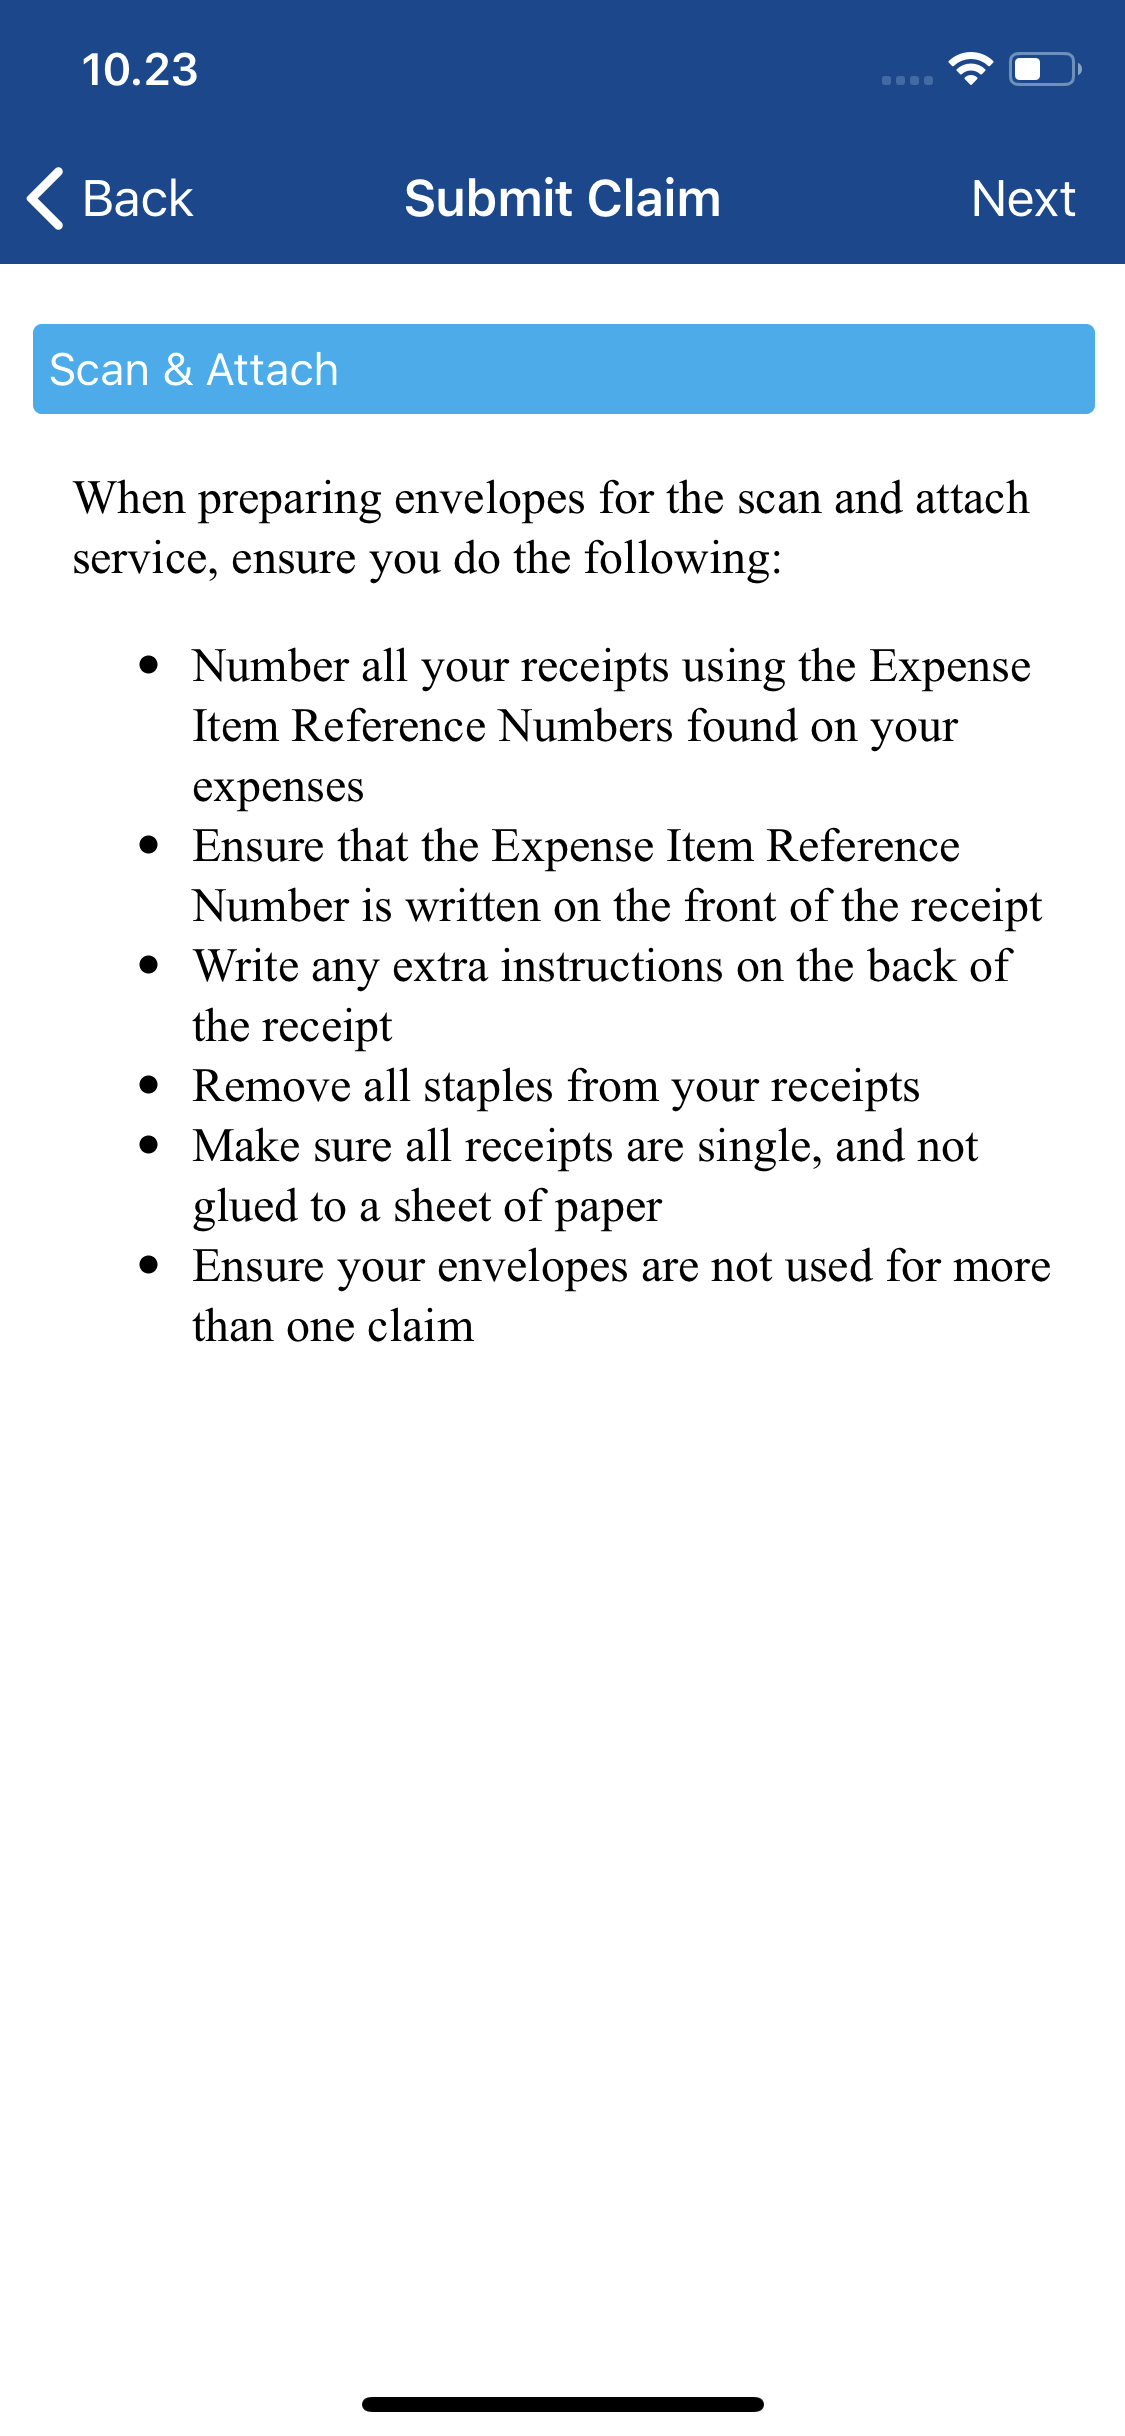
- Tapping No will allow you to continue with the submission process.
- Tap Next to navigate to the Envelope Numbers screen.
- For each envelope that you will send for this claim, enter the unique envelope number into the field on this page. Ensure that the envelope number is entered in the correct format (A-ABC-123). When you have entered a valid envelope number, a new field will be displayed below allowing you to add further envelopes.
- Invalid envelope numbers are displayed in red.
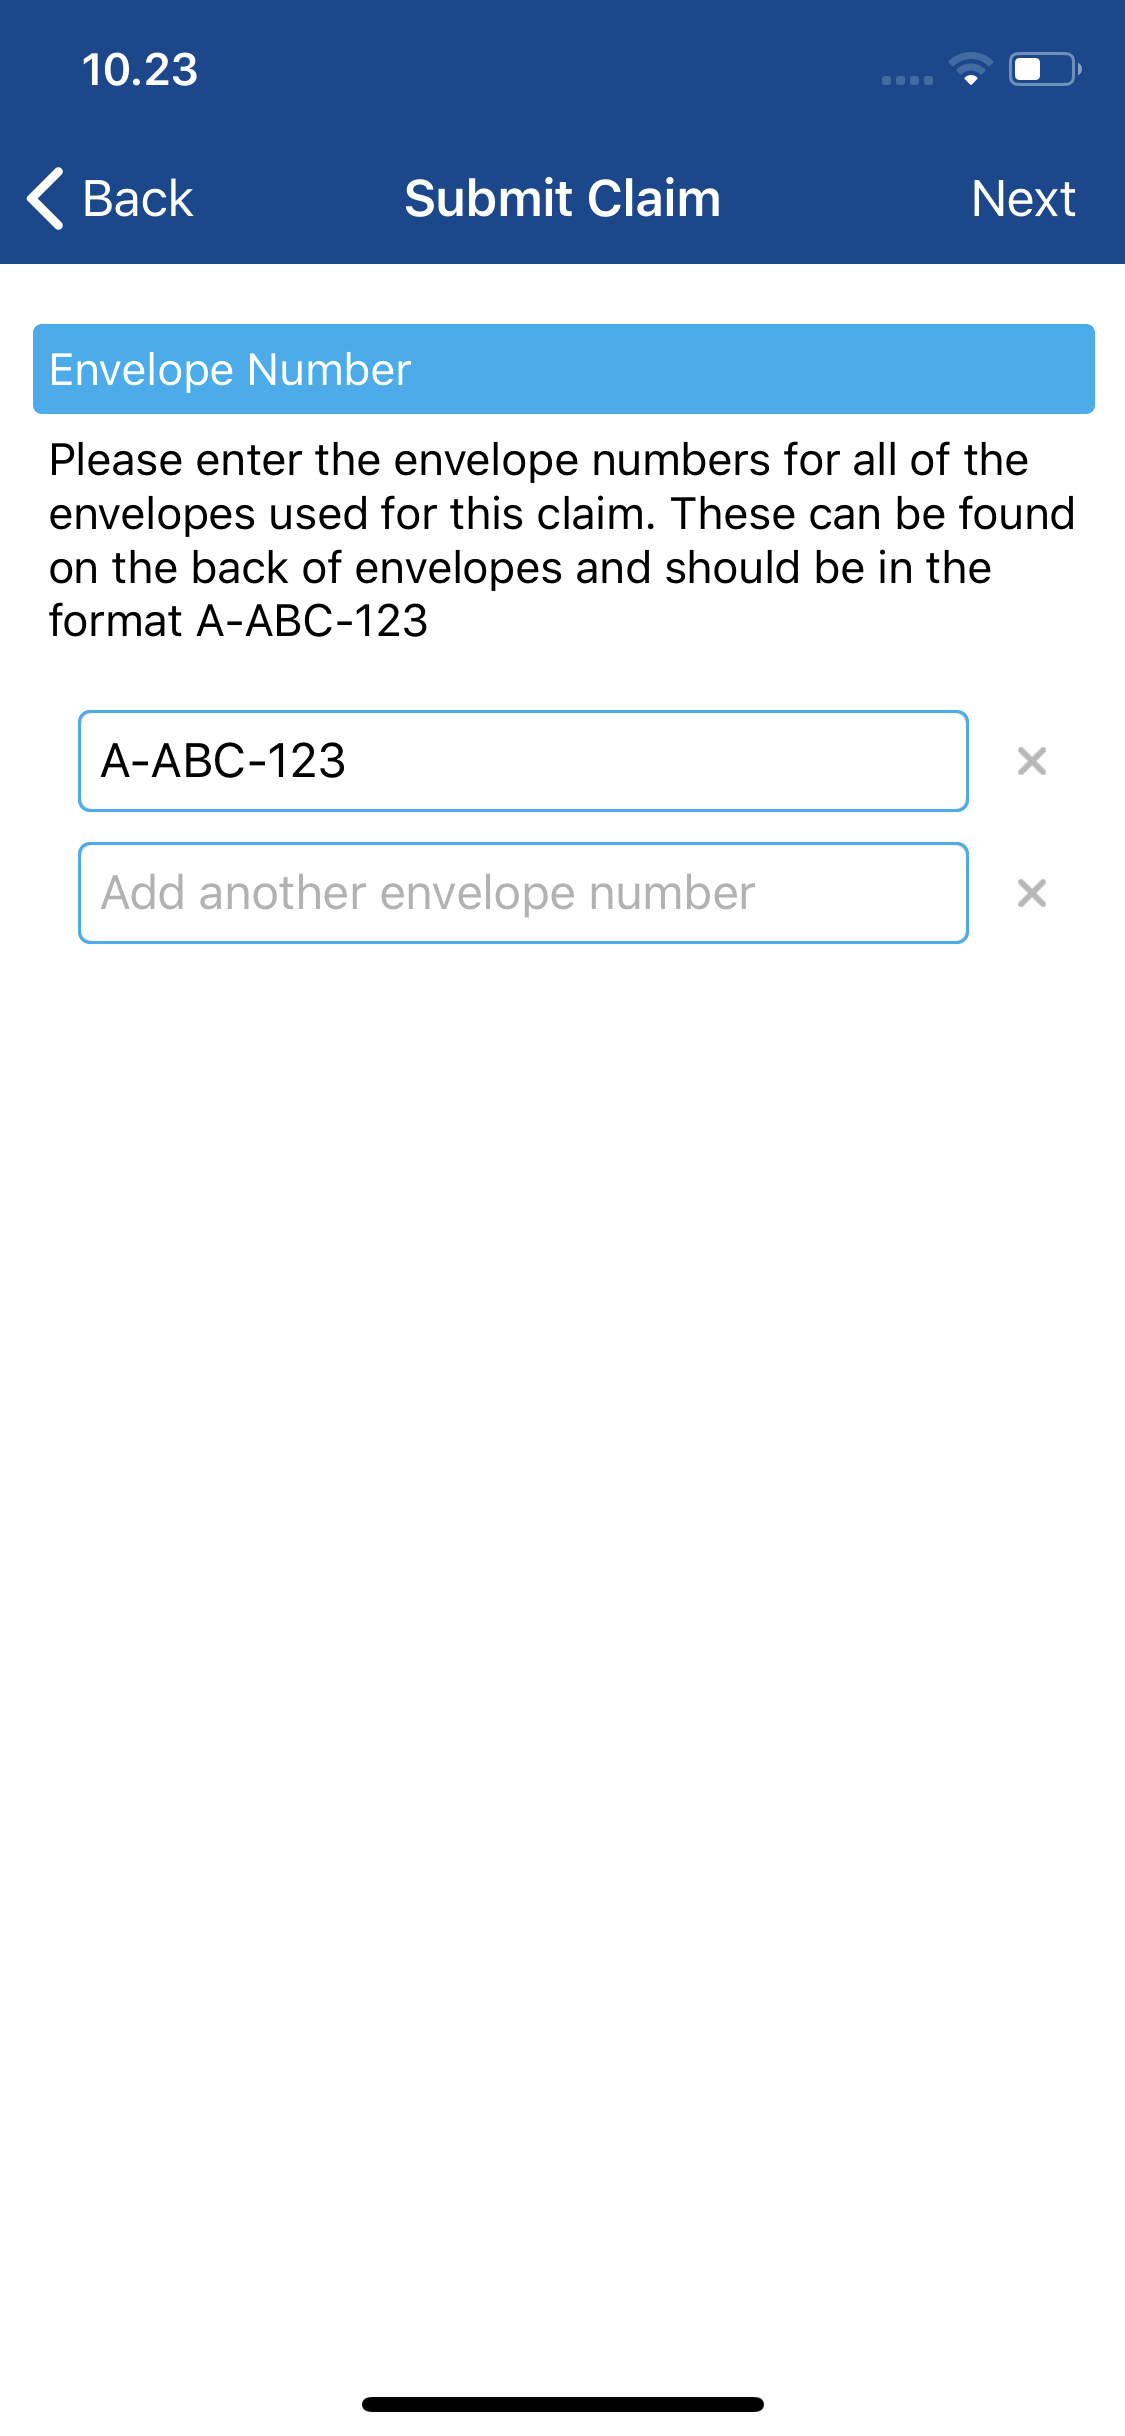
- Invalid envelope numbers are displayed in red.
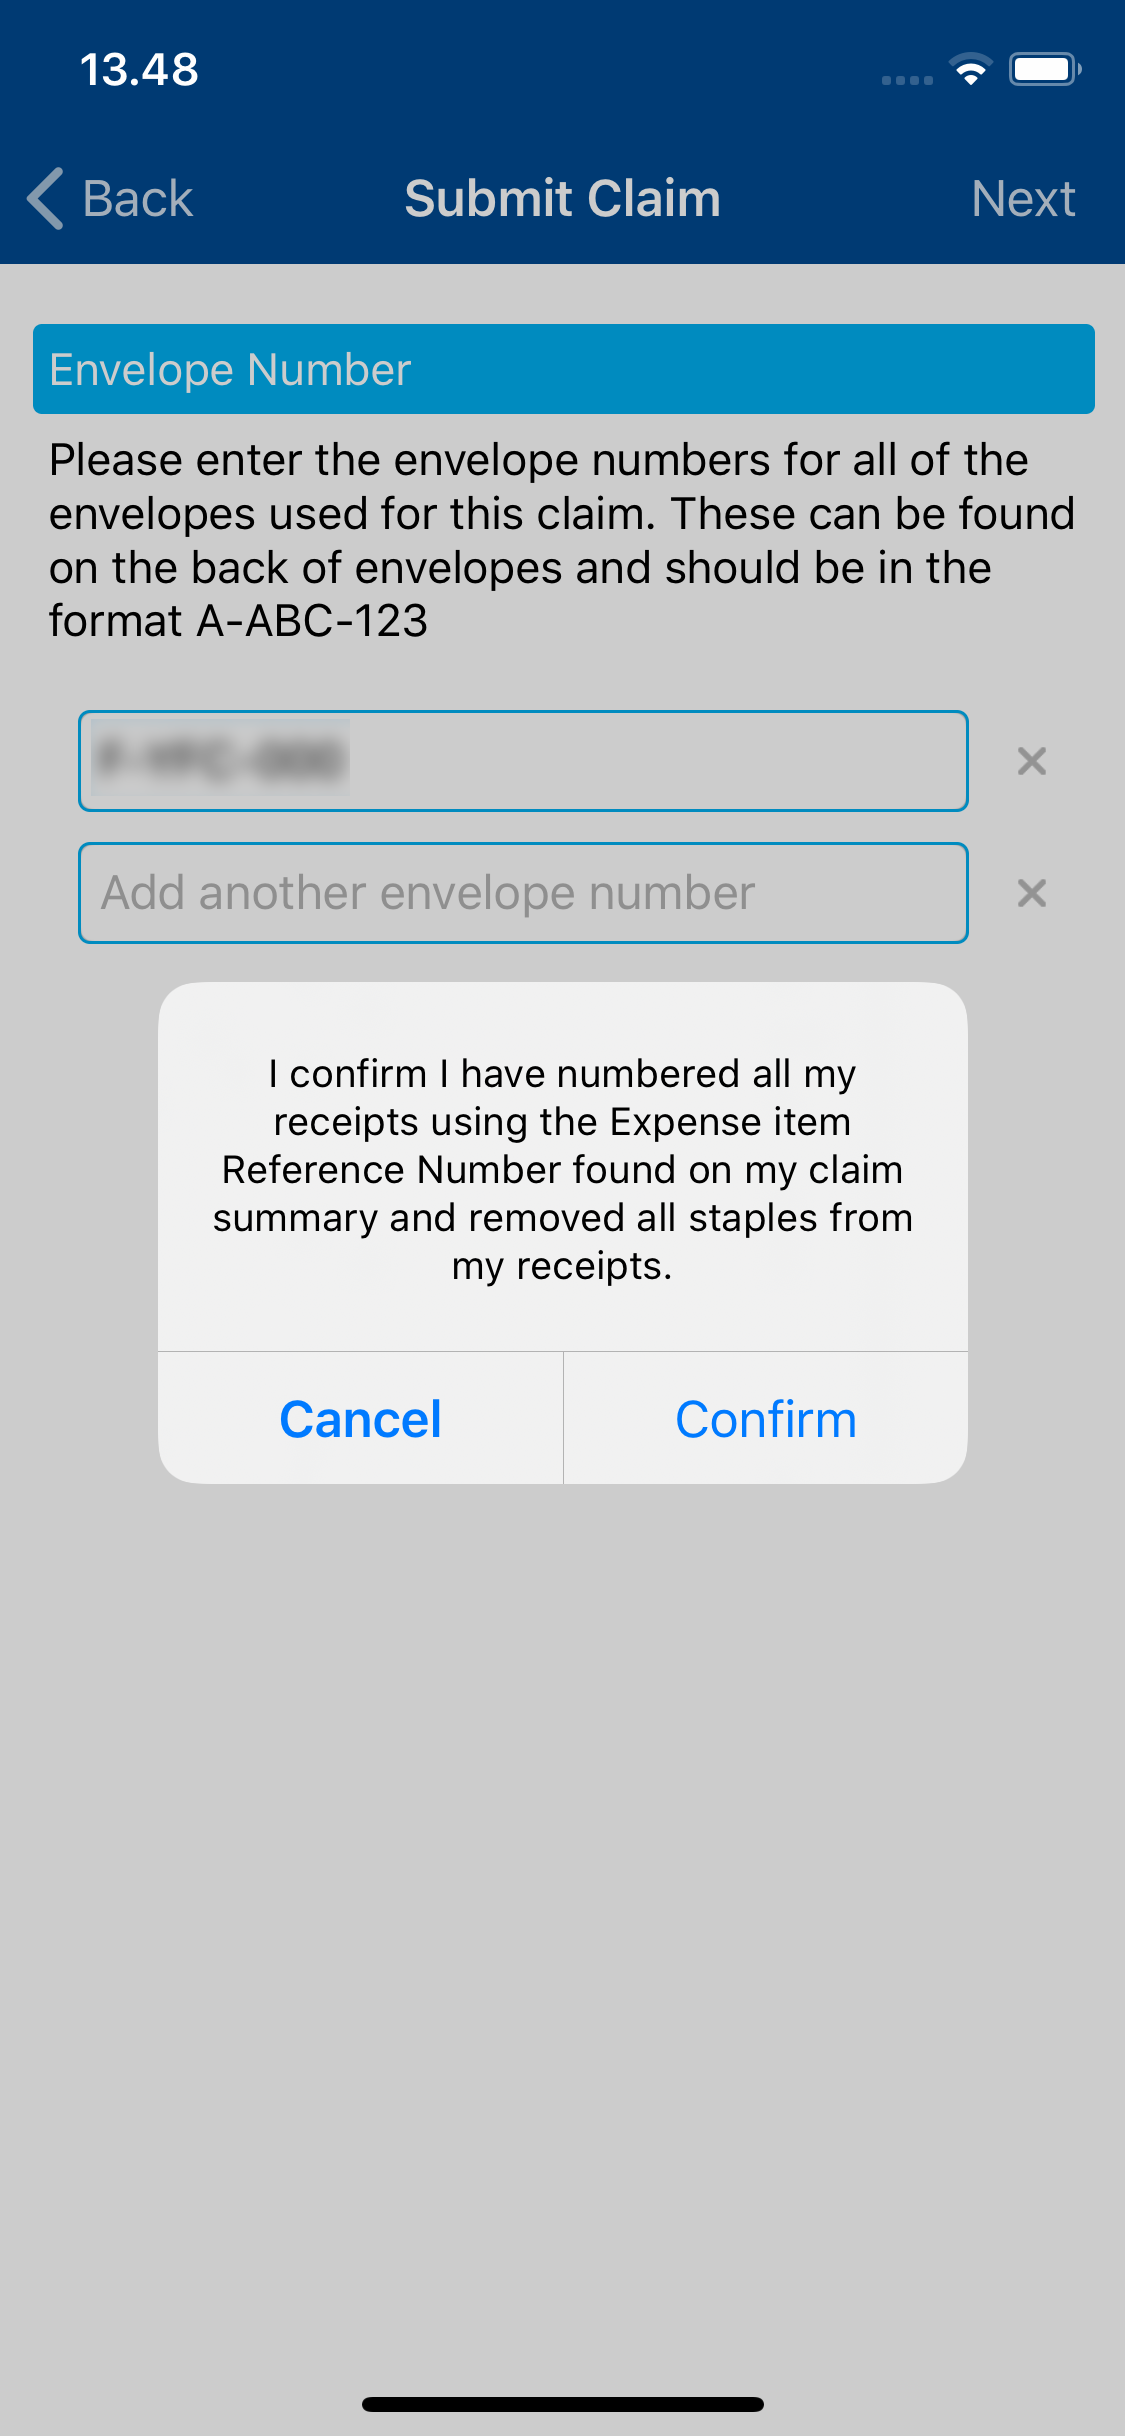
- If all envelope numbers are valid, tap Next. A confirmation message will appear.
- If you have adhered to the information in the message, tap Confirm.
- This will provide you with your unique Claim Reference Number (CR Number). This can then be written in the CR Number field on each of the envelopes which you will be sending to Selenity for this claim.
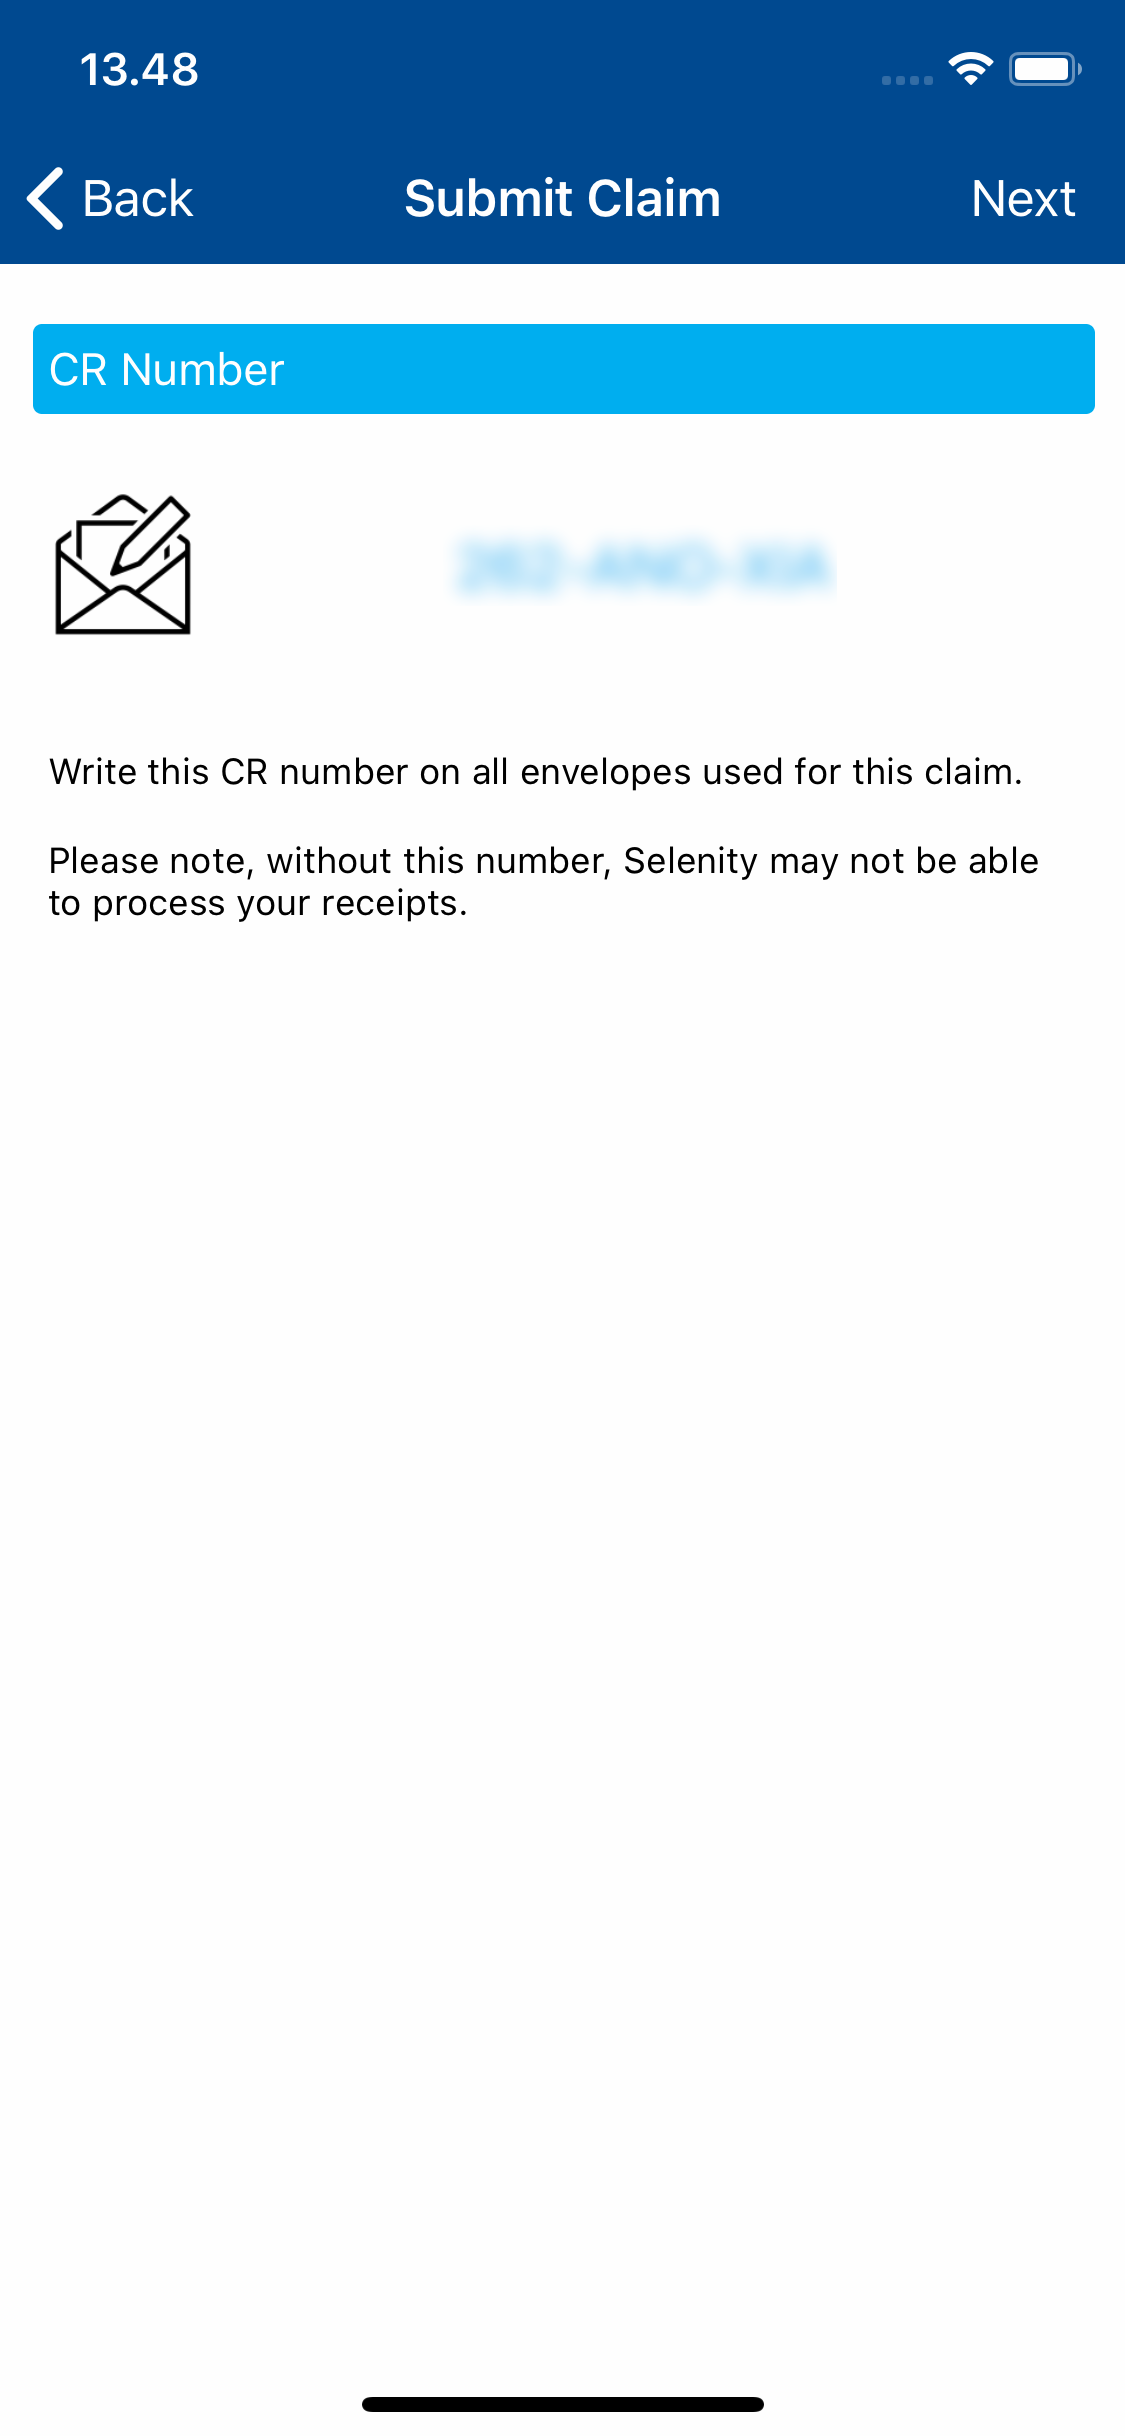
- Tap Next to continue the claim submission process.
Select an Approver
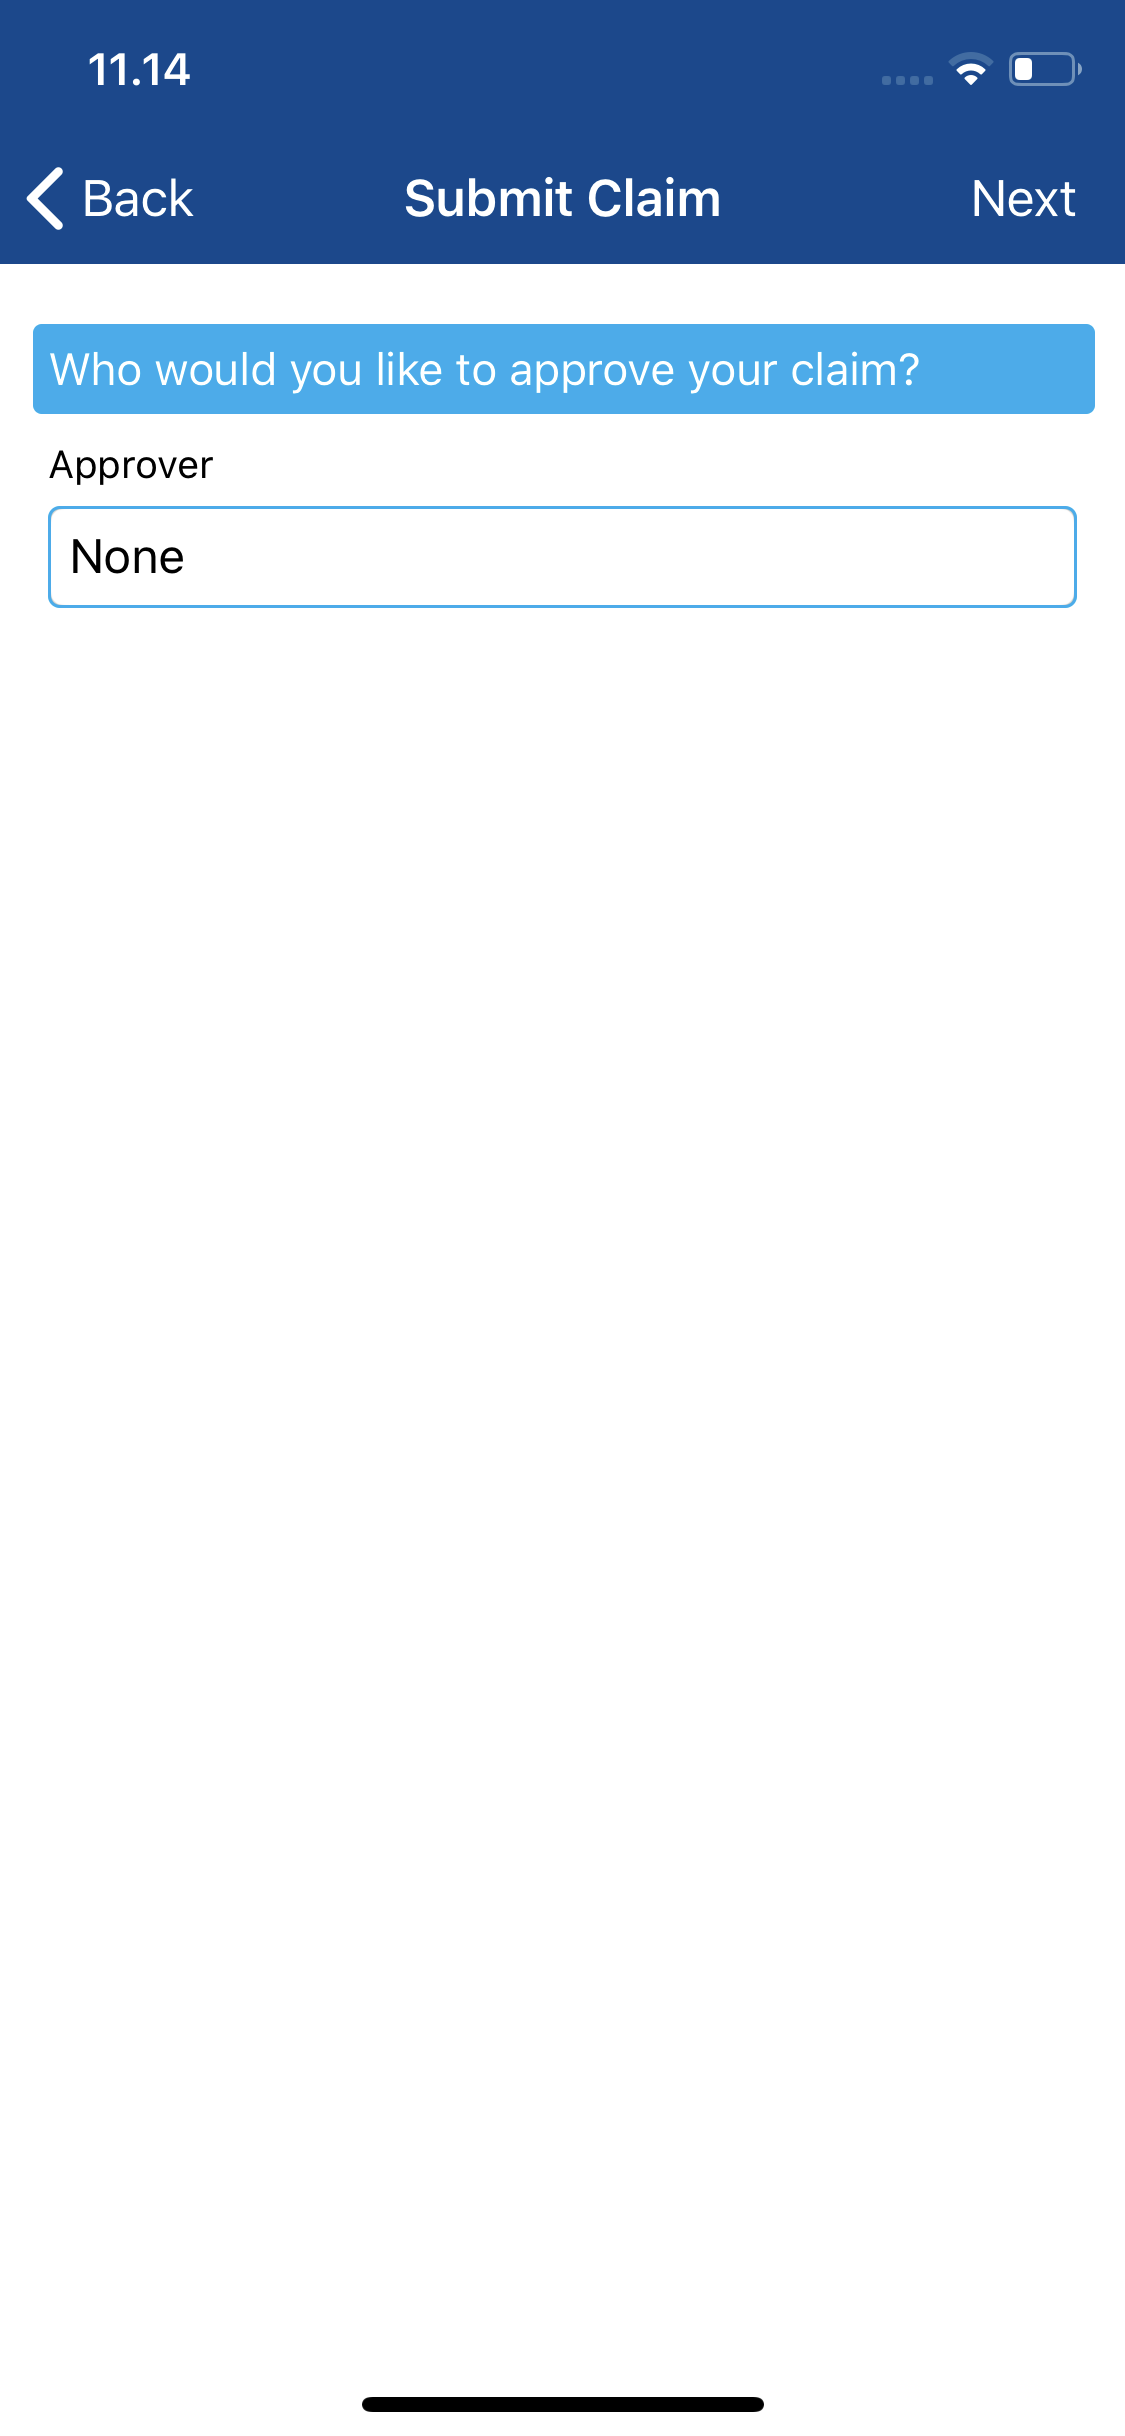
If the first stage of your Signoff Group is either "Determined by Claimant" or "Determined by Claimant from Approval Matrix", you will be prompted to select your claim approver from a pre-defined list.
- After tapping next on the Claim Summary screen, you will be taken to the Select Approver screen.
- Tap the Approver field. This may already be populated with your most recently selected approver. If this approver is correct, tap save to move onto the next stage of the submission process.
- If you are directed to the Select Approver Type screen, tap the appropriate option to view a list of your Recent Approvers or a list of All Approvers. Otherwise, skip to Step 3.
- If you are directed to the Select Approver Type screen, tap the appropriate option to view a list of your Recent Approvers or a list of All Approvers. Otherwise, skip to Step 3.
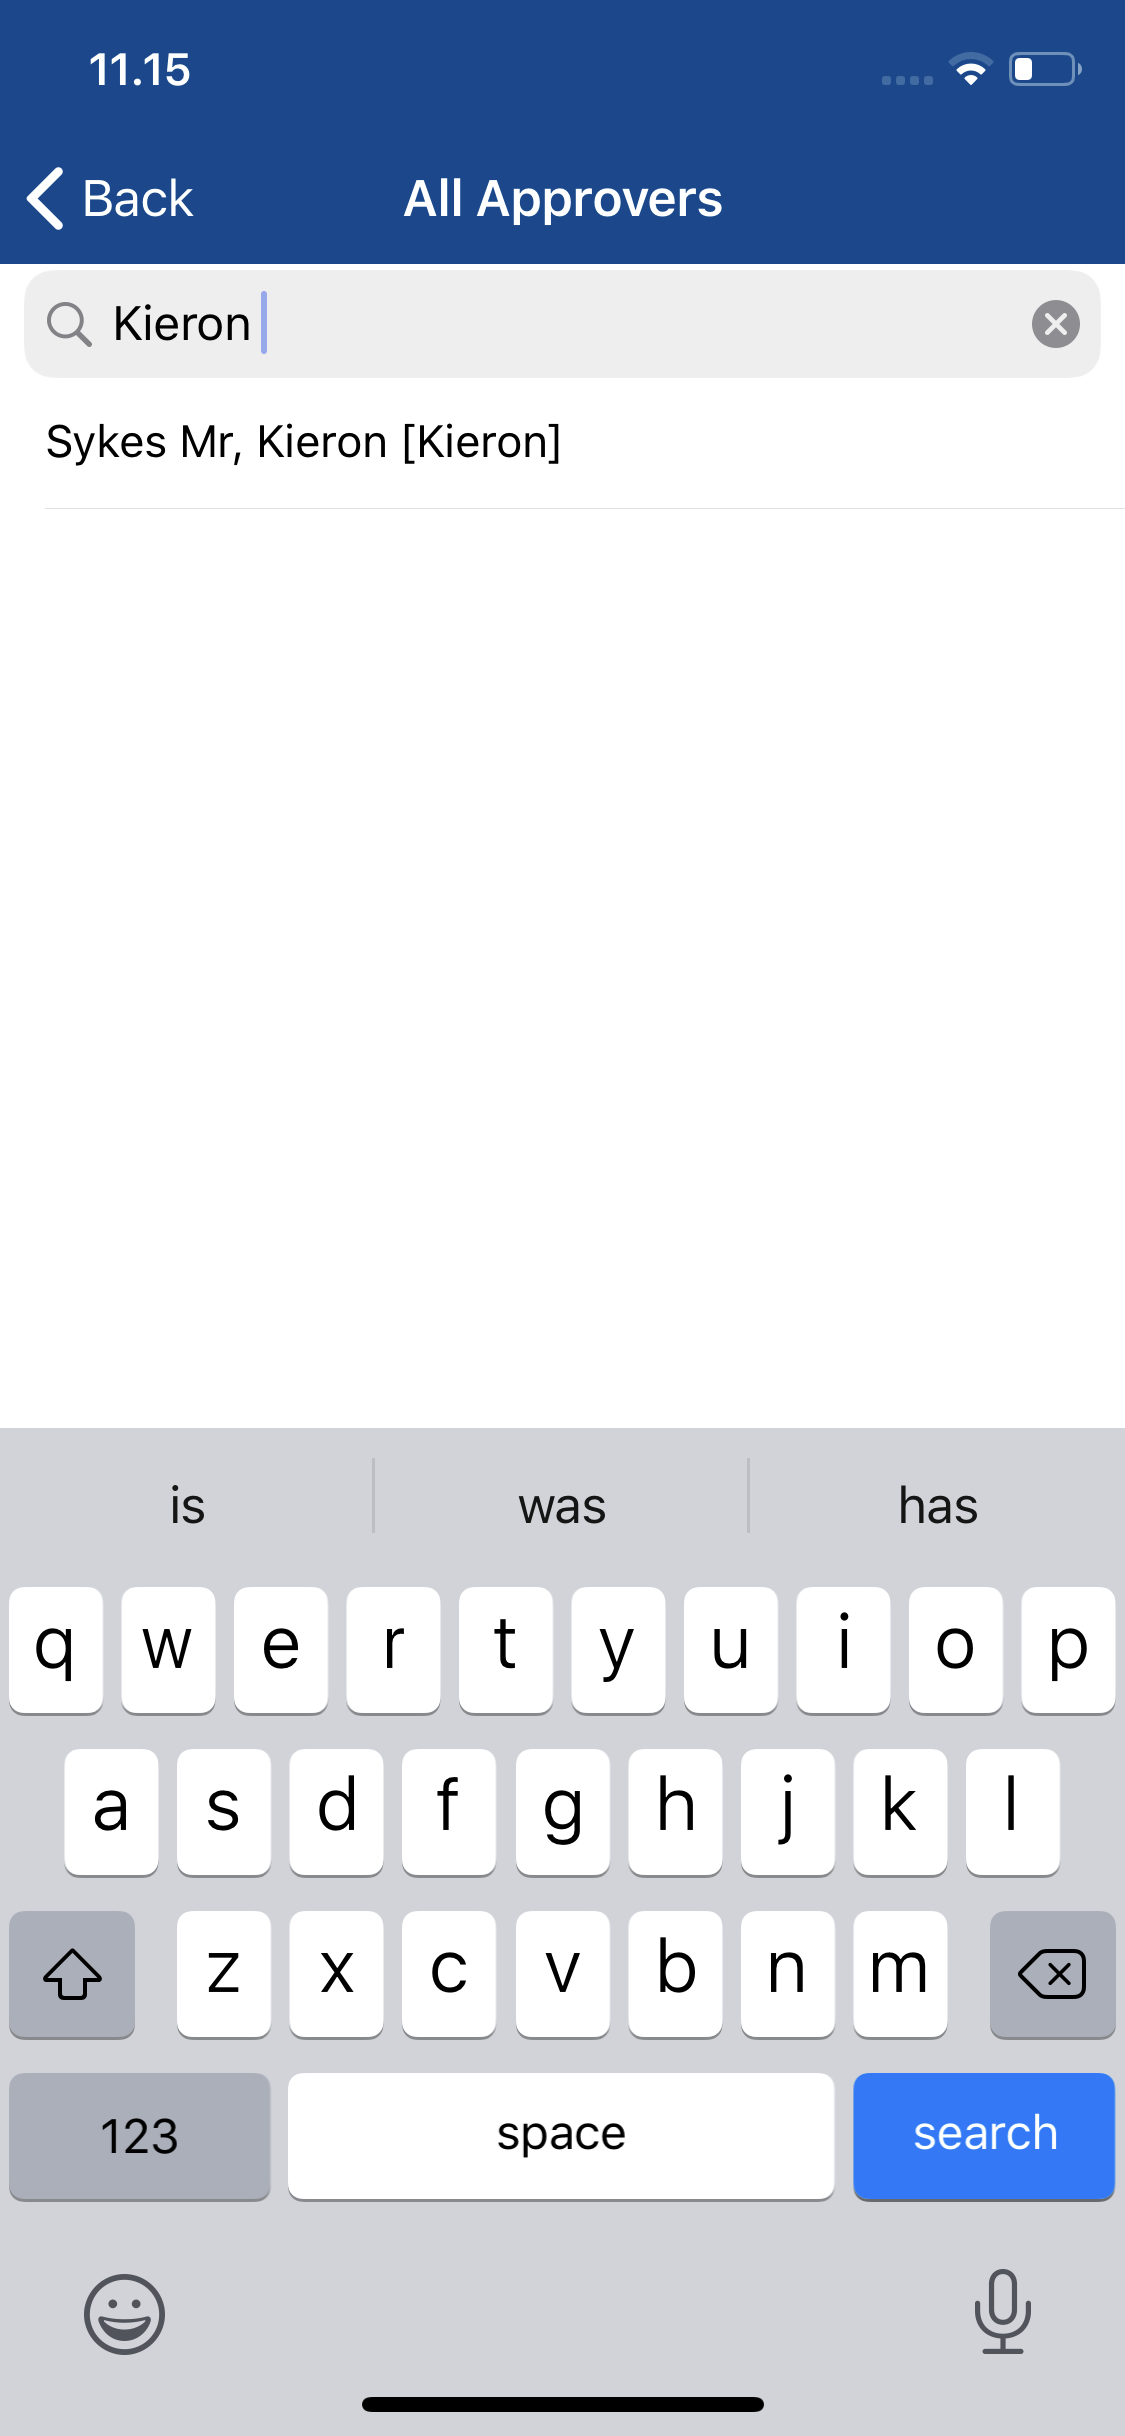
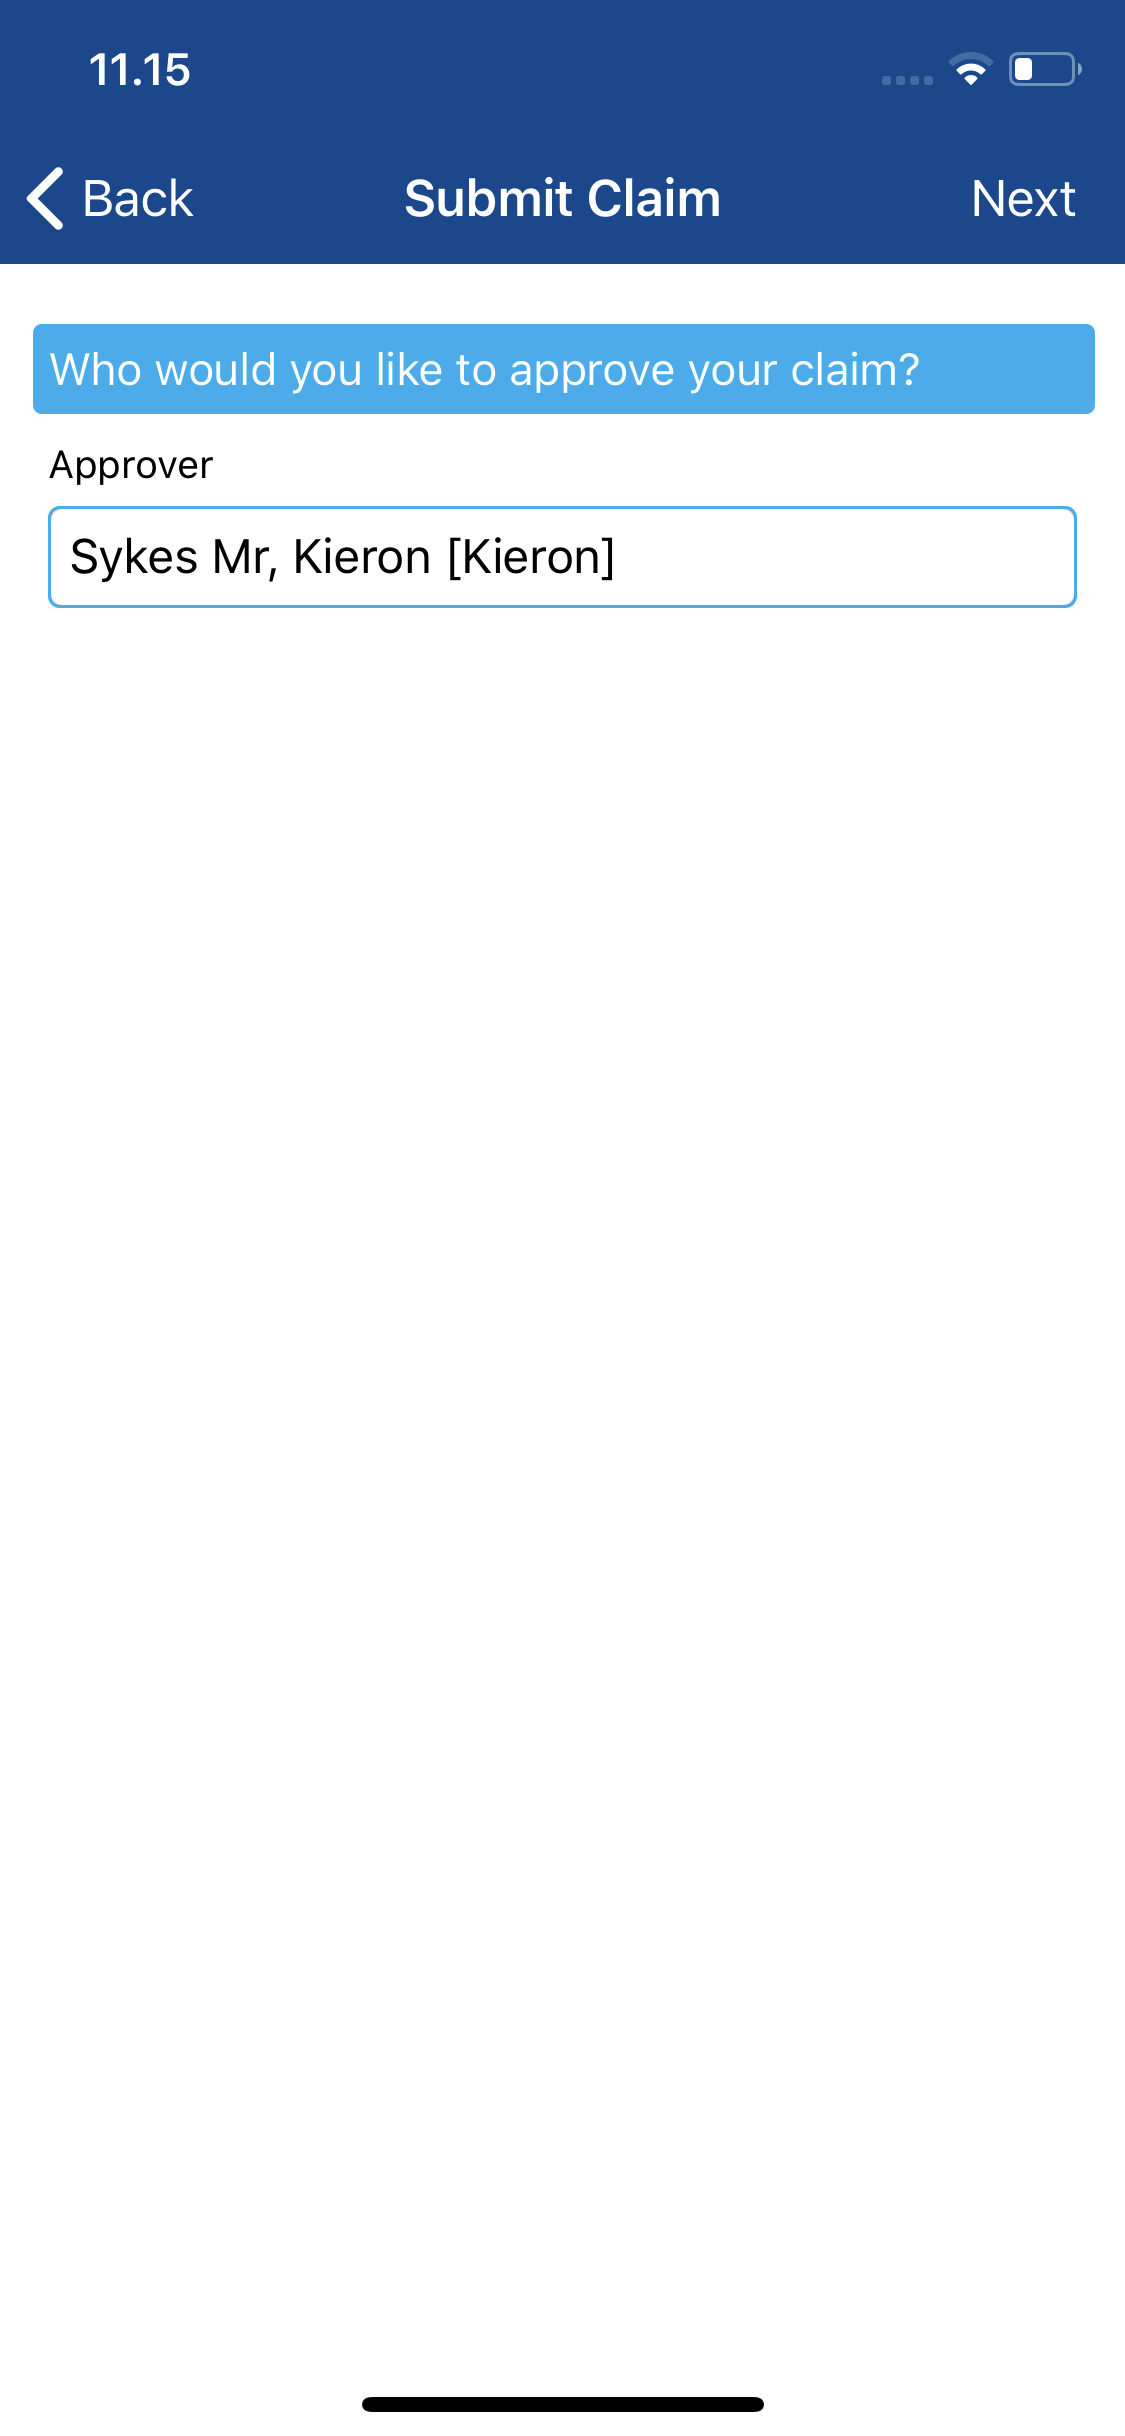
- Use the search field at the top of the page to filter the list of approvers. Tap an approver from the list to define them as your claim approver.
- Tap Next/Save to move onto the next stage of the submission process.

 to display a list of options.
 indicates a Mileage expense item which contains a journey. You can quickly view this journey by tapping View Journey after opening the options menu for the expense.


